Quantcast
Channel: Unixmen » Fedora
Viewing all 343 articles
Browse latest View live

Nux Dextop: A Desktop And Multimedia Oriented RPM Repository

$
0
0

About Nux Dextop

Nux Dextop is a RPM repository specially made for installing popular desktop and multimedia related packages such as VLC, Flash player, Shutter etc., in RHEL, CentOS, and Scientific Linux distributions. It is currently available for RHEL/CentOS/Scientific Linux 6 and 7 versions. This repository is made to coexist with EPEL Repository. And more importantly, Nux Dextop repository may or may not be up to date. Use it at your own risk.

Install Nux Dextop

On RHEL/CentOS/Scientific Linux 6:

First, install EPEL repository as described in the following link.

Then, install Nux Dextop repository using command:

rpm -Uvh http://li.nux.ro/download/nux/dextop/el6/x86_64/nux-dextop-release-0-2.el6.nux.noarch.rpm

Add the Nux-Dextop GPG key using command:

rpm --import http://li.nux.ro/download/nux/RPM-GPG-KEY-nux.ro

Then, update the repository list using command:

yum repolist

On RHEL/CentOS/Scientific Linux 7:

Install EPEL repository using command:

yum install epel-release

Now, add the Nux Dextop repository and it’s GPG key using the following commands:

rpm -Uvh http://li.nux.ro/download/nux/dextop/el7/x86_64/nux-dextop-release-0-1.el7.nux.noarch.rpm
rpm --import http://li.nux.ro/download/nux/RPM-GPG-KEY-nux.ro

Update repository lists using command:

yum repolist

Sample output:

Loaded plugins: fastestmirror
Loading mirror speeds from cached hostfile
 * base: centos.excellmedia.net
 * epel: mirrors.ispros.com.bd
 * extras: centos.excellmedia.net
 * nux-dextop: li.nux.ro
 * rpmforge: kartolo.sby.datautama.net.id
 * updates: centos.excellmedia.net
repo id                                                           repo name                                                                                       status
base/7/x86_64                                                     CentOS-7 - Base                                                                                 8,465
epel/x86_64                                                       Extra Packages for Enterprise Linux 7 - x86_64                                                  7,195
extras/7/x86_64                                                   CentOS-7 - Extras                                                                                 104
nux-dextop/x86_64                                                 Nux.Ro RPMs for general desktop use                                                             1,889
rpmforge                                                          RHEL 7 - RPMforge.net - dag                                                                       245
updates/7/x86_64                                                  CentOS-7 - Updates                                                                              1,725
repolist: 19,623

That’s it. Now, you can install the multimedia packages of your choice.

Example:

yum install shutter vlc smplayer HandBrake-gui

Since Nux Dextop is ‘noarch’ type, you can use it for both 32bit and 64bit distributions.

Known issues with RepoForge and other Repositories

It will probably conflict badly with Repoforge/RPMforge and ATrpms and possibly other repos.In such cases, disable the Nux Dextop as and use it whenever you want.

To disable Nux Dextop, edit /etc/yum.repos.d/nux-dextop.repo file,

vi /etc/yum.repos.d/nux-dextop.repo

Disable it as shown below.

[nux-dextop]
name=Nux.Ro RPMs for general desktop use
baseurl=http://li.nux.ro/download/nux/dextop/el7/$basearch/ http://mirror.li.nux.ro/li.nux.ro/nux/dextop/el7/$basearch/
enabled=0
gpgcheck=1
gpgkey=file:///etc/pki/rpm-gpg/RPM-GPG-KEY-nux.ro
protect=0
[...]

Save and close file.

Update repository lists:

yum replolist

Now, install multimedia packages by enabling it temporarily as shown below.

Example:

yum --enablerepo=nux-dextop install HandBrake-gui

That’s it.

Cheers!


Advertise here with BSA

---------------------------------------------------------------------
Nux Dextop: A Desktop And Multimedia Oriented RPM Repository


How To Install PowerDNS On CentOS

$
0
0

In our previous article, We saw how to install PowerDNS on Ubuntu 14.04. In this tutorial, let us see how to install PowerDNS on CentOS 6.5.

Install PowerDNS On CentOS

Scenario:

Operating system: CentOS 6.5 minimal server
IP Address: 192.168.1.150/24
Hostname: server.unixmen.local

Update your system:

First of all, update your system:

Note: The commands in this article is being performed by Root user.

yum update

Setup MySQL:

Install MySQL using command:

yum install mysql-server mysql -y

Start MySQL service and let it to start automatically on every reboot:

service mysqld start
chkconfig mysqld on

Check if MySQL is listening:

netstat -tap | grep mysql

Sample output:

tcp        0      0 *:mysql                     *:*                         LISTEN      1425/mysqld

Set Database Root user password:

By default, Database root password is empty. So, to prevent unauthorized access to your database server, let us set root user password. Enter the following command to setup mysql root user password:

mysql_secure_installation
NOTE: RUNNING ALL PARTS OF THIS SCRIPT IS RECOMMENDED FOR ALL MySQL
      SERVERS IN PRODUCTION USE!  PLEASE READ EACH STEP CAREFULLY!
In order to log into MySQL to secure it, we'll need the current
password for the root user.  If you've just installed MySQL, and
you haven't set the root password yet, the password will be blank,
so you should just press enter here.

Enter current password for root (enter for none):     ## Press Enter ## 
OK, successfully used password, moving on...
Setting the root password ensures that nobody can log into the MySQL
root user without the proper authorisation.

Set root password? [Y/n]     ## Press Enter ##
New password:                ## Enter new password ##
Re-enter new password:       ## Re-enter new password ##
Password updated successfully!
Reloading privilege tables..
 ... Success!

By default, a MySQL installation has an anonymous user, allowing anyone
to log into MySQL without having to have a user account created for
them.  This is intended only for testing, and to make the installation
go a bit smoother.  You should remove them before moving into a
production environment.

Remove anonymous users? [Y/n]     ## Press Enter ##
 ... Success!

Normally, root should only be allowed to connect from 'localhost'.  This
ensures that someone cannot guess at the root password from the network.

Disallow root login remotely? [Y/n]     ## Press Enter ## 
... Success!
By default, MySQL comes with a database named 'test' that anyone can
access.  This is also intended only for testing, and should be removed
before moving into a production environment.

Remove test database and access to it? [Y/n]     ## Press Enter ##
 - Dropping test database...
 ... Success!
 - Removing privileges on test database...
 ... Success!
Reloading the privilege tables will ensure that all changes made so far
will take effect immediately.

Reload privilege tables now? [Y/n]     ## Press Enter ##
 ... Success!

Cleaning up...

All done!  If you've completed all of the above steps, your MySQL
installation should now be secure.

Thanks for using MySQL!

We completed the installation now. Next, we will Install PowerDNS.

Install PowerDNS:

First, install and enable EPEL repository.

rpm -Uvh http://epel.mirror.net.in/epel/6/i386/epel-release-6-8.noarch.rpm

After installing EPEL repository, run the following command to install PowerDNS.

yum install pdns pdns-backend-mysql bind-utils

After installing PowerDNS, run the following commands to start and enable PowerDNS service to start automatically on every reboot.

service pdns start
chkconfig pdns on

PowerDNS has been installed now.

Create PowerDNS Database and User in MySQL

The next step is we should now create the necessary database, user account, tables, and records etc., for the PowerDNS.

Enter to MySQL prompt using command:

mysql -u root -p

Create database, namely ‘powerdns’. You can define your own.

CREATE DATABASE powerdns;

Create database user, namely ‘poweruser’.

GRANT ALL ON powerdns.* TO 'poweruser '@'localhost' IDENTIFIED BY 'centos';

Here,

powerdns – is the database;

poweruser – is the database user,

centos – is the password for the ‘poweruser’ user.

I recommend you to use any strong password to tighten the security.

Enter the following command to update the user settings.

FLUSH PRIVILEGES;

Now, use the powerdns database with command:

USE powerdns;

Create the necessary tables and records.

First, let us create domains table:

CREATE TABLE domains (
id INT auto_increment,
name VARCHAR(255) NOT NULL,
master VARCHAR(128) DEFAULT NULL,
last_check INT DEFAULT NULL,
type VARCHAR(6) NOT NULL,
notified_serial INT DEFAULT NULL,
account VARCHAR(40) DEFAULT NULL,
primary key (id)
);

Create Unique Index for domains table:

CREATE UNIQUE INDEX name_index ON domains(name);

Create records table:

CREATE TABLE records (
id INT auto_increment,
domain_id INT DEFAULT NULL,
name VARCHAR(255) DEFAULT NULL,
type VARCHAR(6) DEFAULT NULL,
content VARCHAR(255) DEFAULT NULL,
ttl INT DEFAULT NULL,
prio INT DEFAULT NULL,
change_date INT DEFAULT NULL,
primary key(id)
);

Create the following indexes for records table:

CREATE INDEX rec_name_index ON records(name);
CREATE INDEX nametype_index ON records(name,type);
CREATE INDEX domain_id ON records(domain_id);

Create the supermasters table:

CREATE TABLE supermasters (
ip VARCHAR(25) NOT NULL,
nameserver VARCHAR(255) NOT NULL,
account VARCHAR(40) DEFAULT NULL
);

Finally, exit from MySQL prompt using command:

quit;

Configure PowerDNS

Now, we should configure PowerDNS to use MySQL as backend to store Zone files and records.

Backup the old configuration file.

mv /etc/pdns/pdns.conf /etc/pdns/pdns.conf.bak

Then, create /etc/pdns/pdns.conf file;

vi /etc/pdns/pdns.conf

Add the following lines at the end. Set the correct database name and database user which we created earlier.

# MySQL Configuration
#
# Launch gmysql backend
launch=gmysql

# gmysql parameters
gmysql-host=localhost
gmysql-dbname=powerdns
gmysql-user=poweruser
gmysql-password=centos

Finally, restart powerdns service.

service pdns restart

Test PowerDNS

First, edit your network interface configuration file /etc/sysconfig/network-scripts/ifcfg-eth0,

vi /etc/sysconfig/network-scripts/ifcfg-etho

Set the name server IP address:

DEVICE=eth0
TYPE=Ethernet
UUID=add4274e-d5be-4834-9142-8a85f4444b00
ONBOOT=yes
NM_CONTROLLED=yes
BOOTPROTO=none
DEFROUTE=yes
IPV4_FAILURE_FATAL=yes
IPV6INIT=no
NAME="System eth0"
HWADDR=08:00:27:DC:33:3F
IPADDR=192.168.1.150
PREFIX=24
GATEWAY=192.168.1.1
DNS1=192.168.1.150

Restart the network service to save the changes.

service network restart

We completed all installation and configuration parts. Now, we will check whether PowerDNS is really working or not.

We must allow the DNS service default port 53 through firewall.

Edit file /etc/sysconfig/iptables,

vi /etc/sysconfig/iptables

Add the following line:

-A INPUT -p tcp -m state --state NEW --dport 53 -j ACCEPT

Save and close the file. Then, restart iptables service.

service iptables restart

Now, enter the following command to check PowerDNS is working:

dig @127.0.0.1

Or,

dig @localhost

Sample output:

; <<>> DiG 9.8.2rc1-RedHat-9.8.2-0.30.rc1.el6_6.2 <<>> @localhost
; (2 servers found)
;; global options: +cmd
;; Got answer:
;; ->>HEADER<<- opcode: QUERY, status: NOERROR, id: 47553
;; flags: qr rd; QUERY: 1, ANSWER: 0, AUTHORITY: 0, ADDITIONAL: 0
;; WARNING: recursion requested but not available

;; QUESTION SECTION:
;.                IN    NS

;; Query time: 0 msec
;; SERVER: 127.0.0.1#53(127.0.0.1)
;; WHEN: Tue Mar 31 16:08:40 2015
;; MSG SIZE  rcvd: 17

Or,

dig @192.168.1.150

Here 192.168.1.150 is my PowerDNS server’s IP address.

Sample output:

; <<>> DiG 9.8.2rc1-RedHat-9.8.2-0.30.rc1.el6_6.2 <<>> @192.168.1.150
; (1 server found)
;; global options: +cmd
;; Got answer:
;; ->>HEADER<<- opcode: QUERY, status: NOERROR, id: 58268
;; flags: qr rd; QUERY: 1, ANSWER: 0, AUTHORITY: 0, ADDITIONAL: 0
;; WARNING: recursion requested but not available

;; QUESTION SECTION:
;.                IN    NS

;; Query time: 0 msec
;; SERVER: 192.168.1.150#53(192.168.1.150)
;; WHEN: Tue Mar 31 16:09:09 2015
;; MSG SIZE  rcvd: 17

That’s it. PowerDNS is ready to use.

I have successfully installed and configured PowerDNS, now what? It is time to manage PowerDNS using Poweradmin administration tool.

Cheers!!


Advertise here with BSA

---------------------------------------------------------------------
How To Install PowerDNS On CentOS

Configure PostgreSQL With Django Application On CentOS 7

$
0
0

Django is a high level and flexible Python web framework. It is a free and open source tool used to store data into a lightweight SQLite database file. In this article, we will explain how you can make the installation and configuration of PostgreSQL in order to be able to use it with Django applications.

In this tutorial, let us see how to Configure PostgreSQL With Django Application On CentOS 7.

Introduction to PostgreSQL

PostgreSQL is an open source object relational database system. It has been released since 15 years, during which it earned a strong reputation for its reliability, data integrity and correctness. PostgreSQL could be used with all existing operating systems, such Linux, UNIX and windows. All the data types are existed with this tool such INTEGER, NUMERIC, BOOLEAN, CHAR, VARCHAR, DATE, and others. This tool also supports storage of binary large objects, including pictures, sounds and videos.

Before starting it is required to have a clean CentOS 7 server instance with a non-root user set up which also must be configured using “sudo” privileges”.

Configure PostgreSQL With Django Application

Install the needed components from repositories:

We will start our tutorial by installing all the needed components from our CentOS and EPEL repository. So we will need the “pip”, python package manager, the database software and the associated libraries to interact with them. As it is mentioned those components will be installed from the CentOS and EPEL repository. So to enable the EPEL repository you have just to use the following command:

sudo yum install epel-release

To install the required components, the following command is used:

sudo yum install python-pip python-devel gcc postgresql-server postgresql-devel postgresql-contrib

Configure the PostgreSQL:

To initialize the PostgreSQL database, the following command is used:

sudo systemctl start postgresql

After the initialization of the PostgreSQL database, now we will make some adjustment of the configuration files. Choose your editor the “sudo” command and type as below:

sudo nano /var/lib/pgsql/data/pg_hba.conf

Using this command you will open the file which is responsible of the authentication methods for the database system. For local maintenance tasks, the type of connection used with it can be accepted but for a Django project isn’t the case since a user configuration is with a password. In order to adjust this we will edit the “host” lines. Just the last column will be replaced by “md5” which will allow the password authentication:

# TYPE  DATABASE        USER            ADDRESS                 METHOD
# "local" is for Unix domain socket connections only
local   all             all                                     peer
# IPv4 local connections:
#host    all             all             127.0.0.1/32            ident
host    all             all             127.0.0.1/32            md5
# IPv6 local connections:
#host    all             all             ::1/128                 ident
host    all             all             ::1/128                 md5

Now we will restart the service using:

sudo systemctl restart postgresql

sudo systemctl enable postgresql

Create database and database user:

There is an operating system named “postgres” was created during the installation of the Postgres to correspond to the postgres PostgreSQL administrative user. So it is required to change to this user to be able to perform administrative tasks using:

sudo su - postgres

To log in the Postgres session use the following command:

psql

Now we will create our database for the Django project. We will name it “projectdata”:

CREATE DATABASE projectdata;

It is important to finish each command at SQL with semicolon. Now we will create a database user which will be used to connect to and interact with the database, you have to enter your password here:

CREATE USER projectdatauser WITH PASSWORD 'password';

We will make some changes for the connection parameters using the following command:

ALTER ROLE projectdatauser SET client_encoding TO 'utf8';
ALTER ROLE projectdatauser SET default_transaction_isolation TO 'read committed';
ALTER ROLE projectdatauser SET timezone TO 'UTC';

Now we will give our database user access rights to the database already created using the following command:

GRANT ALL PRIVILEGES ON DATABASE myproject TO myprojectuser;

Then type the following command to exit the SQL prompt:

\q

And the following command is used to exit the postgres user’s shell session.

exit

Installation of Django:

Now we will start the installation of our Django and all its dependencies within Python virtual environment. To get the virtual environment package use the following command:

sudo pip install virtualenv

Then type the following command to make a directory for holding your Django project:

mkdir ~/projectdata
cd ~/projectdata

And to create your virtual environment type:

virtualenv projectdataenv

Now we will activate the applications that will be installed within the virtual environment using the following command:

source projectdataenv/bin/activate

You will remark that your prompt will be changed showing you that you are now operating with your virtual environment:

(projectdataenv)user@host:~/projectdata$.

Now we will install the Django and the “psycopg2” package using the “pip” command:

pip install django psycopg2

Using the “projectdata” created directory, we can start our Django project using the following command:

django-admin.py startproject projectdata .

Configure Django database settings:

Now we will configure our project in order to use the created database. We will open the main Django project settings file using the following command:

nano ~/projectdata/projectdata/settings.py

At the end of this file there is a “DATABASES” section which is configured to SQLite as a database.

DATABASES = {
   'default': {
       'ENGINE': 'django.db.backends.sqlite3',
       'NAME': os.path.join(BASE_DIR, 'db.sqlite3'),
   }
}

We will change this section that the PostgreSQL database will be used instead of SQLite.

We will do as below:

DATABASES = {   'default': {
       'ENGINE': 'django.db.backends.postgresql_psycopg2',
       'NAME': 'projectdata',
       'USER': 'projectdatauser',
       'PASSWORD': 'password',
       'HOST': 'localhost',
       'PORT': '',
   }
}

Then save and close the file.

Test our project:

Now we will test our Django project starting by the migration of our data structures to our database using the following command:

cd ~/projectdata
python manage.py makemigrations
python manage.py migrate

Then type the following command to create an administrative account while you will be asked to choose a username, an e-mail address and a password:

python manage.py createsuperuser

now we will start our Django project using the following command:

python manage.py runserver 0.0.0.0:8000

In your web browser, visit your server’s domain name or IP address followed by :8000 to reach default Django root page:

http://server_domain_or_IP:8000

Then add the “/admin” to the end of the URL, that you be in front of the login screen. So enter your username and password already created that you will be taken to the admin interface. You can stop the development server using the Ctrl-C on your terminal window.

Now our user account information was stored in our database and it can be appropriately been accessed.

Conclusion

The installation and configuration of the PostgreSQL was described in this article. This tool can be used as the backend database for a Django project.


Advertise here with BSA

---------------------------------------------------------------------
Configure PostgreSQL With Django Application On CentOS 7

Install Poweradmin, A Web-based Control Panel For PowerDNS, In Linux

$
0
0

About Poweradmin

Poweradmin is a free, web-based PowerDNS administration tool. Using this tool, anyone, even a novice user, can easily manage PowerDNS. Poweradmin allows us to easily define Zone files and record types. The current version of Poweradmin is adapted from a very old version of Poweradmin that was originally written by Jorn Ekkelenkamp and Roeland Nieuwenhuis. The current version has extended enhancements, feature and performance improvements.

Poweradmin is released under GPL, and it supports GNU/Linux, Windows, and Mac OS X.

Features

The following are the list notable features of Poweradmin.

  • Full support for all zone types: master, native or slave.
  • Full support for supermasters, for automatic provisioning of slave zones.
  • Full support for A, AAAA, CNAME, HINFO, MX, NS, PTR, SOA, SRV and TXT record types.
  • Multi-language support.
  • Support for larger databases.
  • Support for custom layouts.
  • Enhanced user and permission management setup. It now allows for fine-grained control of the permissions a user has, using “permission templates”, assigned to users.
  • Full support for IPv6.
  • And many.

Install Poweradmin

In this tutorial, let us see how to install Poweradmin in DEB and RPM based systems.

Install Poweradmin On RPM based systems:

First, make sure you have installed PowerDNS on your system.

After installing PowerDNS, install the following prerequisites.

yum install httpd php php-mcrypt php-pdo php-mysql wget

Start httpd service and make it to start automatically on every reboot.

service httpd start
chkconfig httpd on

Next, edit /etc/sysconfig/iptables file,

vi /etc/sysconfig/iptables

Allow the apache web server default port ’80’ through firewall.

[...]
-A INPUT -p tcp -m state --state NEW --dport 80 -j ACCEPT
[...]

Then, restart iptables service.

service iptables restart

If you use DEB based system like Ubuntu, then follow the instructions given below.

Install Poweradmin On DEB based systems:

Check out the following link to install PowerDNS on DEB based systems.

After installing PowerDNS, install the following prerequisites.

sudo apt-get install apache2 gettext libapache2-mod-php5 php5 php5-common php5-curl php5-dev php5-gd php-pear php5-imap php5-ming php5-mysql php5-xmlrpc php5-mhash php5-mcrypt wget

Then, Install PEAR modules using command:

sudo pear install DB
sudo pear install pear/MDB2#mysql

Enable Mcrypt module with command:

sudo php5enmod mcrypt

Finally, start/restart apache service using command:

sudo service apache2 start

Download and Install Poweradmin:

Download the latest version of Poweradmin as shown below.

wget http://sourceforge.net/projects/poweradmin/files/poweradmin-2.1.7.tgz

Extract the downloaded file.

tar xvfz poweradmin-2.1.7.tgz

Move the extracted files to the apache document root as shown below.

mv poweradmin-2.1.7/ /var/www/html/poweradmin

Note: If you use Ubuntu version lower than 14.04 such as Ubuntu 13.10, 13.04, 12.04 etc., then the apache root document folder will be /var/www/.

Set the proper permission and ownership  to /var/www/html/poweradmin directory.

On RPM based systems:

chown -R apache:apache /var/www/html/poweradmin/

On DEB based systems:

sudo chown -R www-data:www-data /var/www/html/poweradmin/

Finally, restart apache service to take effect the changes.

On RPM based systems:

service httpd restart

On DEB based systems:

sudo service apache2 start

Starting Poweradmin Web-based installer:

Once you completed all the above steps, open up your web browser, and type http://ip-address/poweradmin/install/ to start the web-based installation.

On RPM based systems, you might be end up with: “403 forbidden” error.

403 Forbidden - Mozilla Firefox_001

To fix this error, setup the proper SELinux policies using commands:

setsebool -P httpd_enable_homedirs true
chcon -R -t httpd_sys_content_t /var/www/html/poweradmin/

After running the above commands, refresh your web page. You should see the following screen. Select your preferred language and Click Go to step 2 button.

Poweradmin - Mozilla Firefox_002

Now you should get warning message like:

“This installer expects you to have a PowerDNS database accessable from this server. This installer also expects you to have never ran Poweradmin before, or that you want to overwrite the Poweradmin part of the database. If you have had Poweradmin running before, any data in the following tables will be destroyed: perm_items, perm_templ, perm_templ_items, users and zones. This installer will, of course, not touch the data in the PowerDNS tables of the database. However, it is recommended that you create a backup of your database before proceeding.”

That means, if you have any zone files created in your PowerDNS server, plas backup them first.

Click the Go to step 3 button.

Poweradmin - Mozilla Firefox_003

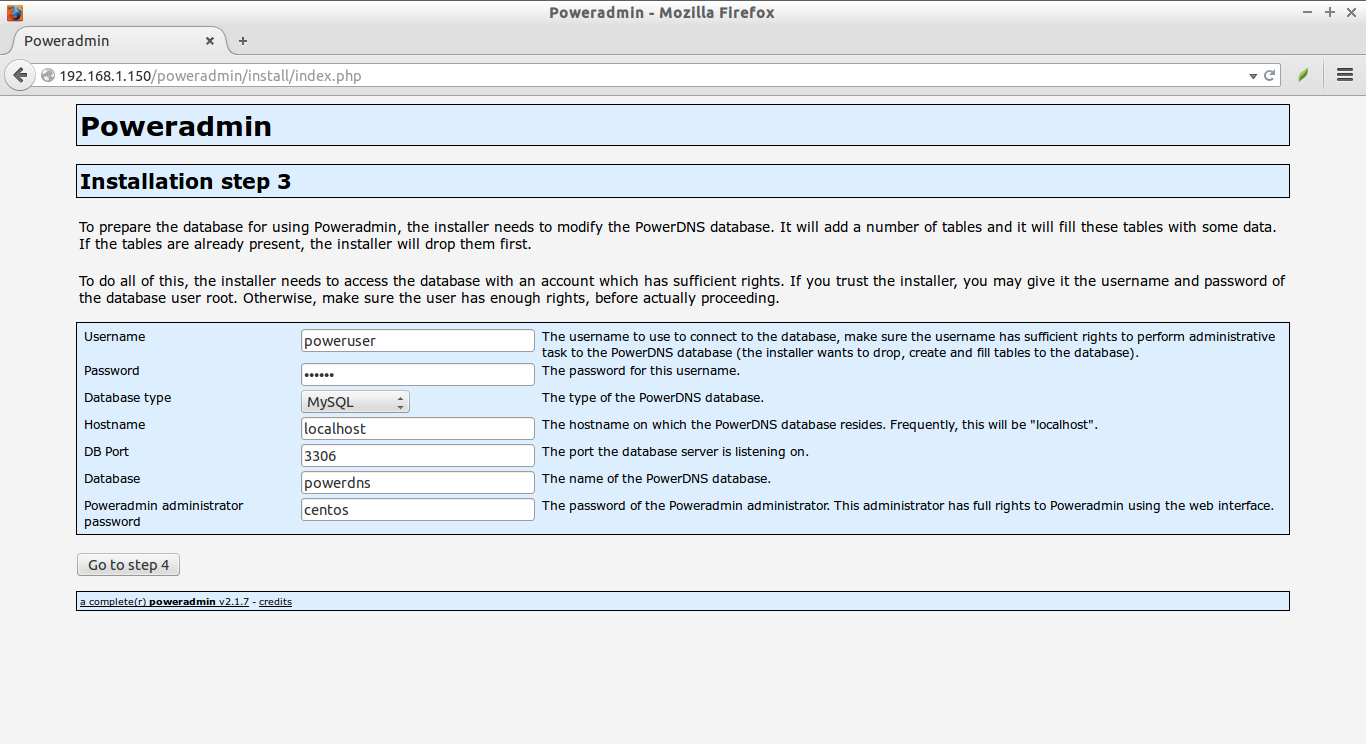
This is the important step. Keep attention. Enter the database username and password to connect to the database. As you may know, we have created the database for PowerDNS with proper permission during PowerDNS installation in our previous articles. Also, select your database type(Ex.MySQL, PostgreSQL etc). Enter the name of the PowerDNS database and the password of the Poweradmin administrator. This administrator has full rights to Poweradmin using the web interface.

Then, click Go to step 4 button.

Poweradmin - Mozilla Firefox_005

Here,

  • powerdns (You can also use ‘root’ in the Username section) – The username to use to connect to the database, make sure the username has sufficient rights to perform administrative task to the PowerDNS database (the installer wants to drop, create and fill tables to the database).
  • MySQL – The type of the PowerDNS database.
  • localhost – The hostname on which the PowerDNS database resides. Frequently, this will be “localhost”.
  • 3306 – The port the database server is listening on.
  • powerdnsThe name of the PowerDNS database.

If you have entered the correct values, you should see the following screen. Otherwise, make sure you have entered the correct database name, user name and password details.

Now, enter the username and password for Poweradmin. This new user will have limited rights only. Click Go to step 5 button to continue.

Poweradmin - Mozilla Firefox_006

Here,

  • poweruser – The username for Poweradmin.
  • centos – The password for this username.
  • hostmaster.unixmen.local – When creating SOA records and no hostmaster is provided, this value here will be used. Should be in the form “hostmaster.example.net”.
  • ns1.unixmen.local – When creating new zones using the template, this value will be used as primary nameserver. Should be like “ns1.example.net”.
  • ns2.unixmen.local – When creating new zones using the template, this value will be used as secondary nameserver. Should be like “ns2.example.net”.

Click Go to step 6 to update records in the PowerDNS database.

Poweradmin - Mozilla Firefox_007

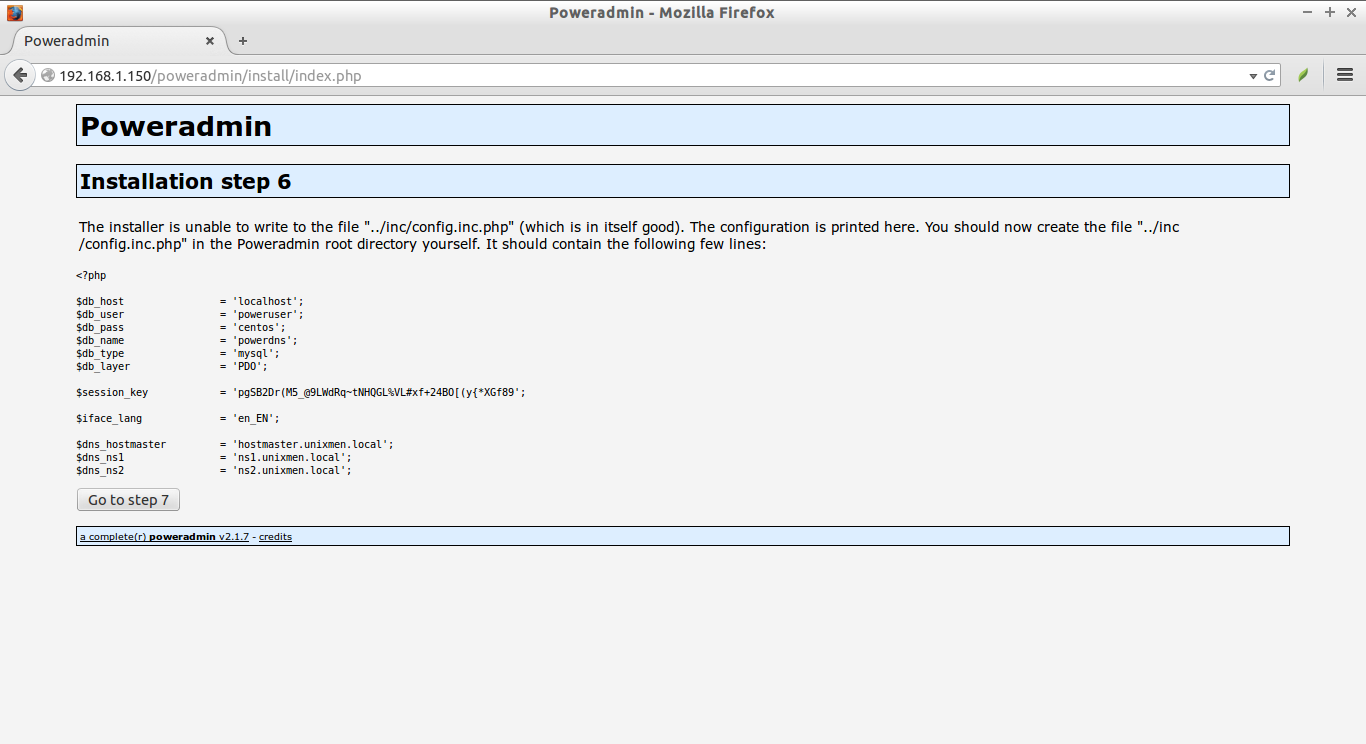
Now, the installer will ask you should now create the file “../inc/config.inc.php” in the Poweradmin root directory yourself. And update the contents of the config.inc.php file with the contents as shown in the below screen.

Poweradmin - Mozilla Firefox_008

To do that, open terminal and create config.inc.php file in the Poweradmin root directory,

vi /var/www/html/poweradmin/inc/config.inc.php

Add the following lines as shown in the above screenshot.

<?php

$db_host		= 'localhost';
$db_user		= 'poweruser';
$db_pass		= 'centos';
$db_name		= 'powerdns';
$db_type		= 'mysql';
$db_layer		= 'PDO';

$session_key		= 'pgSB2Dr(M5_@9LWdRq~tNHQGL%VL#xf+24BO[(y{*XGf89';

$iface_lang		= 'en_EN';

$dns_hostmaster		= 'hostmaster.unixmen.local';
$dns_ns1		= 'ns1.unixmen.local';
$dns_ns2		= 'ns2.unixmen.local';

After creating the config.inc.php file, return back to your installation screen and click Go to step 7 button.

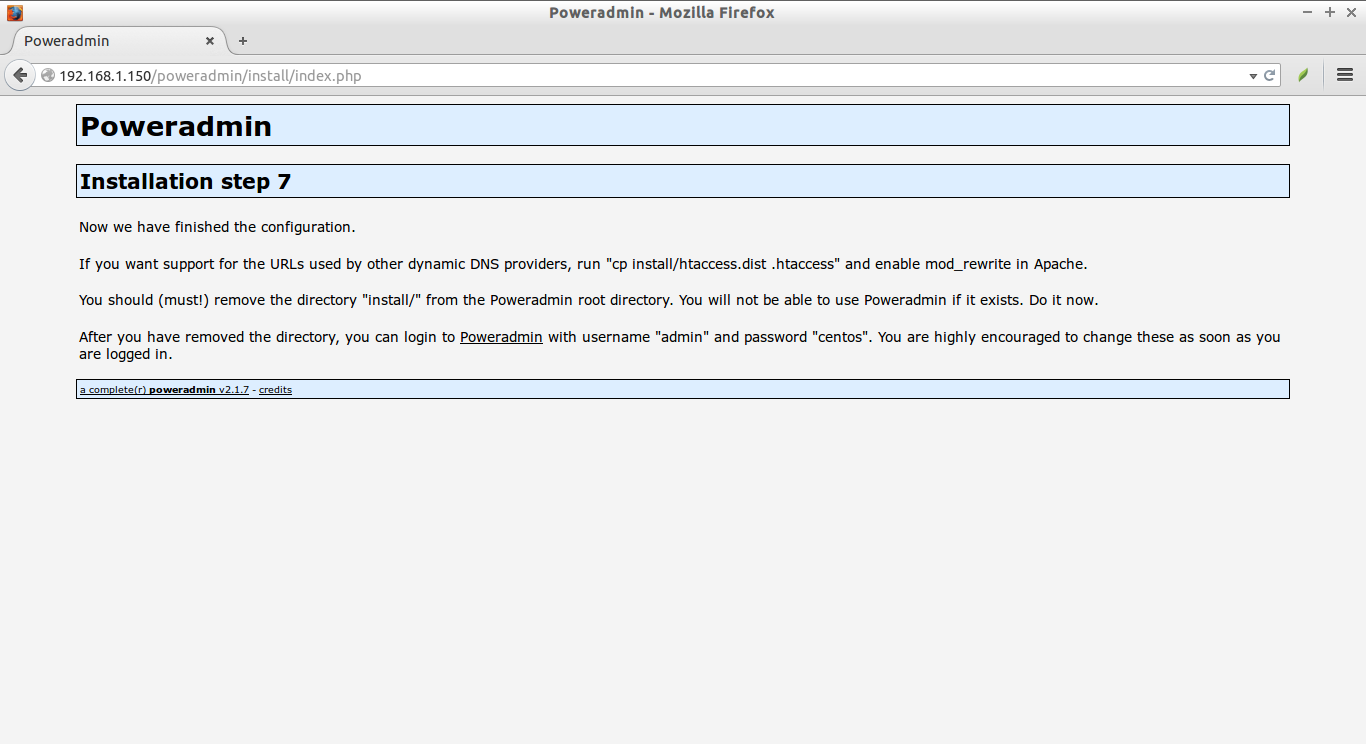
Done! Now we have finished the configuration.

Poweradmin - Mozilla Firefox_010

If you want support for the URLs used by other dynamic DNS providers, run “cp install/htaccess.dist .htaccess” and enable mod_rewrite in Apache.

You must remove the directory “install/” from the Poweradmin root directory. You will not be able to use Poweradmin if it exists.

rm -fr /var/www/html/poweradmin/install/

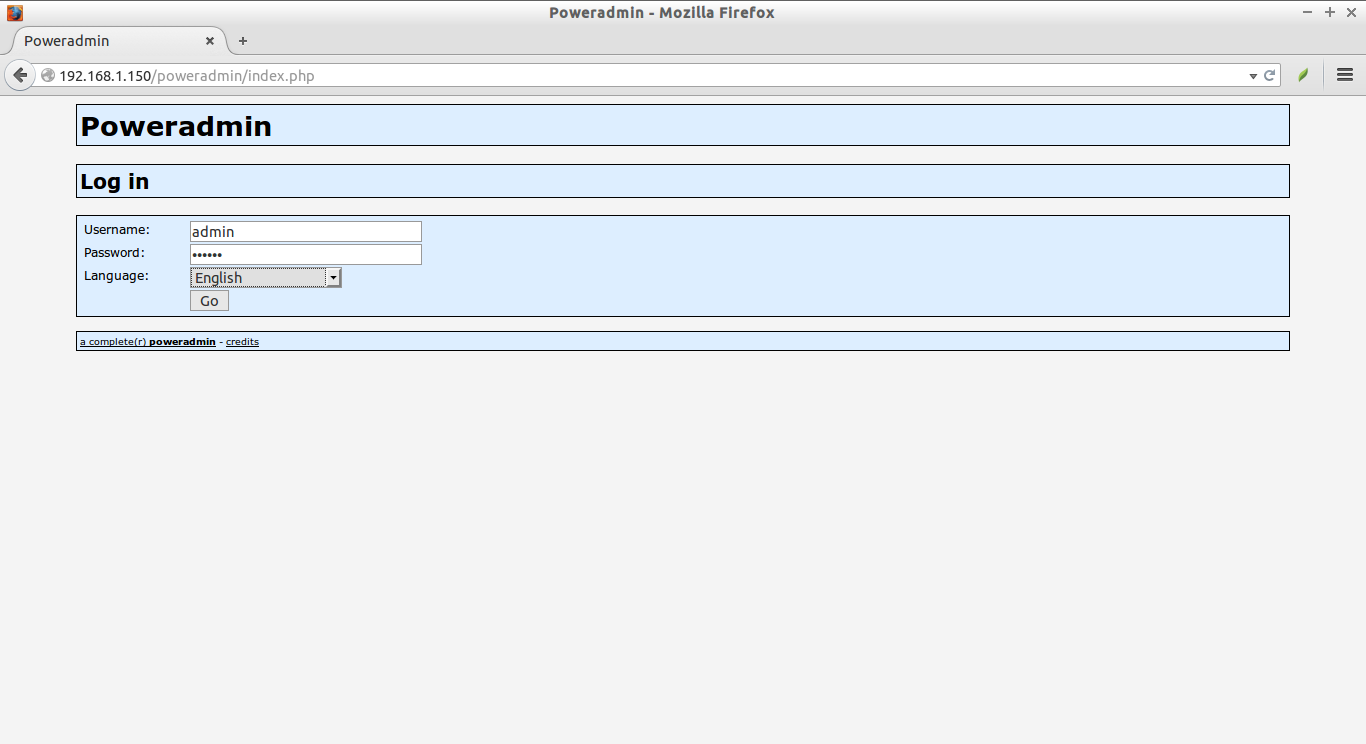
After you have removed the directory, you can login to Poweradmin web console using URL http://IP-address/poweradmin/index.php with username “admin” and password “centos”(which we created in the previous steps).

Poweradmin - Mozilla Firefox_011

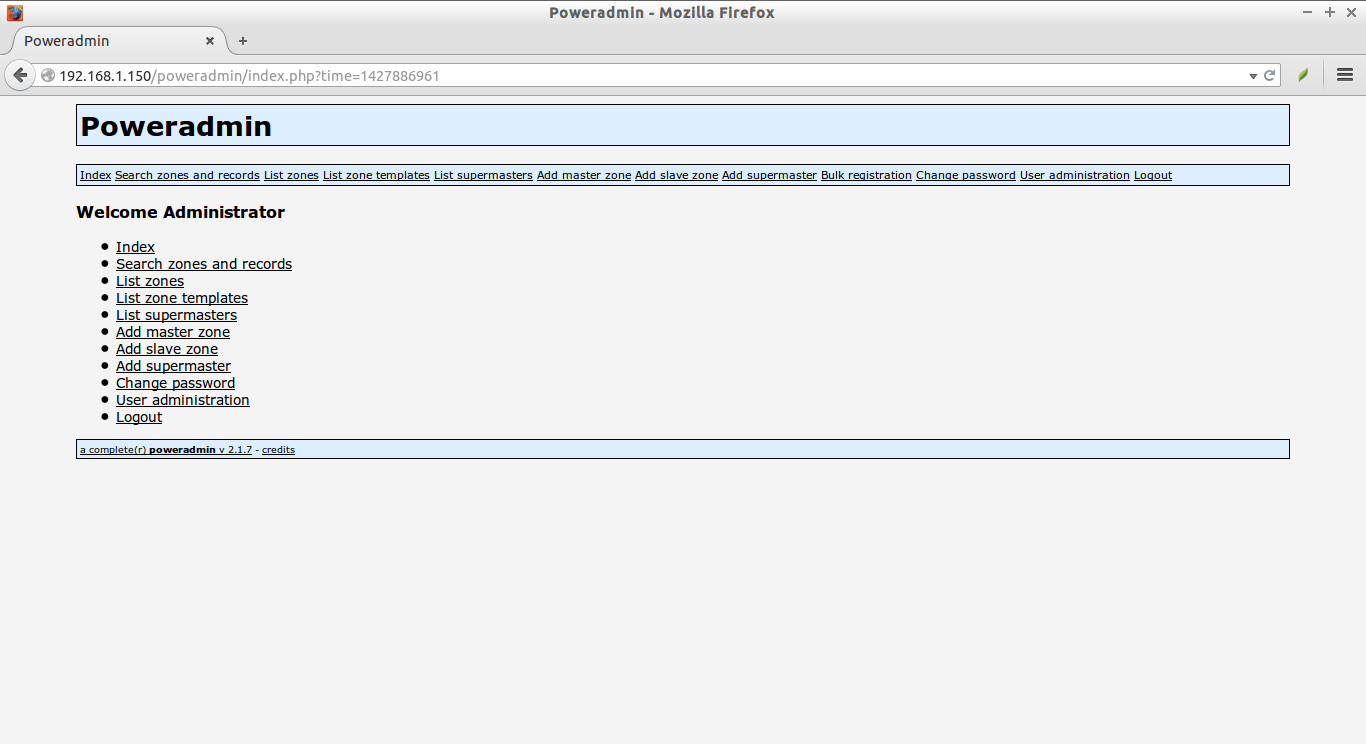
This is how my Poweradmin Dashboard looked after entering into it.

Poweradmin - Mozilla Firefox_012

It is highly recommended to change and set a strong password for Poweradmin user.

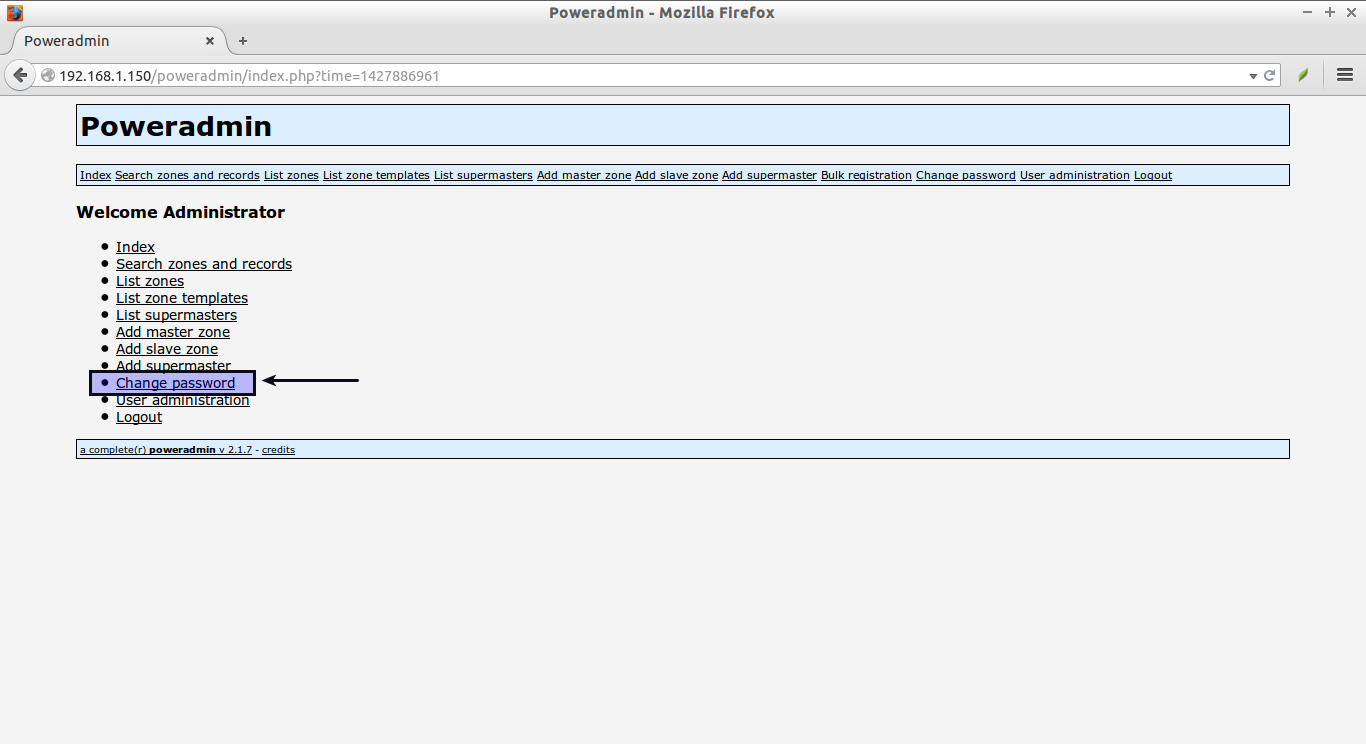
To do that, click on the Change password link in the Dashboard.

Poweradmin - Mozilla Firefox_012

Enter the current and new passwords twice.

Poweradmin - Mozilla Firefox_014

Now, our Poweradmin web console has been secured.

In our next tutorial, we will see how to create Zone files using Poweradmin.

That’s it. Cheers!


Advertise here with BSA

---------------------------------------------------------------------
Install Poweradmin, A Web-based Control Panel For PowerDNS, In Linux

VPSSIM: A Script To Deploy LEMP Stack Automatically In CentOS

$
0
0

About VPSSIM

VPSSIM, an acronym of VPS is SIMple, is an auto-installer script for LEMP stack setup. Using this script, anyone, even the novice users, can easily deploy LEMP stack, i.e Nginx, MariaDB, and PHP in minutes. VPSSIM will currently work on both CentOS 6 and CentOS 7.

Features

  • Works both on 32 and 64bit systems;
  • Latest and stable Nginx;
  • NginX running PHP via FastCGI is faster and consumes much less RAM memory than Apache + mod_php;
  • PHP-FPM with FastCGI;
  • You can setup different versions of PHP. You can choose PHP 5.4, 5.5 or 5.6 when setup and change PHP version anytime;
  • MariaDB for better performance;
  • Supports SSL;
  • Includes PhpMyAdmin for managing databases;
  • Includes CSF firewall;
  • We can either enable or disable PhpMyAdmin;
  • Optional Zend opcache/Memcached/Google Pagespeed;
  • And many.

Try VPSSIM Demo

Before setup VPSSIM in your server, you can try VPSSIM VPS DEMO and see what it does, and how it works.

Here, We will see how to access and test VPSSIM demo.

  • VPSSIM demo IP address: 168.235.69.220
  • User name: vpssim
  • Password: vpssim

Open your Terminal, an type:

ssh vpssim@168.235.69.220

Type ‘Yes’ to add the host (168.235.69.220) to known list.

The authenticity of host '168.235.69.220 (168.235.69.220)' can't be established.
RSA key fingerprint is 99:6d:40:bc:65:34:c9:e7:75:87:ea:be:39:9b:37:96.
Are you sure you want to continue connecting (yes/no)? yes
Warning: Permanently added '168.235.69.220' (RSA) to the list of known hosts.
vpssim@168.235.69.220's password:  ##password is vpssim

After you login to VPS, SSH auto redirect to VPSSIM demo

sk@sk: ~_013

Okay, I am happy with VPSSIM, now I want to install it on my production server. How do I do it? Well, follow the procedures given below.

VPSSIM Installation

As we mentioned before, VPSSIM will work both on CentOS 6 and CentOS 7. Do not install it in a existing systems that has Nginx, Php, or MariaDB already installed. It may conflict with the existing installations. Use it only on a fresh and minimal servers.

Before setup VPSSIM, you need a VPS at minimum 512 MB RAM with centos 6 or 7. We will install and test VPSSIM in CentOS 6.5 minimal server.

Log in to your server with root privileges, and update your system.

yum update

Then, Enter the following command to start the installation.

yum -y install wget && wget https://vpssim.com/install && chmod +x install && ./install

The above command will start to pull and install all required packages. It will take a while depending upon your Internet connection speed.

After a few moments, you’ll be asked to choose which PHP version you want to install. Here, I go the latest version. So, I entered the choice 1.

root@server1:~_002

Now, the installer will check for the system specifications. Then, It will ask you to enter the domain name, PHP port etc.

root@server1:~_004

Now, it will ask you to confirm the details you have given. Just enter Y and hit Enter key.

root@server1:~_005

Note down or take screenshot of the following URLs that needed after installation completed.

Finally press Enter.

root@server:~_004

This will take some time. The installer will start to download and install all required packages for LEMP stack. Be patient and grab a cup of Coffee!

root@server:~_005

After a few minutes, you’ll be asked to enter the MySQL root user password. Enter the password twice.

root@server1_012

After the installation is over, your server will be automatically reboot in few seconds.

sk@sk: ~_007

Congratulations!! VPSSIM has been successfully installed. Now, you can login to the server as usual.

CentOS 6.5 Minimal (VPSSIM) [Running] - Oracle VM VirtualBox_008

Now, type “vpssim” in the Terminal to see list of menus available.

vpssim

Sample output:

=========================================================================
               VPSSIM - Manage VPS/Server by VPSSIM.COM                
=========================================================================
                             VPSSIM Menu                                
=========================================================================
 1) Add Website & Code          11) Cronjob Manage
 2) Remove website          12) CSF Firewall Manage
 3) Backup code & Config      13) IPtables Firewall Manage
 4) Check & Block IP DOS      14) Setup SSL (https)
 5) Database Manage          15) Download Log file
 6) PhpMyadmin Manage          16) Tools - Addons
 7) Zend OPcache Manage          17) Upgrade / Downgrade PHP
 8) Google pagespeed Manage   18) Server Status
 9) Memcached Manage          19) Update VPSSIM
10) Swap Manage              20) Exit
Type in your choice:

From the menu, you can type any numbers to start installing the corresponding service. For example, I am going to update VPSSIM, so I entered the number “19”.

root@server1:~_015

To view the server status, enter number: 18.

Sample output:

root@server:~_009

Press Enter to return back to VPSSIM menu.

To exit from the VPSSIM menu, type number: 20

Testing Nginx:

To test whether Nginx is properly working, open up the web browser and type: http://IP-address or http://domain-name.

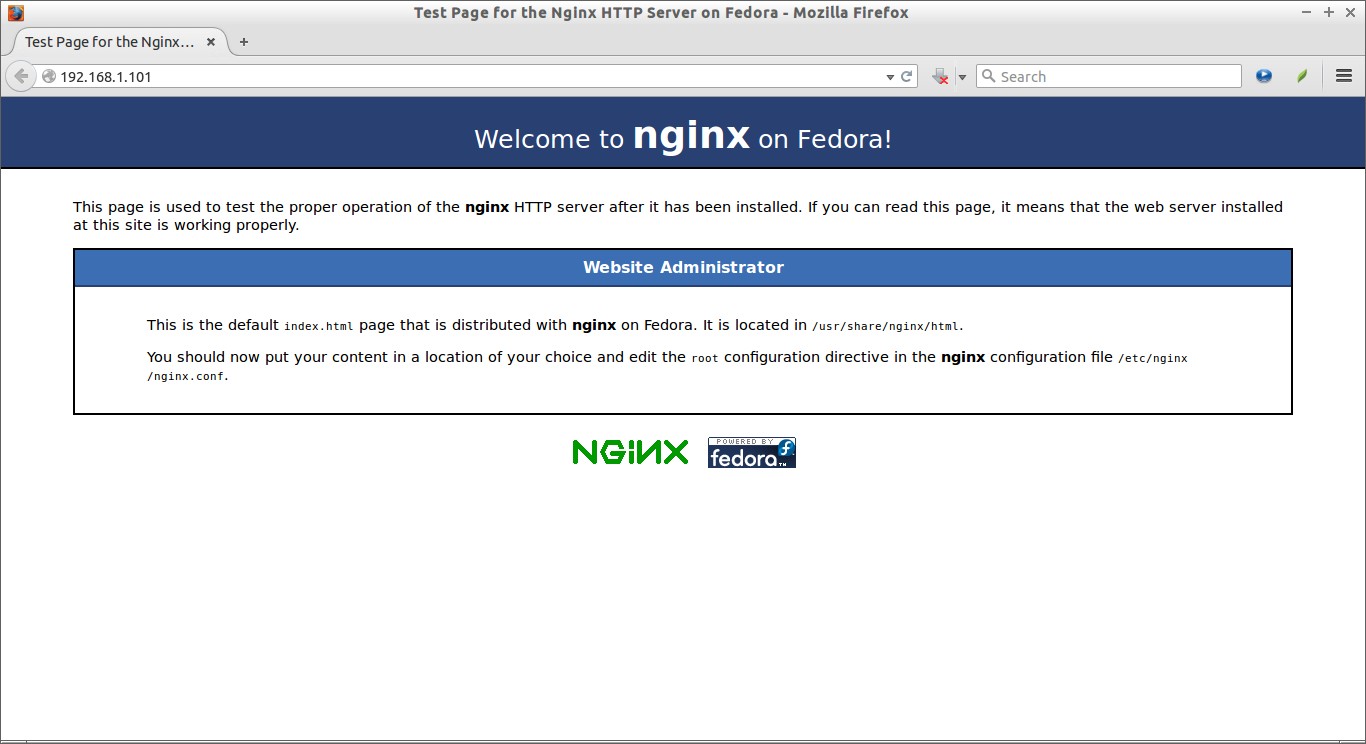
You should see the following nginx test page.

Test Page for the Nginx HTTP Server - Mozilla Firefox_010

Access PhpMyAdmin Console:

Type http://IP-addres:2015 or http://domain-name:2015/ in the address bar of your Browser.

Enter the mysql root user name and it’s password which we created during installation. in my case my database root username/password is root/centos.

phpMyAdmin - Mozilla Firefox_011

PhpMyAdmin Dashboard:

192.168.1.150:2015 - localhost | phpMyAdmin 4.3.12 - Mozilla Firefox_012

From PhpMyAdmin dashboard you can create/delete/edit any number of databases in few Mouse clicks.

That’s it. Your LEMP server is ready to use. Start building your websites.

But, I want to setup LEMP server step by step myself? How do I do it? Well, follow the below links to setup LEMP server step by step manually.

Cheers!


Advertise here with BSA

---------------------------------------------------------------------
VPSSIM: A Script To Deploy LEMP Stack Automatically In CentOS

How To Install CentOS Web Panel In CentOS

$
0
0

About CentOS Web Panel

There are so many free and paid Control panels available nowadays. We will, today, discuss about CentOS Web panel(CMP), specially designed for RPM based distributions like CentOS, RHEL, Scientific Linux etc. CWP is a free, Open Source control panel that can be widely used for deploying a Web hosting environment easily. Unlike other Control panels, CWP is automatically deploy the LAMP stack with Varnish Cache server.

Features

CWP comes with lot of features and free services. As I mentioned before, CWP automatically installs full LAMP stack (apache, php, phpmyadmin, webmail, mailserver etc.) on your server.

Here is the complete list of features and software that will be automatically installed and configured during CWP installation.

List of softwares to be installed and configured during CWP installation:

  • Apache Web Server
  • PHP 5.4
  • MySQL + phpMyAdmin
  • Postfix + Dovecot + roundcube webmail
  • CSF Firewall
  • File System Lock (no more website hacking, all your files are locked from changes)
  • Backups; AutoFixer for server configuration

3rd Party Applications:

  • CloudLinux + CageFS + PHP Selector
  • Softaculous – Script Installer (Free and Premium)

Web Server:

  • Varnish Cache server
  • Compiles Apache from source
  • Apache reCompiler + Additional modules
  • Apache server status, configuration
  • Edit apache vhosts, vhosts templates, include configuration
  • Rebuild all apache Virtual hosts
  • suPHP & suExec
  • Mod Security + OWASP rules
  • Tomcat 8 server management
  • DoS protection
  • Perl cgi script support

PHP:

  • Compiles PHP from source
  • PHP Switcher (switch between PHP versions like: 5.2, 5.3, 5.4, 5.5)
  • PHP Selector select PHP version per user or per folder (PHP 4.4, 5.2, 5.3, 5.4, 5.5, 5.6)
  • Simple php editor
  • Simple php.ini generator in the users panel
  • PHP addons
  • PHP.ini editor & PHP info & List modules
  • php.ini per user account
  • FFMPEG, For Video streaming websites
  • CloudLinux + PHP Selector

User Management

  • Add, List, Edit adn Remove Users
  • User Monitoring
  • Shell access management
  • User Limit Managment
  • Limit Processes
  • Limit Open Files
  • User FTP & File Manager
  • CloudLinux + CageFS
  • Dedicated IP per account

DNS:

  • FreeDNS
  • Add, Edit, List and Remove DNS zones
  • Edit nameserver IPs
  • DNS zone template editor
  • New Easy DNS Zone Manager (with ajax)
  • New DNS Zone list with Additional resolving information using google (also checking rDNS, nameservers….)

Email:

  • Postfix & dovecot
  • MailBoxes, Alias
  • Roundcube webmail
  • Postfix Mail queue
  • rDNS Checker Module
  • AntiSPAM
  • SPF & DKIM Integration
  • Re-Build Postfix/Dovecot Mail server with AntiVirus, AntiSpam Protection
  • Email Auto Responder

System:

  • CPU core and clock info
  • Memory usage info
  • Detailed Disk status
  • Software Info like kernel version, uptime etc.
  • Services Status
  • ChkConfig Manager
  • Network port usage
  • Network configuration
  • SSHD configuration
  • Auto-Fixer (checks important configuration and tries to auto-fix issues)

Monitoring:

  • Monitor services eg. top, apache stats, mysql etc.
  • Use Java SSH Terminal/Console within panel
  • Services Configuration (eg. Apache, PHP, MySQL etc)
  • Run shell commands in screen/background

Security:

  • CSF Firewall
  • SSL generator
  • SSL Certificate Manager
  • CloudLinux + CageFS

SQL:

  • MySQL Database Management
  • Add local or remote access user
  • Live Monitor MySQL process list
  • Create, Remove database
  • Add additional users per database
  • MySQL server configuration
  • PhpMyAdmin
  • PostgreSQL, phpPgAdmin Support

Additional options:

  • TeamSpeak 3 Manager
  • Shoutcast Manager
  • Auto-update
  • Backup manager
  • File Manager
  • Virtual FTP users per domain
  • cPanel Account Migration (restores files, databases and database users)
  • And many more.

Install CentOS Web Panel In CentOS 6

At the time writing this tutorial, CWP only supports upto CentOS 6.x versions. It doesn’t work on CentOS 7 and later versions.

Prerequisites:

Before installing CWP, you must know the following information:

  • CWP only supports static IP addresses. It does not support dynamic, sticky, or internal IP addresses.
  • CWP doesn’t has an uninstaller. After you install CWP, you must reinstall the server to remove it.
  • Only install CWP on a freshly installed operating system without any configuration changes.
  • Need atleast 512MB RAM for 32 bit systems.
  • 1024MB for 64 bit systems.
  • Need 4GB RAM or more to deploy all modules.
  • At least 20GB or hard disk space is required.

For testing purpose in VirtualBox, 640MB RAM and 10GB hdd space is enough.

Update server:

Install wget package first. This is needed to download CWP.

yum install wget -y

Update your server using command:

yum update -y

Reboot once to take effect the changes.

Install CWP:

Change to /usr/local/src/ directory:

cd /usr/local/src

Download latest CWP version with command:

wget http://centos-webpanel.com/cwp-latest

If the above URL doesn’t work, use the following link instead.

wget http://dl1.centos-webpanel.com/files/cwp-latest

Then, start CWP installer using command:

sh cwp-latest

Sample output:

root@server:-usr-local-src_001

root@server:-usr-local-src_002

The installation will take upto 30 minutes or more depending upon your Internet speed.

Finally, you’ll see the installation completed message like below. Note down the details such as mysql root user password and login URLs of CWP. You”ll need them later. Then Press Enter key to reboot your system.

root@server:-usr-local-src_004

After booting into the system, you will see the CWP welcome login message.

CentOS 6.5 Minimal [Running] - Oracle VM VirtualBox_006

Adjust Firewall/Router:

The CWP default web console ports are 2030(http) and 2031(https). You should allow the both ports through firewall/Router in order to access the CWP web console from a remote system.

To do that, edit:

vi /etc/sysconfig/iptables

Add the following lines:

[...]
-A INPUT -p tcp -m state --state NEW -m tcp --dport 2030 -j ACCEPT
-A INPUT -p tcp -m state --state NEW -m tcp --dport 2031 -j ACCEPT
[...]

Save and close the file. Restart iptables service to take effect the changes.

service iptables restart

Accessing CWP Web Console

Open up your browser and type:

http://IP-Address:2030/

Or

https://IP-Address:2031/

You will see the following like screen.

The login credentials are:

  • Username: root
  • Password: your root password

Login | CentOS WebPanel - Mozilla Firefox_007

This is how CWP dashboard will look:

CWP.admin - Mozilla Firefox_008

Congratulations! CWP has been successfully has been installed.

CWP Basic Configuration

Next, we have to do couple of things such as:

  1. Setup nameservers
  2. Setup shared ip (must be your public IP address)
  3. Setup at least one hosting package (or edit default package)
  4. Setup root email, etc.

Setup nameservers:

To setup nameservers, go to DNS Functions -> Edit nameservers IPs.

CWP.admin - Mozilla Firefox_009

Set your nameservers and click Save changes button.

CWP.admin - Mozilla Firefox_010

Setup Shared IP And Root mail ID:

This is important step to host websites on your host. To setup shared IP, go to CWP Settings -> Edit settings.

CWP.admin - Mozilla Firefox_011

Enter your Static IP and Email ID, and Click Save settings button.

CWP.admin - Mozilla Firefox_012

Now, CWP is ready to host websites.

Setup hosting package:

A hosting package is nothing but a Web hosting plan that consists of allowed diskspace, bandwidth, no of FTP accounts, no of email ids, and no of databases etc. You can setup any number of web hosting plans as your wish.

To add a package, go to Packages – Add a Package from the CWP console.

CWP.admin - Mozilla Firefox_013

Enter the name of the package, amount of Diskquota/RAM allowed, FTP/Email accounts, Databases, and subdomains etc. Click Save settings button to create the web hosting plan.

CWP.admin - Mozilla Firefox_014

Now, CWP is ready to host your domains.

Adding Domains:

To create a new Domain, you to have at least one user account.

To add a user, go to User Accounts -> New Account.

Enter the domain(ex.unixmen.com), username, password and Email id etc. Finally, click Create.

CWP.admin - Mozilla Firefox_016

Now, let us add a new domain.

To add a domain, go to Domains -> Add Domain.

Enter the Domain and assign the domain the users of your choice.

CWP.admin - Mozilla Firefox_017

Conclusion

In this tutorial, we have seen how to install and configure CentOS Web Panel to create a simple web hosting environment. CWP is very simple to install and use. Even a novice user can create a basic web hosting server in a couple of hours. Also, CWP is completely free to use and open source. Give it a try! You won’t be disappointed.

You can find the more details about CWP in the CentOS Web Panel Wiki page.

Cheers!


Advertise here with BSA

---------------------------------------------------------------------
How To Install CentOS Web Panel In CentOS

NethServer: A CentOS Based All-in-one Server Distribution

$
0
0

About NethServer

NethServer

NethServer is a free, Open Source, CentOS based all-in-one Linux server distribution, specially designed for small offices and medium-size enterprises. NethServer offers number of built-in modules that can be used to turn any systems into a mail, Web, Proxy, DNS, FTP, Cloud, IDS, Samba, or VPN servers instantly within few minutes. Just forget the step by step and comprehensive installation steps, because we can install the modules of our choice with a ‘single click’. It comes with a built-in powerful and modern web interface that simplifies the common administrative tasks. Since it is based on popular CentOS distribution, NethServer is very powerful, solid, secured distribution. We can regularly get security fixes, updates from the official CentOS repositories as well.

Features

NethServer has number of features, including:

  • Web-filter – Filters both HTTP and HTTPS traffic with Squid with or without authentication. Also, It comes ClamAV antivirus.
  • Mail server – Postfix+Dovecot+Roundcube with Antivirus support
  • File server – SAMBA server, Primary Domain controller.
  • Web server – Multi-domain support with ready made LAMP stack
  • Firewall – Built-in Shorewall
  • VPN – Host2Net and Net2Net VPNs based on OpenVPN and L2TP. Compatible with Linux, Windows, Android and iOS.
  • Groupware – Based on SOGo
  • Private Cloud – OwnCloud
  • Web-based console for administering NethServer
  • And many

NethServer Editions

NethServer comes in two flavours as stated below.

  1. Community Edition – free for personal use
  2. Enterprise Edition – Paid version

You can find the features comparison of both editions in the following link.

Install NethServer

Minimum hardware requirements are:

  • 64 bit CPU
  • 1 GB RAM
  • 8 GB disk space
  • Fast Internet connection
  • CD/DVD or Usb drive

We can install NethServer in two methods:

  1. Using NethServer ISO.
  2. Using NethServer YUM repository.

1. Installing from ISO:

This method is easy for new users. All you need is to download the NethServer from the following link, burn it to CD/DVD or USB drive and install it as the way you install CentOS.

As of writing this tutorial, the latest version was NethServer 6.6.

2. Installing from YUM

The second method is best option for those who already have servers/VPSs that pre-installed with CentOS distribution.

First, update your system:

yum update -y

Add NethServer repositories using command:

yum localinstall http://mirror.nethserver.org/nethserver/nethserver-release-6.6.rpm -y

Then, install NethServer base system using command:

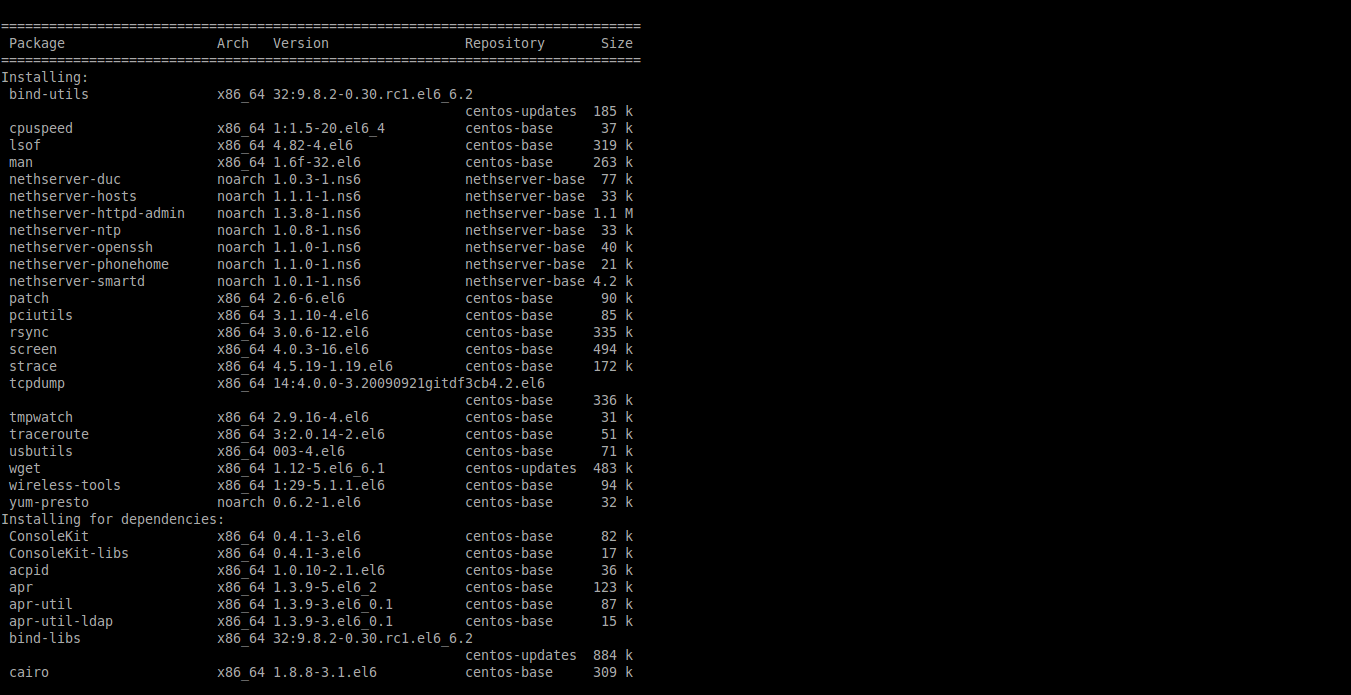
nethserver-install

Sample output:

root@server:~_001

The above command will desperately download and install all packages in your server. It will take a while depending upon your Internet connection speed. Just be patient and have a cup of Coffee.

Alternatively, to install base system and additional modules at once, include the name of the module along with NethServer installation script as show below.

nethserver-install nethserver-mail nethserver-nut

After installation completed, you will see the following message.

root@server:~_002

Note down the URLs to access the NethServer Web UI later.

Access NethServer Web UI

NethServer can be configured using the Server Manager web interface. Open up web browser and type: https:IP-Address:980 in your browser’s address bar.

If the web server module is installed, you can also access the web interface using URL: https://server_name/server-manager.

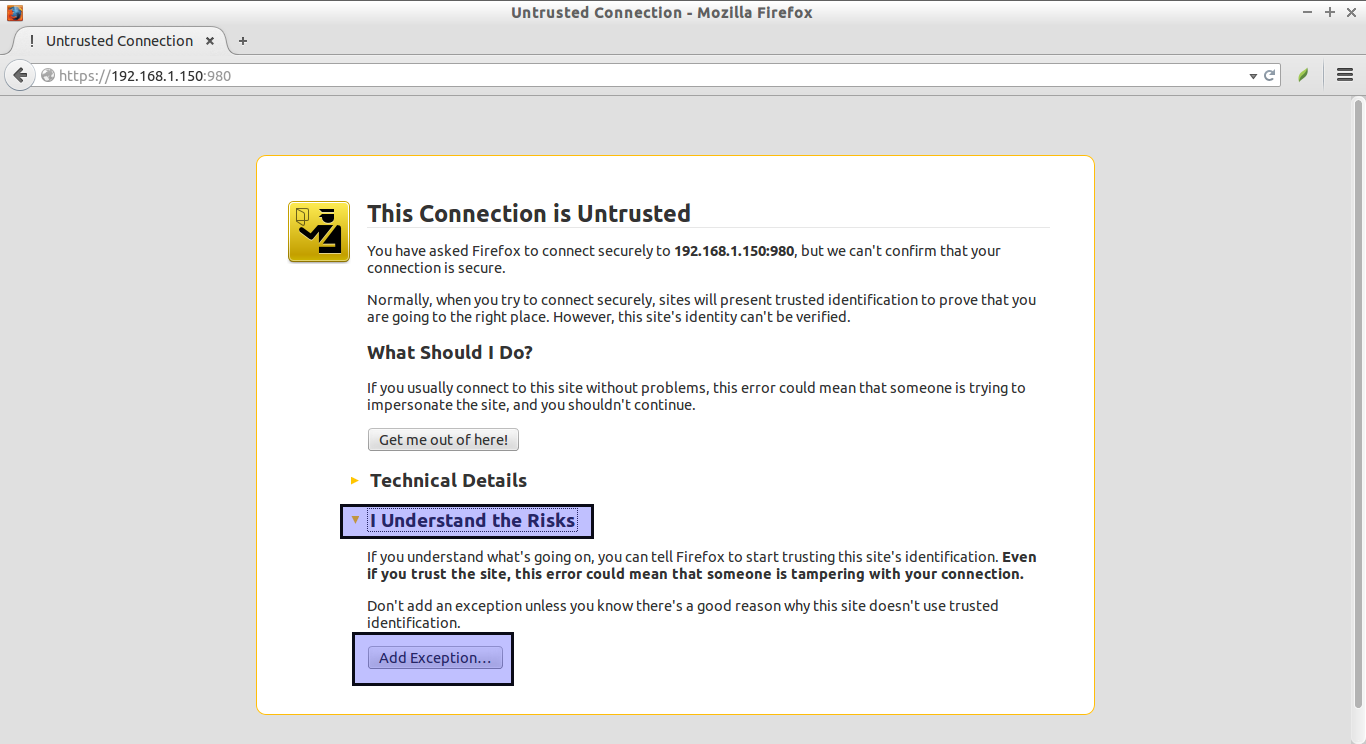
Accept the Untrusted connection.

Untrusted Connection - Mozilla Firefox_004

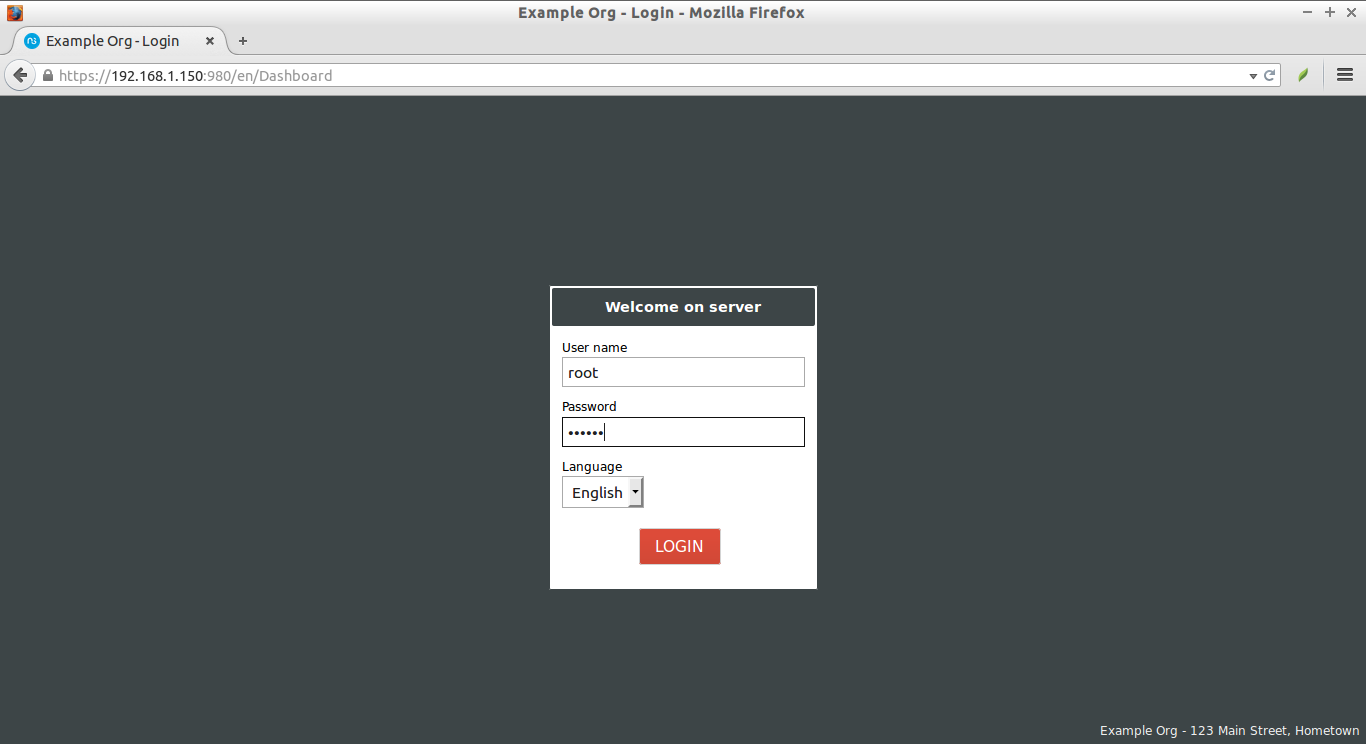
Enter the user name and password.

  • Username: root
  • Password: <your_root_password>

Example Org - Login - Mozilla Firefox_005

Note: if you install NethServer using ISO, the default user name and password might be:

  • Default user name: root
  • Default password: Nethesis,1234

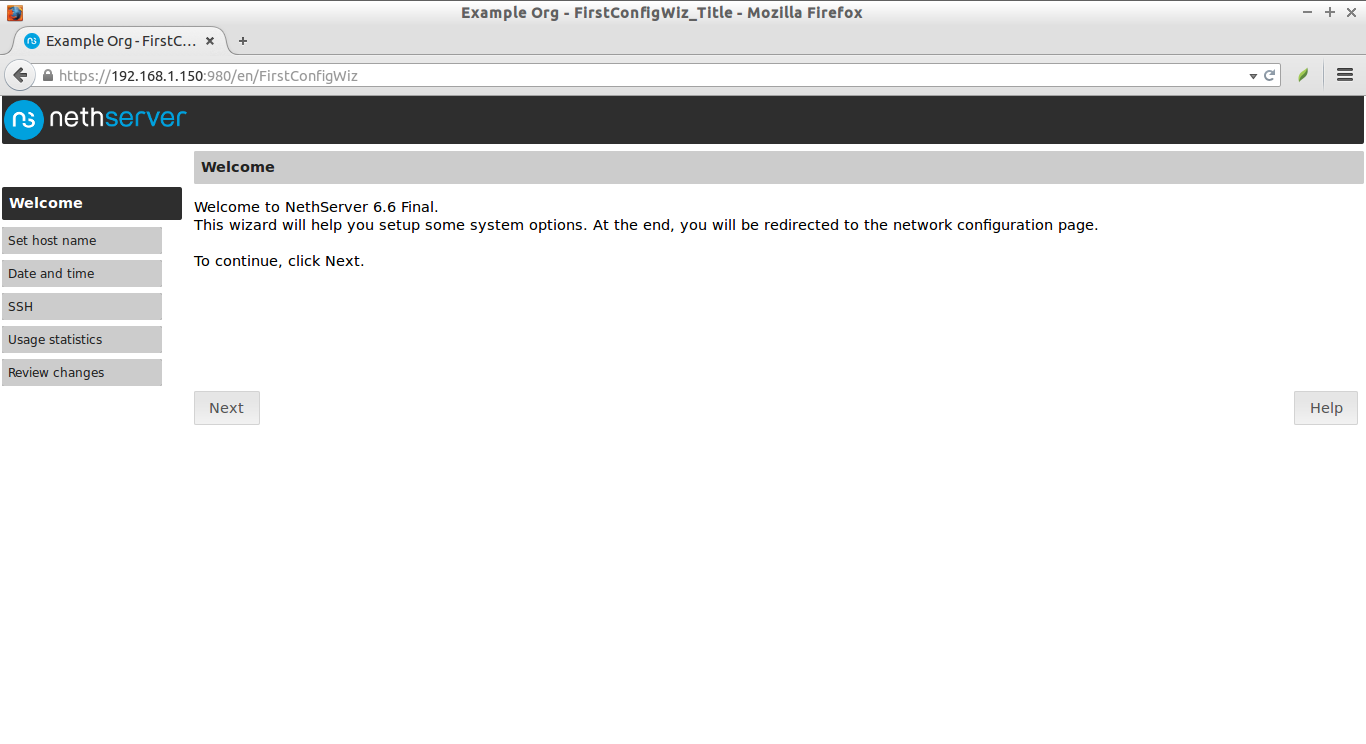
We’re not finished yet. Click Next to continue.

Example Org - FirstConfigWiz_Title - Mozilla Firefox_006

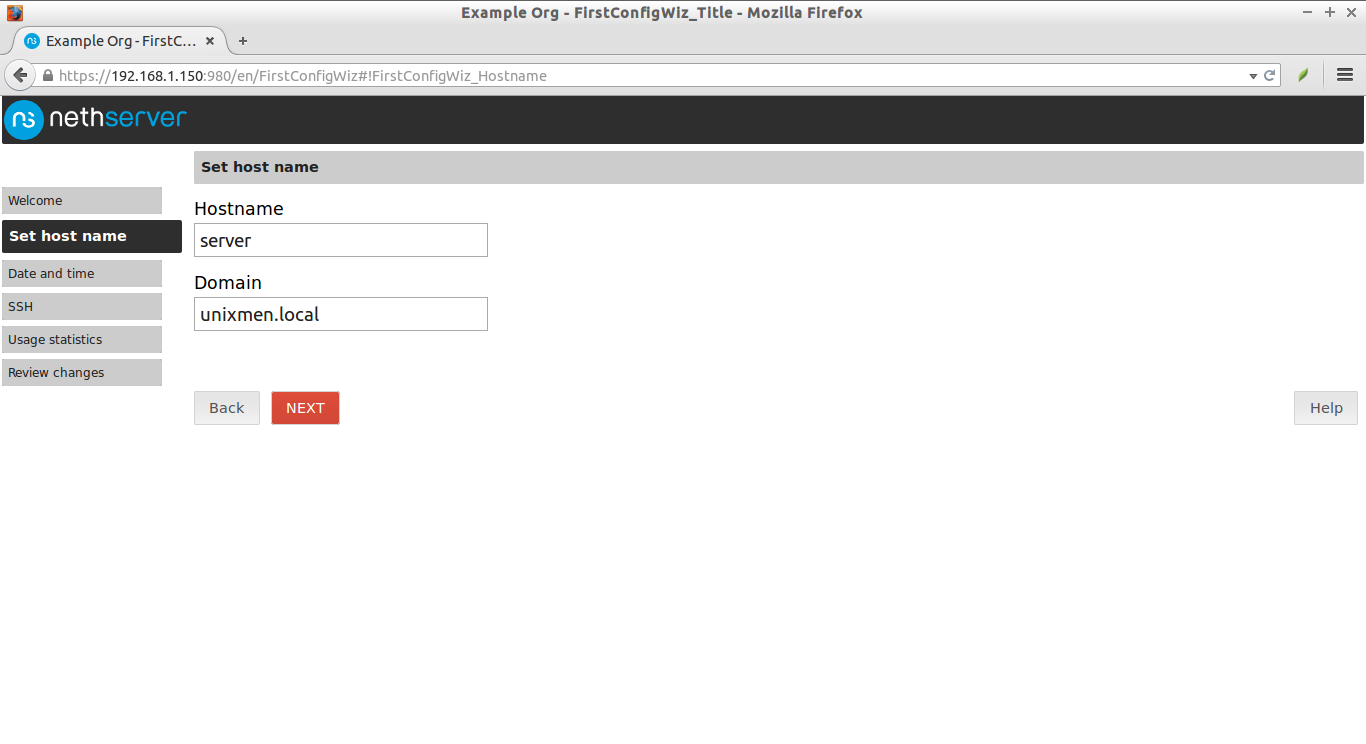
Enter Hostname and Domain name. Click Next.

Example Org - FirstConfigWiz_Title - Mozilla Firefox_007

Select Timezone and click Next.

Example Org - FirstConfigWiz_Title - Mozilla Firefox_008

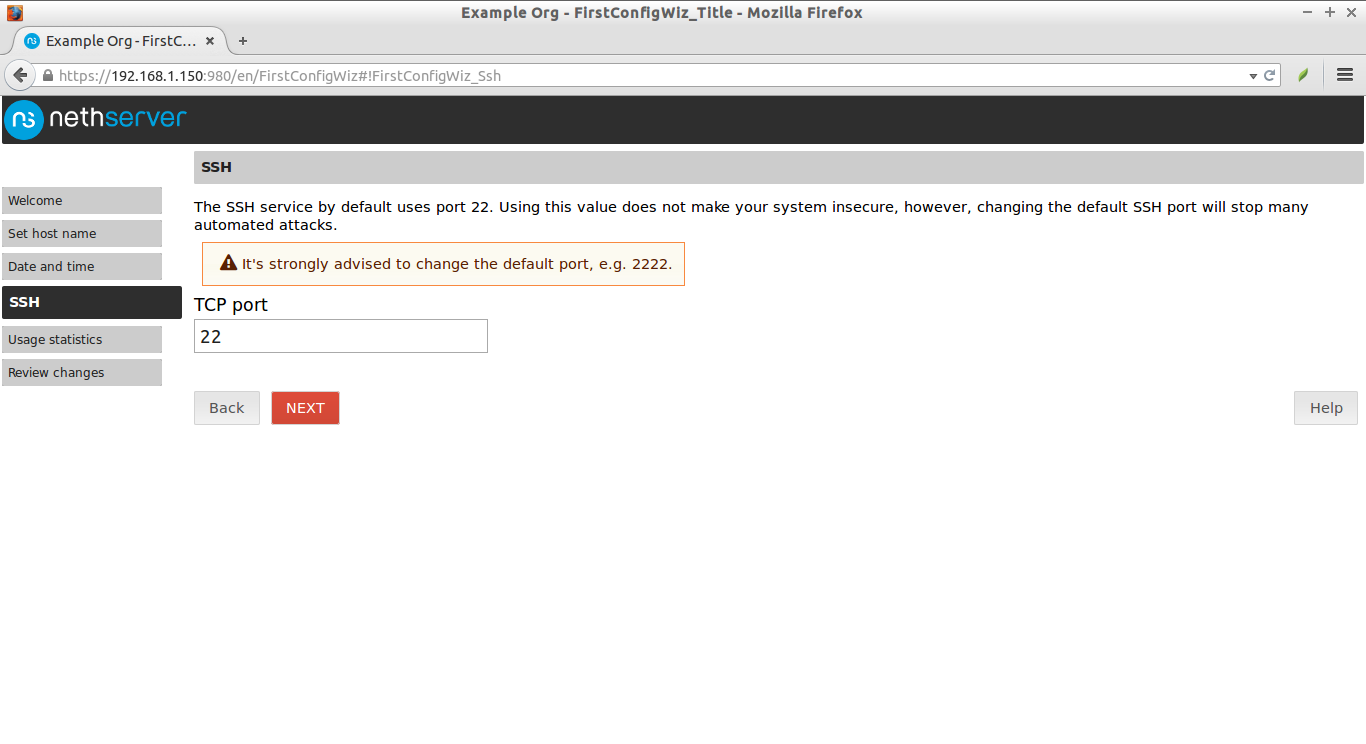
Change default SSH port and click Next. I go with the defaults.

Example Org - FirstConfigWiz_Title - Mozilla Firefox_009

Click Next.

Example Org - FirstConfigWiz_Title - Mozilla Firefox_010

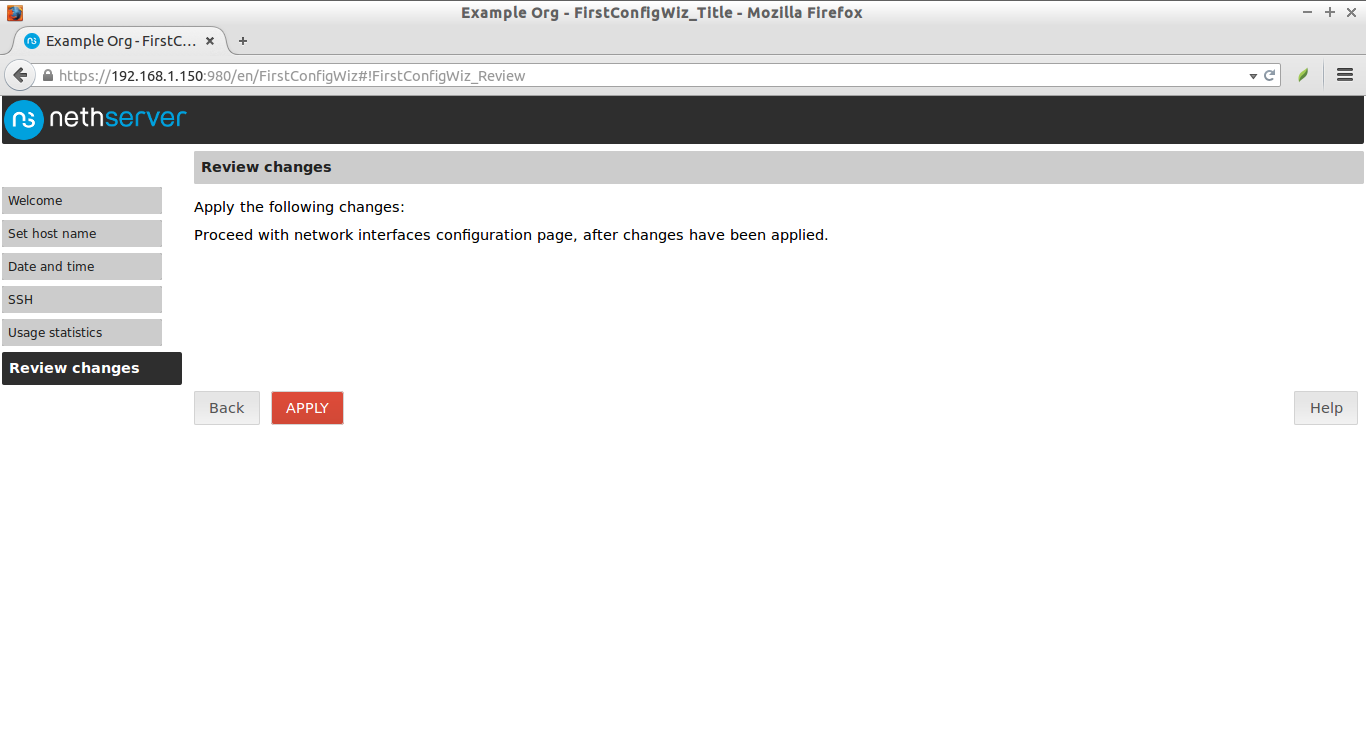
Click Apply to save and proceed to next step.

Example Org - FirstConfigWiz_Title - Mozilla Firefox_011

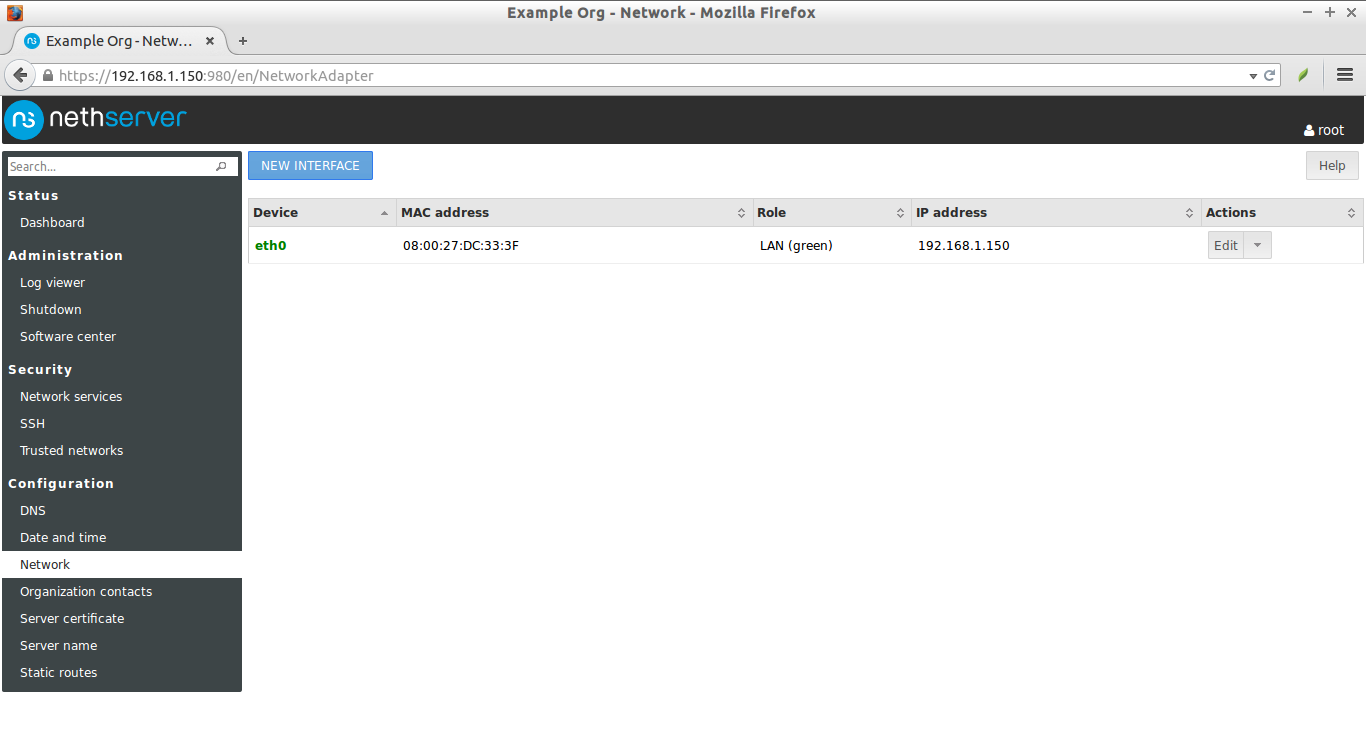
Here is the important part. The Network page configures how the server is connected to the local network (LAN) or other ones (i.e. Internet). If the server has firewall and gateway functionality, it will handle extra networks with special function like DMZ and guests network. NethServer supports an unlimited number of network interfaces.

You can assign network interface cards to a particular zones. Here is the list of supported zones by NethServer.

  • green: local network. Hosts on this network can access any other configured network
  • blue: guests network. Hosts on this network can access orange and red network, but can’t access to green zone
  • orange: DMZ network. Hosts on this network can access red networks, but can’t access to blue, orange and green zones
  • red: public network. Hosts on this network can access only the server itself

As I have only one NIC in my server, I left this part as default.

Click NEW INTERFACE button to create logical interfaces.

The list of available logical interfaces are:

  • alias: associate more than one IP address to an existing network interface. The alias has the same role of its associated physical interface
  • bond: arrange two or more network interfaces, provides load balancing and fault tolerance
  • bridge: connect two different networks, it’s often used for bridged VPN and virtual machine
  • VLAN (Virtual Local Area Network): create two or more physically separated networks using a single interface

Example Org - Network - Mozilla Firefox_013

As I have only one NIC, I will assign my NIC to bridge mode.

Example Org - Network - Mozilla Firefox_014

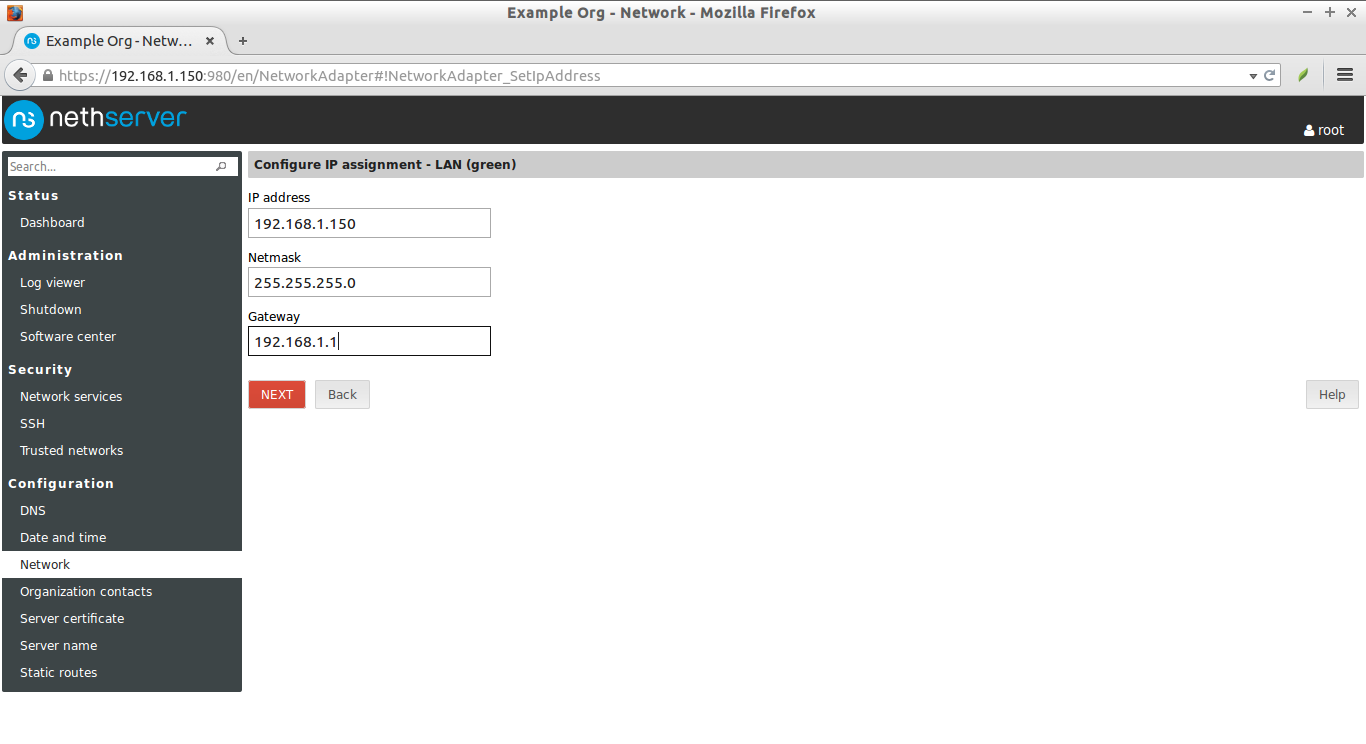
Enter IP address, Subnet, and Gateway etc. Click Next to proceed.

Example Org - Network - Mozilla Firefox_015

That’s it. We have created logical interface.

Example Org - Network - Mozilla Firefox_016

If you want to create another one, click on the ‘NEW INTERFACE’ button and follow the onscreen instructions.

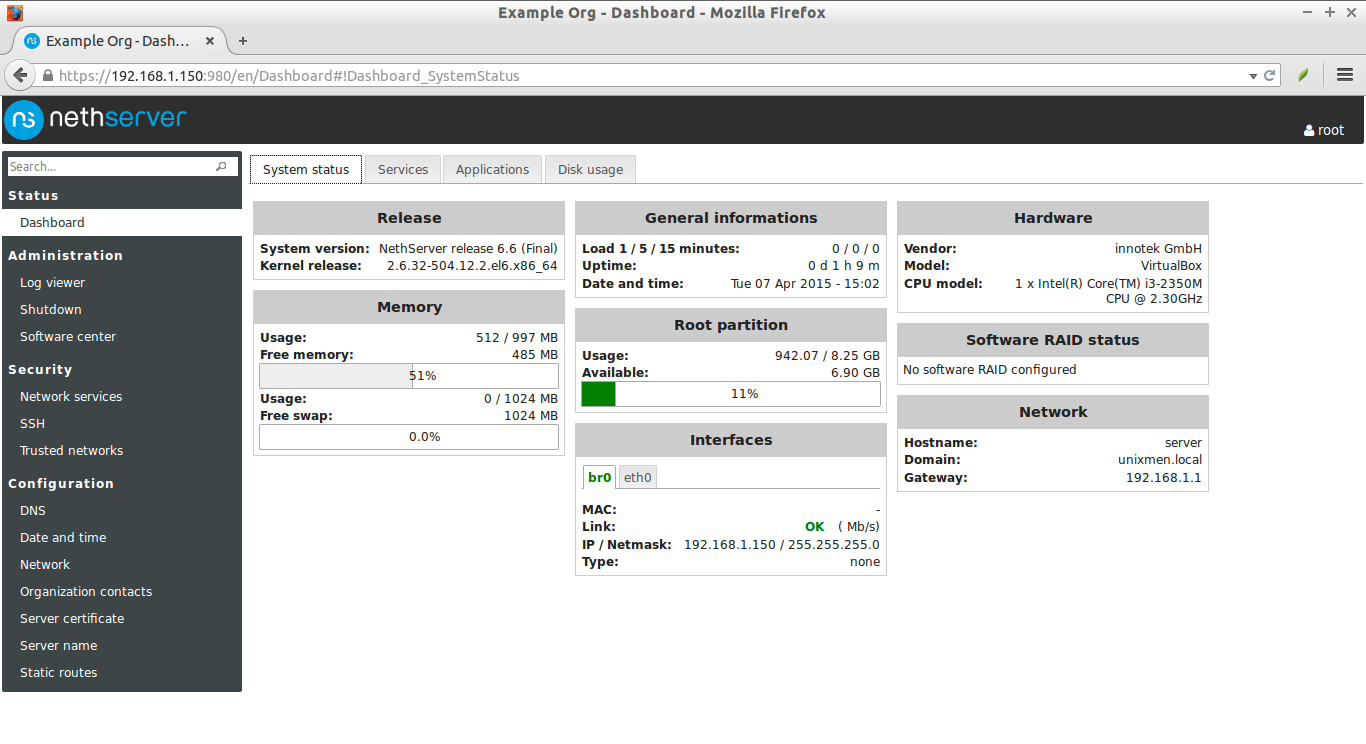
This is how my NethServer’s dashboard looked:

Example Org - Dashboard - Mozilla Firefox_017

From now on, you can install any modules ( FTP, Mail, or Web Server etc.) directly from the Web UI.

NethServer Software center

We have installed NethServer’s base system. Now, we will install the modules.

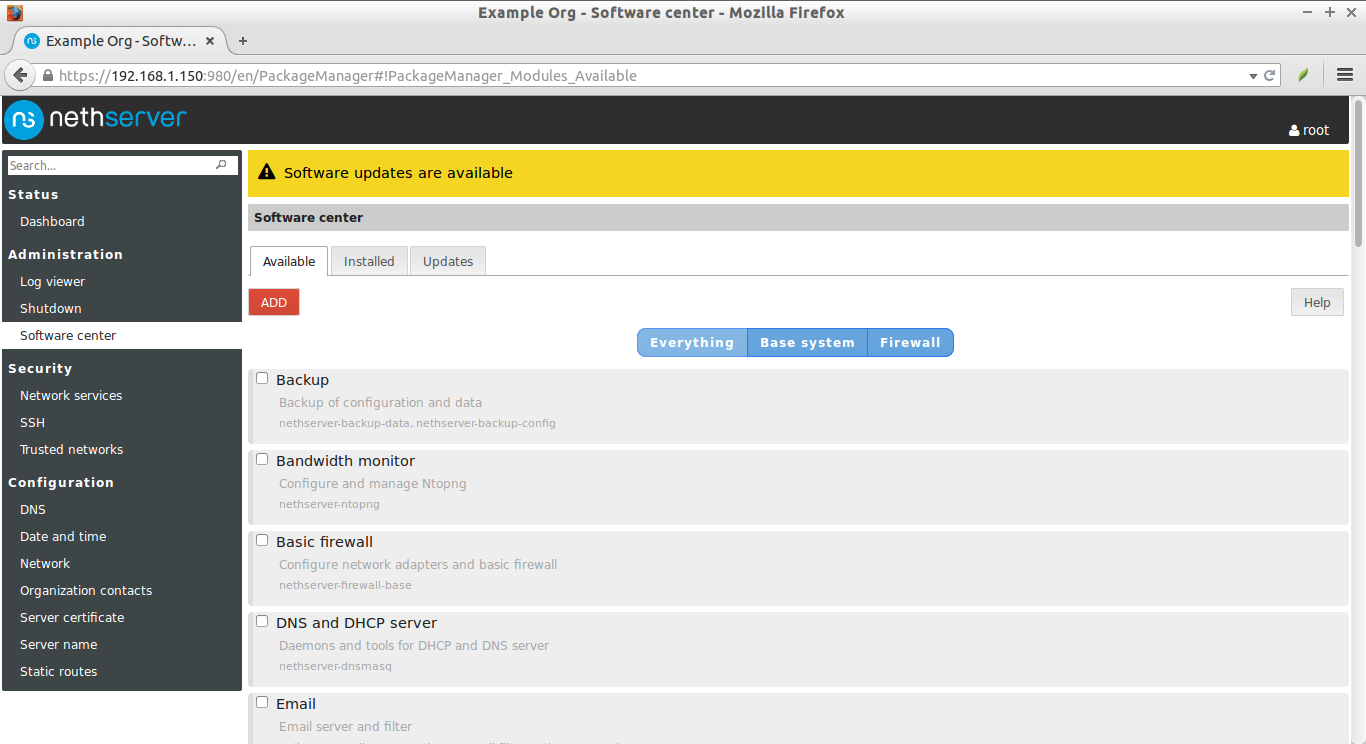
NethServer’s Software center allows us to install and remove modules. it shows the all available and installed (checked) modules. The view can be filtered by category.

Example Org - Software center - Mozilla Firefox_018

Here is the list of available modules.

NethServer Modules:

  • Backup
  • Users and groups
  • Email
  • Webmail
  • POP3 connector
  • POP3 proxy
  • Shared folders
  • Windows network
  • Chat
  • UPS
  • Fax Server
  • IAX Modem
  • Web proxy
  • Web content filter
  • Firewall and gateway
  • IPS (Snort)
  • Bandwidth monitor (ntopng)
  • Statistics (collectd)
  • DNS
  • DHCP and PXE server
  • VPN
  • FTP
  • ownCloud
  • Phone Home
  • WebVirtMgr

Like I said before, we can install any module with a ‘single click’. If you want to install a module, just check the corresponding box and click Add button.

Installing ownCloud Module:

For example, here I will show you how to install ownCloud module.

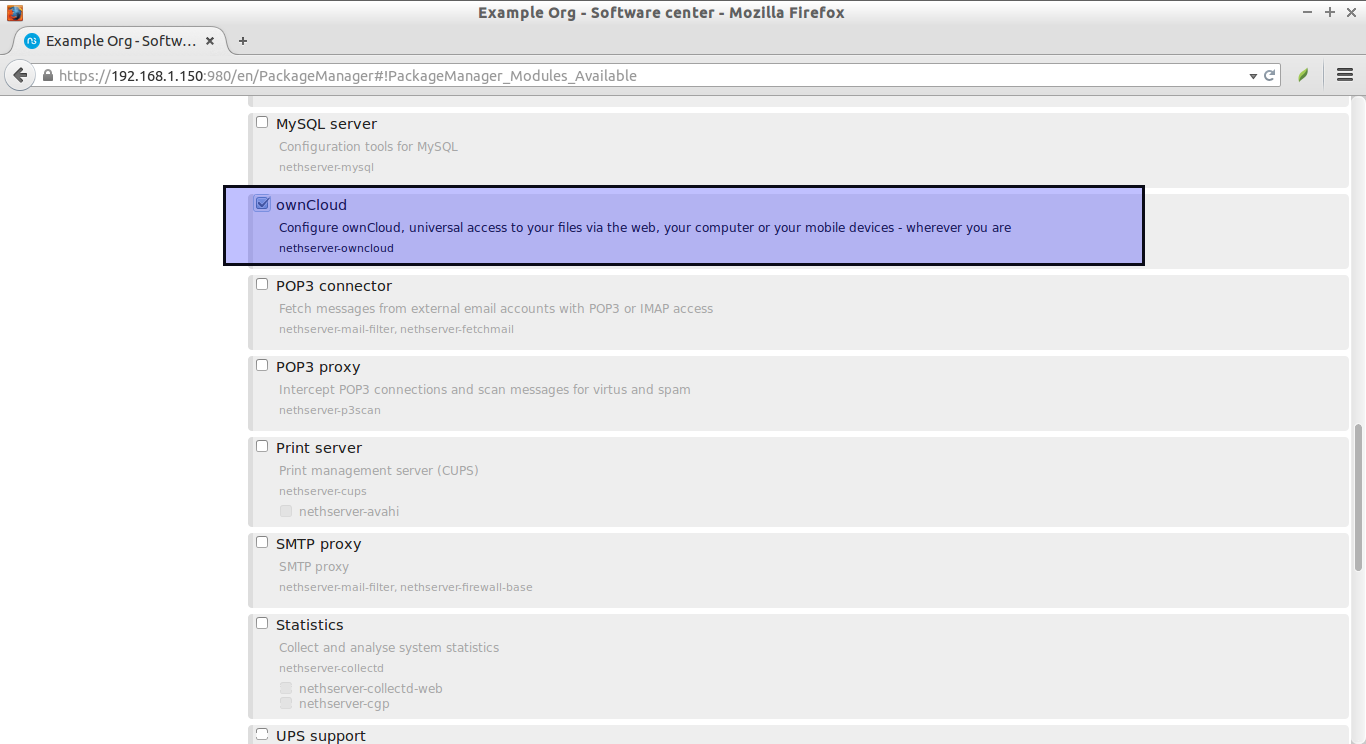
Scroll down and find the ownCloud module. Check the ownCloud checkbox and click Add button at the end.

Example Org - Software center - Mozilla Firefox_019

Then. click APPLY CHANGES button.

Example Org - Software center - Mozilla Firefox_020

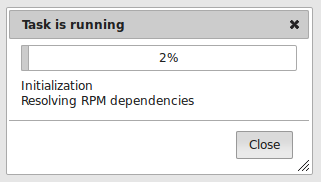
Once you clicked the APPLY CHANGES button, NethServer will automatically download, install and configure ownCloud along with all it’s dependencies.

Selection_021

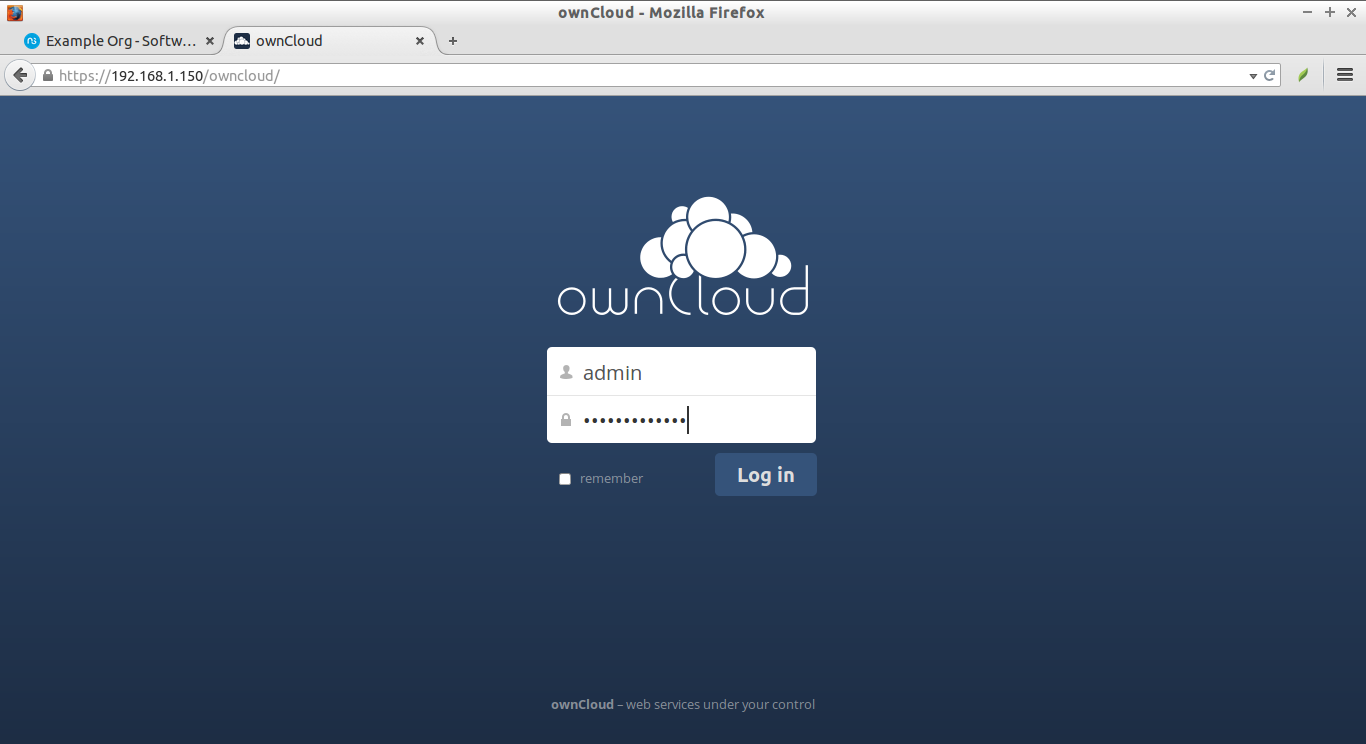
Once the installation completed, open a new tab and enter the URL: https://IP-Address/owncloud in your web browser to access your ownCloud dashboard.


  • use admin/Nethesis,1234 as default credentials

ownCloud - Mozilla Firefox_022

Voila! We have installed ownCloud in our server. How easy, isn’t it?

This is how ownCloud dashboard looked at first log in.

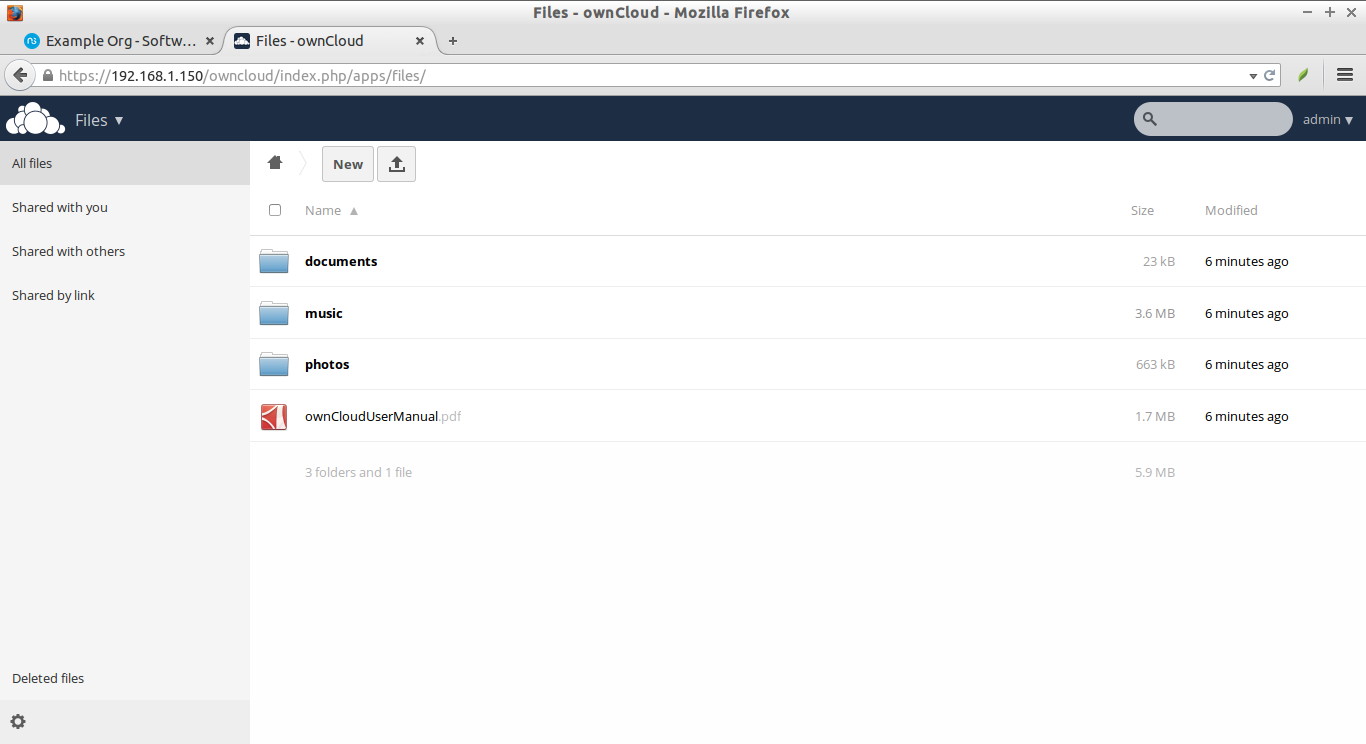
Files - ownCloud - Mozilla Firefox_023

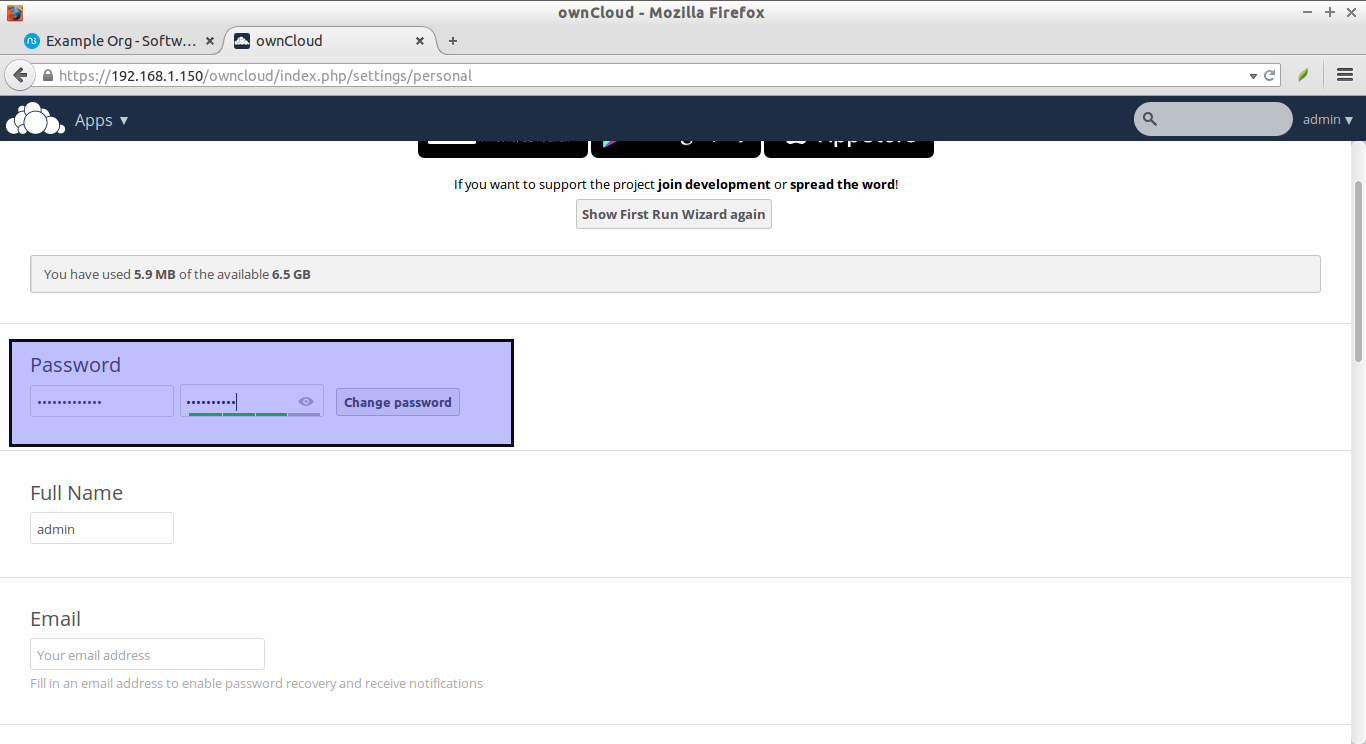
Change the ownCloud Admin user password to something stronger. To do that, Click on the admin user on the top right corner.

Then, select Personal.

Selection_025

Enter your current and new password. Finally, click on Change password button.

ownCloud - Mozilla Firefox_026

That’s it. Log out and log in back to your ownCloud’s dashboard using the new password.

Similarly, you can install any modules of your choice.

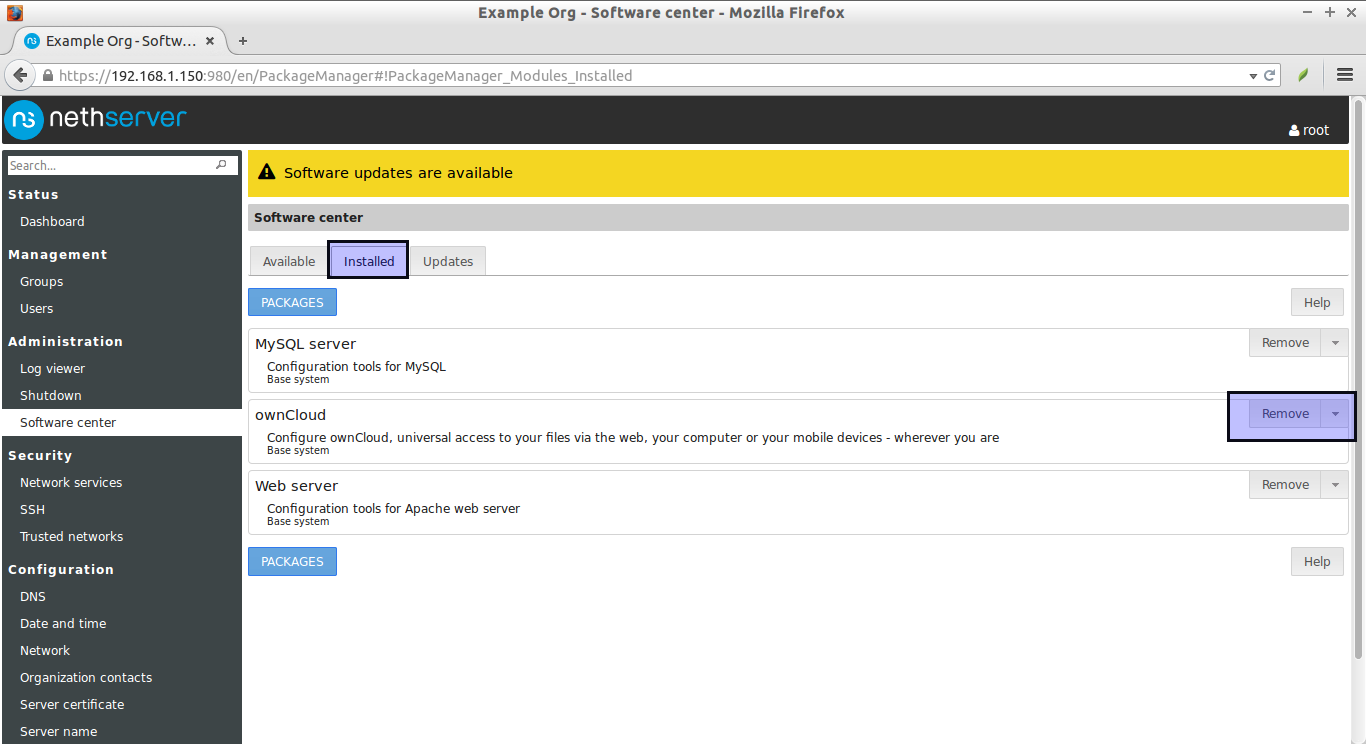
Removing modules:

Go to the section called “Installed” in the software center and click the Remove button to uninstall any modules.

Example Org - Software center - Mozilla Firefox_028

Conclusion

In this tutorial, we have seen how to install and configure NethServer, and how to install a module from the software center. I must say that the NethServer is definitely a worth distribution to deploy in your organization. Though, the Community edition has some limited features, It is capable of installing all major components such as FTP, Mail, Squid proxy, Or Web server. If you want to add specific modules which are not available in the Community edition, you can purchase and try them from the Enterprise edition. Whether you want to deploy a mail server or VPN server or anything, you can just install them in a couple of mouse clicks easily using the NethServer’s software center.

To know more about NethServer, I suggest you to have a look at the NethServer’s official documentation page.

Cheers!

Source and Reference:


Advertise here with BSA

---------------------------------------------------------------------
NethServer: A CentOS Based All-in-one Server Distribution

Installation Of Telegram Messenger In Linux

$
0
0

Telegram is a cloud based messaging application characterized by its fast speed and security features. Currently, it is used by a very large user base and it is the preferred one for them since it has a lot of features that make it different from others. It is similar to WhatsApp but instead of caring more about money than user’s privacy like what does WhatsApp. Telegram is a free and open source application while the user’s privacy is one of its priorities. It is used by every mobile platform, including Android, iOS, Windows Phone, Ubuntu Touch. It is also important to know that it can be used on desktops, thanks to third party applications such as Webogram (Chrome extension), Sigram (Linux native client) and others. Recently, the official desktop apps was released for Linux, Windows, and Mac OS X.

In this article, we will list the features of this modern cloud based messaging application that allows you to share pictures, videos and even files. Then, the installation will be outlined.

Features of Telegram

The identification formula with Telegram consists in the mobile number of the user. A SMS will be sent or a call will be made to give the verification code to the possessor of the entered phone number. The phone number for the verification can be changed without losing the old messages. Discussions with groups may be made, send pictures also.

From its different features, we can list the following ones:

  • Its availability for desktop and mobile devices: Android, Iphone/Ipad, Windows phone, Web-Version, PC, Mac and Linux.
  • A heavily encrypted and self-destruct messages are available. The messages access can be from multiple devices and platform.
  • Several security measures to protect it from different hackers.
  • It has a very fast speed of processing and message delivery.
  • It is a very powerful application, no limit to media and chats.
  • It supports desktop notifications, stickers and sending, receiving files of photos and others.
  • After 6 months of inactivity, the concerned user account will be deleted automatically.
  • There are two types of chats, either an ordinary one which uses client server encryption and can be accessed from multiple devices or the secret chats which uses end-to-end encryption and can be accessed just by the two participating devices.

Installing Telegram in Linux

To install Telegram in Linux you have just to download it from the official website. Your operating system will be detected directly and you will see the button which you have to select responding to your needs. Or, you can use the “wget” command to download it directly as you see in the following line:

# wget https://updates.tdektop.com/tlinux/tsetup.0.7.23.tar.xz

After downloading the concerned package, change the directory from the current working one to the extracted directory.

# tar –xf tsetup.0.23.tar.xz
# cd Telegram/

Later you will use the following line to execute the binary file “Telegram”:

# ./Telegram

Firstly click in the “Start messaging” button,

telgram1

Enter your phone number and start the execution.

telgram1

You will receive the code by SMS or by phone call. So enter this verification code, your first and last name too. Then, click in “Signup” button. You have now a Telegram account, so you can start adding your contact by entering their first name, last name and their phone number.

telgram1

You can start chatting using Telegram interface from every device.

Use Telegram for Ubuntu as an application

Now we will give you the instructions to make Telegram available for your user only. We consider that you are using GNOME or UNITY. So we will start by extracting the download archive from the Telegram website, (if you did it previously you don’t need to repeat it now), then open a terminal window and use the following command to create the needed file for your desktop environment:

Nano .local/share/applications/telegram.desktop

This command will enable you to open the “nano” editor where you can create a new file.

You can see in the contents of the opened editor everything you need for this new file: the name, the image, the directory and the type, and the icon.

[Desktop Entry]
Encoding=UTF-8
Name=Telegram
Exec=/home/username/Telegram/Telegram
Icon=/home/username/Telegram/icon.png
Type=Application
Categories=Network;

After getting this image, replace the username with your own username in your desktop; save it using “ctrl+o”, confirm it using “Enter” and exit using “ctrl+x”.

Now you will need a few other commands to start using Telegram: so you will need to add the PPA (Personal Package Archive) using the following command:

sudo add-apt-repository ppa:noobslab/apps

Then update your Ubunto software sources using the following command:

Sudo apt-get update

Now you can install your Telegram application for your desktop using the following command:

Sudo apt-get install telegram-desktop

So you are able to start using Telegram on your Ubuntu system.

Install Telegram in other Linux Distros

The previous command can’t be with every version of Linux, since not all of them can get an installation through personal package archive of an Arch user repository. If those option you don’t have with your system, so you will install Telegram with the standard method as fellow:

So start by downloading the tar archive of Telegram from its official website, then open up a terminal window:

cd ~/downloads

This command will help you to find the downloaded tar archive. Then extract this folder:

tar –xJvf tsetup.0.7.6.tar

Place the extracted folder in your selected directory using the following command:

Sudo mv Telegram /opt/telegram

Then create a link to be able to run Telegram using the following command:

Sudo ln –sf /opt/telegram/Telegram /usr/bin/telegram

Conclusion

Different messaging applications are used in our days, like iMessage, Google Hangouts, Viber, Whatsapp, Facebook Messenger and many others. All of them are great for use but they don’t have a desktop version. With Telegram isn’t the case you can get a great desktop application which can be opened with pc of mobile. Telegram is a messaging app with a focus on speed and security. It’s super-fast, simple, secure and free. It seamlessly syncs across all of your devices and can be used on desktops, tablets and phones alike where you can send an unlimited amount of messages, photos, videos and files of any type (.doc, .zip, .pdf, etc.).

---------------------------------------------------------------------
Installation Of Telegram Messenger In Linux


X2Go: An Open Source Remote Desktop Solution For Linux

$
0
0

About X2Go

X2Go is an Open Source remote desktop application for GNU/Linux that uses NX technology protocol. The main difference between X2Go and other remote desktop applications is it provides secure standalone remote desktop sessions via SSH. So, each session connected using X2Go is strongly encrypted and safe. X2Go allows you mainly to connect to Linux systems from Linux, Windows, or Mac OS systems. Also, many clients can simultaneously connect and use single X2Go server. It comes with two components, namely X2Go server and X2Go client. X2Go server is a system that is being accessed from a client system. And, the X2Go is a system which can be used to access the X2Go server. This Client will be able to connect to X2Go server(s) and start, stop, resume and terminate (running) desktop sessions. X2Go Client stores different server connections and may automatically request authentication data from LDAP directories. Furthermore it can be used as fullscreen loginscreen (replacement for loginmanager like xdm).

X2Go server package can only be installed in Linux systems, whereas X2Go client package can be installed on many OS, including Linux, Windows, and Mac OS X.

Features

  • Graphical Remote Desktop that works well over both low bandwidth and high bandwidth connections;
  • The ability to disconnect and reconnect to a session, even from another client;
  • Support for sound;
  • Support for as many simultaneous users as the computer’s resources will support;
  • Traffic is securely tunneled over SSH;
  • File and printer Sharing from client to server;
  • Easily select from multiple desktop environments (e.g., MATE, GNOME, KDE);
  • Remote support possible via Desktop Sharing;
  • The ability to access single applications by specifying the name of the desired executable in the client configuration or selecting one of the pre-defined common applications;
  • Server-side list of available applications is displayed on the client, and you can run any number of them from within the same session like Citrix MetaFrame/Presentation Server/XenApp;
  • The ability to access a Windows computer that supports RDP via X2Go-proxied RDP;
  • X2Go client can also serve as a graphical front-end to a client-side rdesktop/xfreerdp installation;
  • A Thin Client Environment is available;
  • A Session Broker that supports centralized configuration and load balancing;
  • And many.

Install X2Go Server

X2Go server and client installation is much easier compared to other remote desktop applications. X2Go development team has made separate repositories for different operating systems.

The following instructions describes how to install X2Go server on various distributions. As I mentioned before, the X2Go can only be installed in Linux based systems.

On Ubuntu 14.04:

Run the following commands to add X2Go repository and install it in Ubuntu 14.04 or higher versions.

sudo apt-get install software-properties-common
sudo add-apt-repository ppa:x2go/stable
sudo apt-get update
sudo apt-get install x2goserver x2goserver-xsession

On Ubuntu 12.04:

For Ubuntu 12.04 and previous versions, you can add X2Go repository and install it as shown below.

sudo apt-get install python-software-properties
sudo add-apt-repository ppa:x2go/stable
sudo apt-get update
sudo apt-get install x2goserver x2goserver-xsession

On Debian 7:

First add X2Go repository. To do that, edit,

sudo vi /etc/apt/sources.list.d/x2go.list

Add the following lines:

# X2Go Repository (release builds)
deb http://packages.x2go.org/debian wheezy main
# X2Go Repository (sources of release builds)
deb-src http://packages.x2go.org/debian wheezy main

# X2Go Repository (nightly builds)
#deb http://packages.x2go.org/debian wheezy heuler
# X2Go Repository (sources of nightly builds)
#deb-src http://packages.x2go.org/debian wheezy heuler

Add X2Go GPG key:

sudo apt-key adv --recv-keys --keyserver keys.gnupg.net E1F958385BFE2B6E

Then, update software repository list and install X2Go server using the following commands:

sudo apt-get install x2goserver x2goserver-xsession

On Fedora 19 and later:

X2Go server and client packages are available in the default repositories of Fedora 19 and later versions. So, install X2Go server using command:

sudo yum install x2goserver

On RHEL 7/Scientific Linux 7/CentOS 7 systems:

Add EPEL repository first.

yum install epel-release

Then, install X2Go server package using command:

yum install fuse-sshfs
yum install x2goserver x2goserver-xsession

On RHEL 6/Scientific Linux 6/CentOS 6 systems:

Similarly, add EPEL repository in CentOS/RHEL/Scientific Linux 6.x systems:

yum install epel-release

Then, install X2Go server package using command:

yum install fuse-sshfs
yum install x2goserver x2goserver-xsession

On openSUSE systems:

Add X2Go repository as shown below. Replace the version number with your own.

zypper ar http://packages.x2go.org/opensuse/<distro-version>/extras x2go-extras
zypper ar http://packages.x2go.org/opensuse/<distro-version>/main x2go-release

Then, install X2Go server using command:

zypper in x2goserver x2goserver-xsession

On SUSE systems:

Add X2Go repository as shown below. Replace the version number with your own.

zypper ar http://packages.x2go.org/sle/<distro-version>/extras x2go-extras
zypper ar http://packages.x2go.org/sle/<distro-version>/main x2go-release

Then, install X2Go server using command:

zypper in x2goserver x2goserver-xsession

OpenSUSE 11 and SLES/SLED 11 do not support /etc/sudoers.d as a place for custom sudoers config files.

If you are using any of these distributions and are having issues regarding running Qt applications with elevated privileges (e.g., via kdesu or sudo), please use this workaround.

Copy the contents of the “x2goserver” file residing in the documentation directory /usr/share/doc/packages/x2goserver.

Get elevated privileges. Either via:

su

or

sudo -i
Then, launch:
visudo
Paste the previously copied content at the end of the sudoers file. Save and exit your editor.

On Gentoo:

Currently X2Go cannot connect to an openssh server compiled with the HPN patch. To make sure x2goserver works on your Gentoo server, you must recompile net-misc/openssh with HPN support disabled. Add the following line to /etc/portage/packages. use:

net-misc/openssh -hpn

Then recompile net-misc/openssh, update the configuration file, and restart the sshd server, as follows:

emerge -1 net-misc/openssh
dispatch-conf
/etc/init.d/sshd restart

Note: A local X.Org installation is not required on the X2Go Server

Install X2Go Client

X2Go Client is available for Windows, Mac OS X, and many Linux distributions.

Add X2Go repository as shown above in the X2Go server installation section depending upon the distribution you use.

Then, install X2Go client using command:

On Debian and Ubuntu like systems:

sudo apt-get install x2goclient

On RHEL and CentOS like systems:

yum install x2goclient

On SUSE and openSUSE like systems:

zypper in x2goclient

Usage

From your client systems, launch X2Go client either from Menu or Unity Dash.

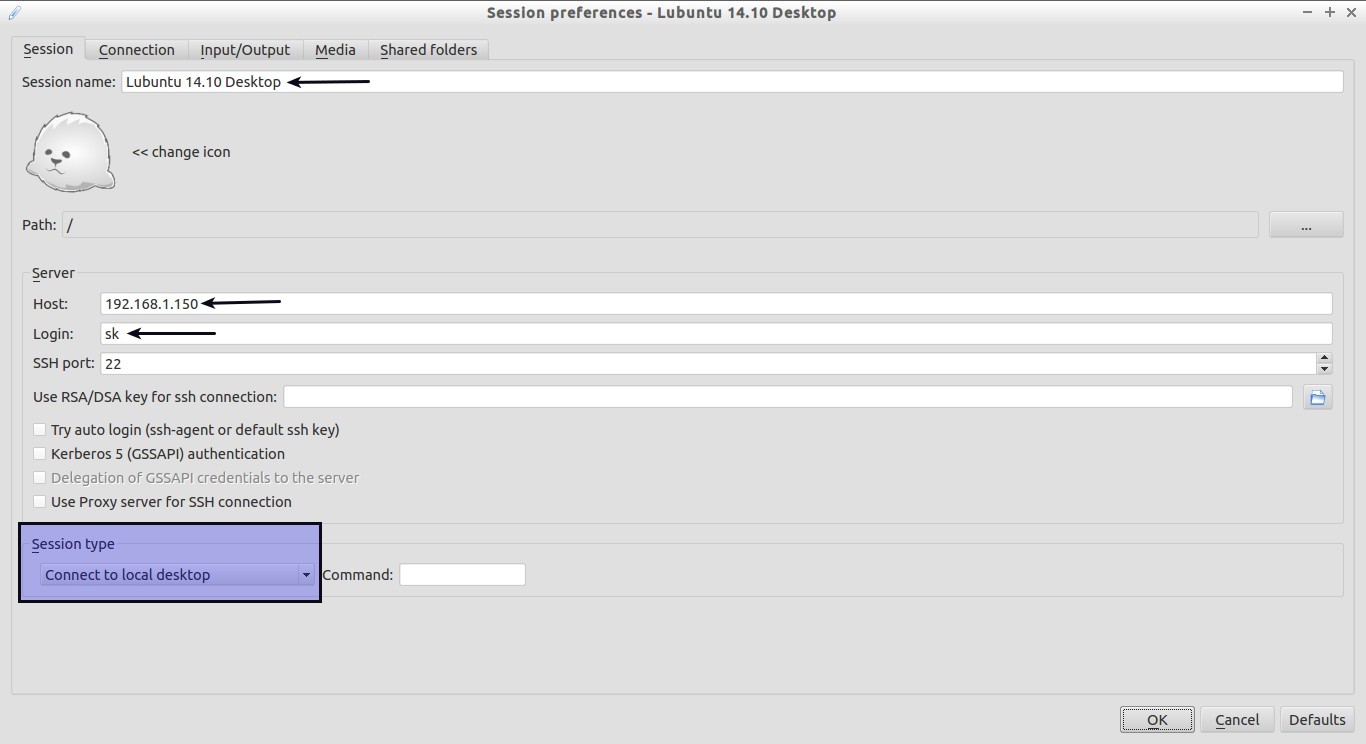
Enter the Session name, remote system’s IP address, remote system’s user name, and desktop environments (Ex.LXDE,  KDE etc.).

For example, here I select “Connect to local desktop” session.

Finally, click Ok to continue.

Session preferences - Lubuntu 14.10 Desktop_001

Click on the session name to continue.

X2Go Client_002

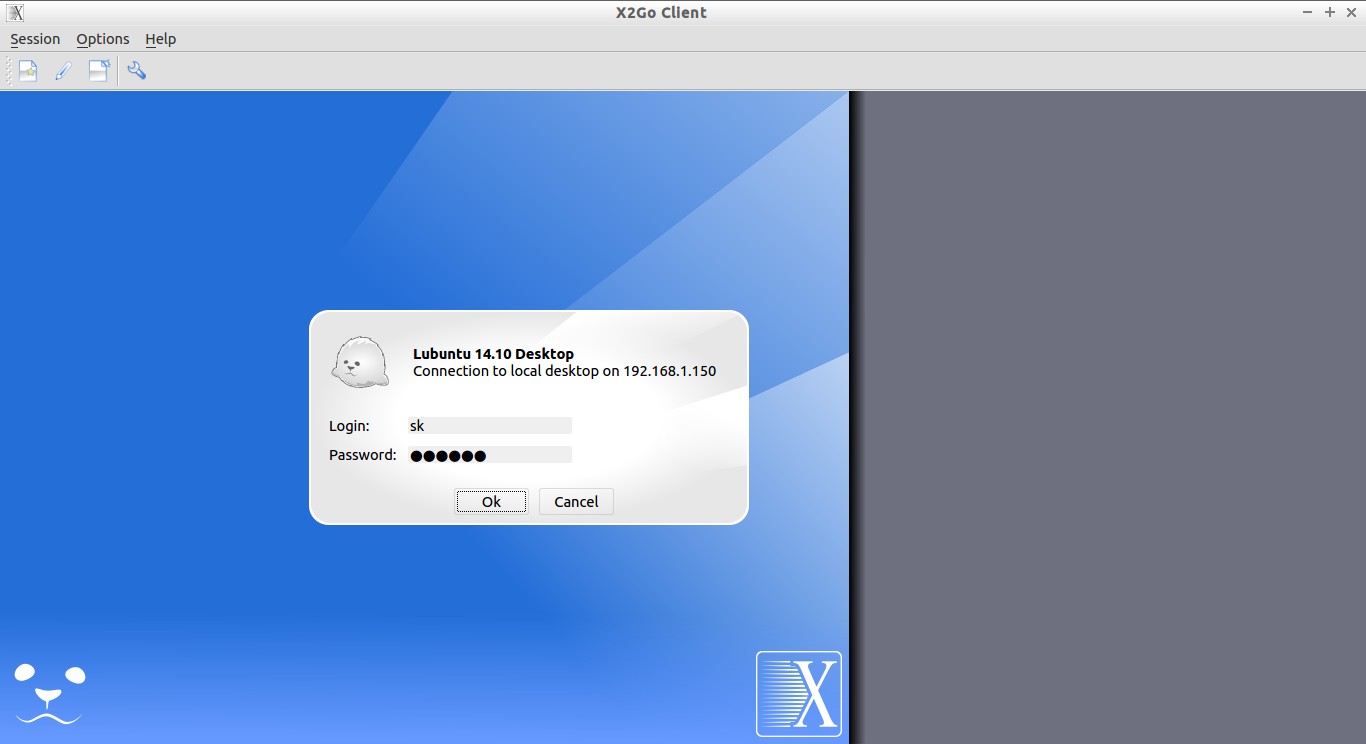
Now, enter the remote system’s password and click Ok to continue.

X2Go Client_003

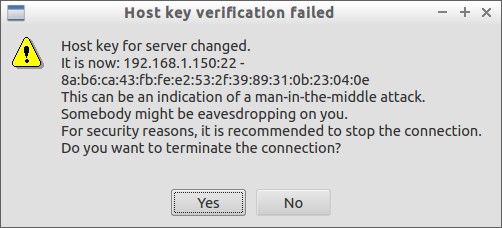
You might the get the following warning message.

Host key verification failed

Host key for server changed.
It is now: 192.168.1.150:22 - 8a:b6:ca:43:fb:fe:e2:53:2f:39:89:31:0b:23:04:0e
This can be an indication of a man-in-the-middle attack.
Somebody might be eavesdropping on you.
For security reasons, it is recommended to stop the connection.
Do you want to terminate the connection?

Just ignore the warning by clicking on the “No” button and continue.

Host key verification failed_005

Click Yes to continue.

Host key verification failed_006

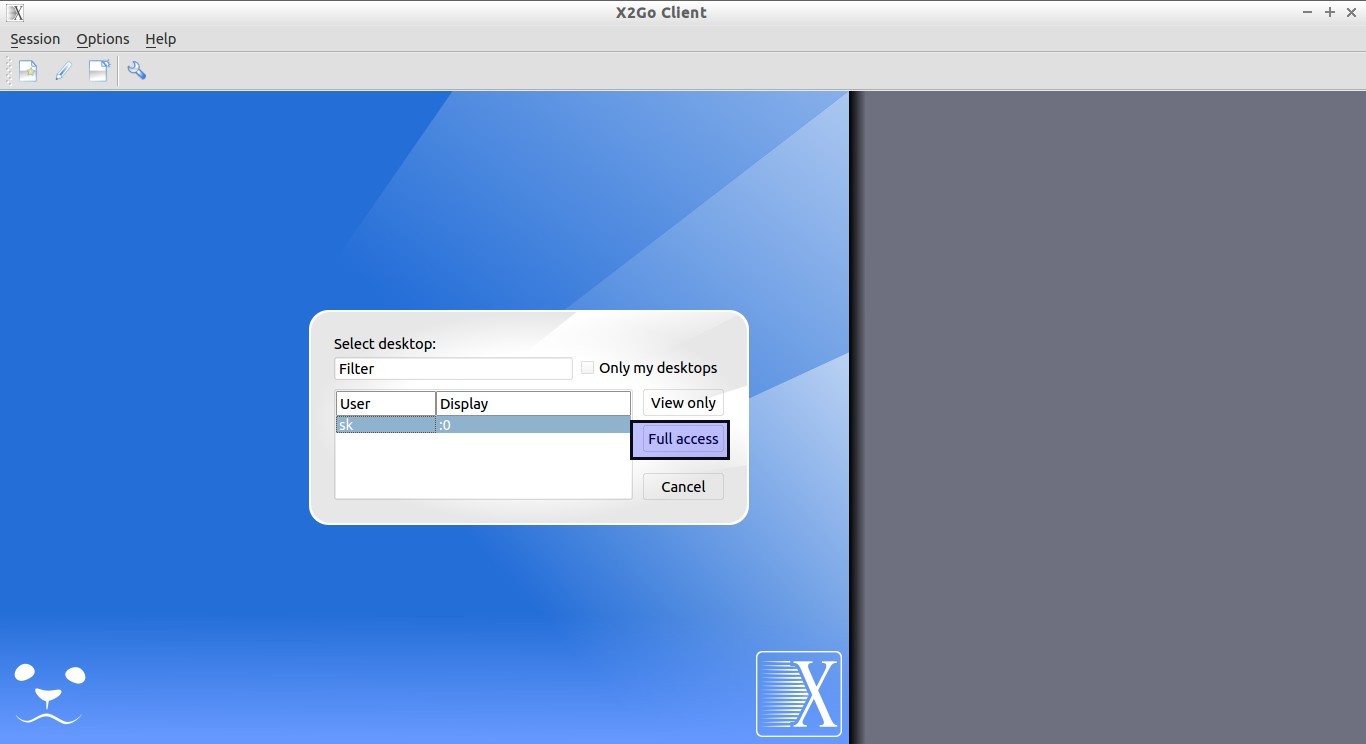
Select the type of access: Full or view only.

Here, I select “Full access”.

X2Go Client_004

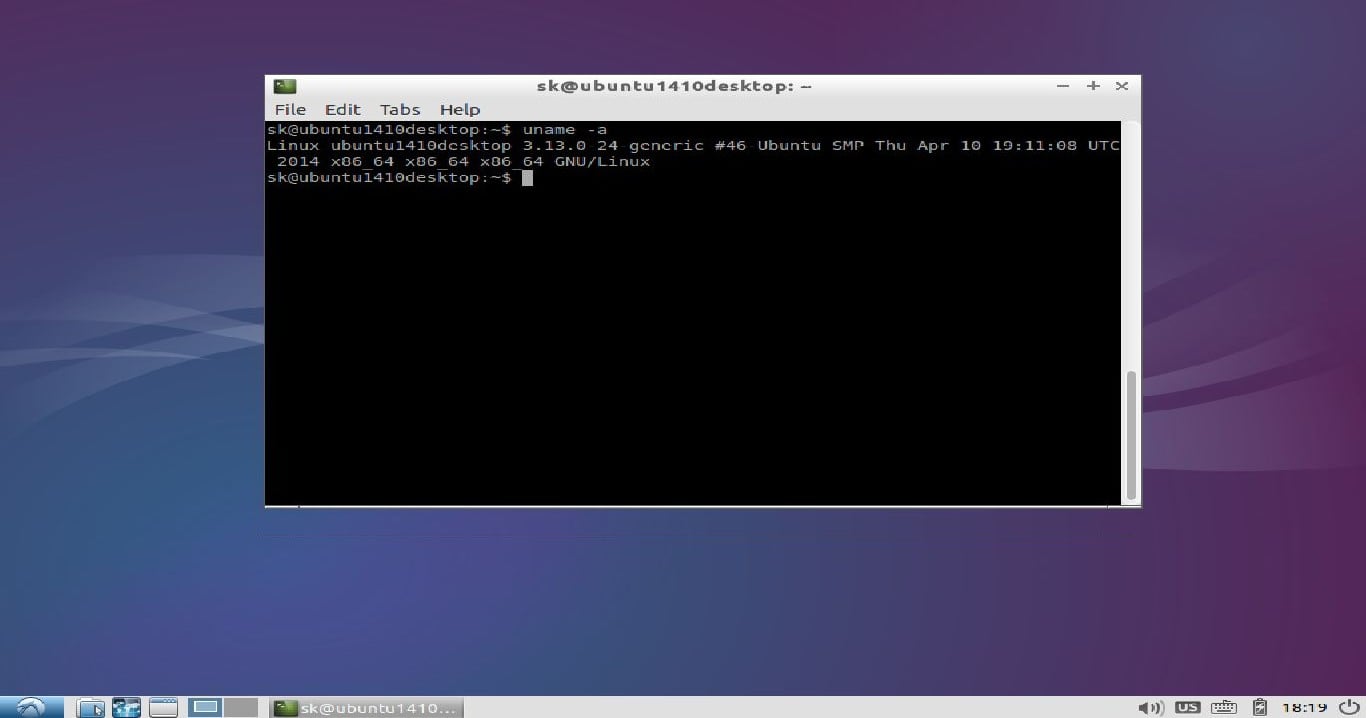
Congratulations! Now, you can access your remote desktop. This is how my Lubuntu 14.10 remote desktop session looks.

Lubuntu 14.10 Desktop_007

Now, you can explore your remote system as the way you do locally. Also, you can create multiple different sessions with different DEs. And, many users can access the same session simultaneously.

Conclusion

X2Go is a perfect tool for thin client environment. While testing this tool, I faced some problems. I can’t access other desktop environments like Unity, KDE, LXDE. But, I hope there must be a work around to solve those issues. Apart from that, other session types, such as Openbox, Terminal, Internet browser are worked well as expected. X2Go has options to select different resolutions for the remote sessions. Also, you can mount local shares to remote sessions if you want. All traffics are forwarded via SSH, so security won’t be big issue while using X2Go.

In case of any problems, X2Go team offers both community and professional support. If you have any problems, post your queries there.

Give it a try. I hope you won’t be disappointed.

Cheers!

---------------------------------------------------------------------
X2Go: An Open Source Remote Desktop Solution For Linux

How To Install LAMP Stack (Apache, MariaDB And PHP) In Fedora 22

$
0
0


LAMP is a combination of operating system and open-source software stack. The acronym LAMP comes from the first letters of Linux, Apache HTTP Server, MySQL/MariaDB database, and PHP, Perl or Python.

In this tutorial, let us see how to install LAMP stack in Fedora 22 server. Although, the same procedure will work Fedora 21 and earlier versions.

My testbox hostname and IP address are server.unixmen.local and 192.168.1.101/24 respectively. Well, let us start to deploy the LAMP stack now.

Install Apache

Apache is an open-source, multi-platform web server. It provides a full range of web server features including CGI, SSL and virtual domains.

Change to root user using the following command:

su

Enter the following command to install Apache:

In Fedora 22:

dnf install httpd -y

In Fedora 21 and earlier versions:

yum install httpd -y

Enable the httpd service to start automatically on every reboot:

systemctl enable httpd

Start httpd service using the following command:

systemctl start httpd

If you are encountered with the following error:

Job for httpd.service failed. See 'systemctl status httpd.service' and 'journalctl -xn' for details.

Delete all contents in your /etc/hostname file and add the word “localhost”. Also set localhost to the “Servername” value in /etc/httpd/conf/httpd.conf file and try again to start httpd service.

And adjust the firewall to allow the httpd service to access it from remote clients.

firewall-cmd --permanent --add-service=http
firewall-cmd --permanent --add-service=https

Restart firewalld service:

firewall-cmd --reload

Test Apache:

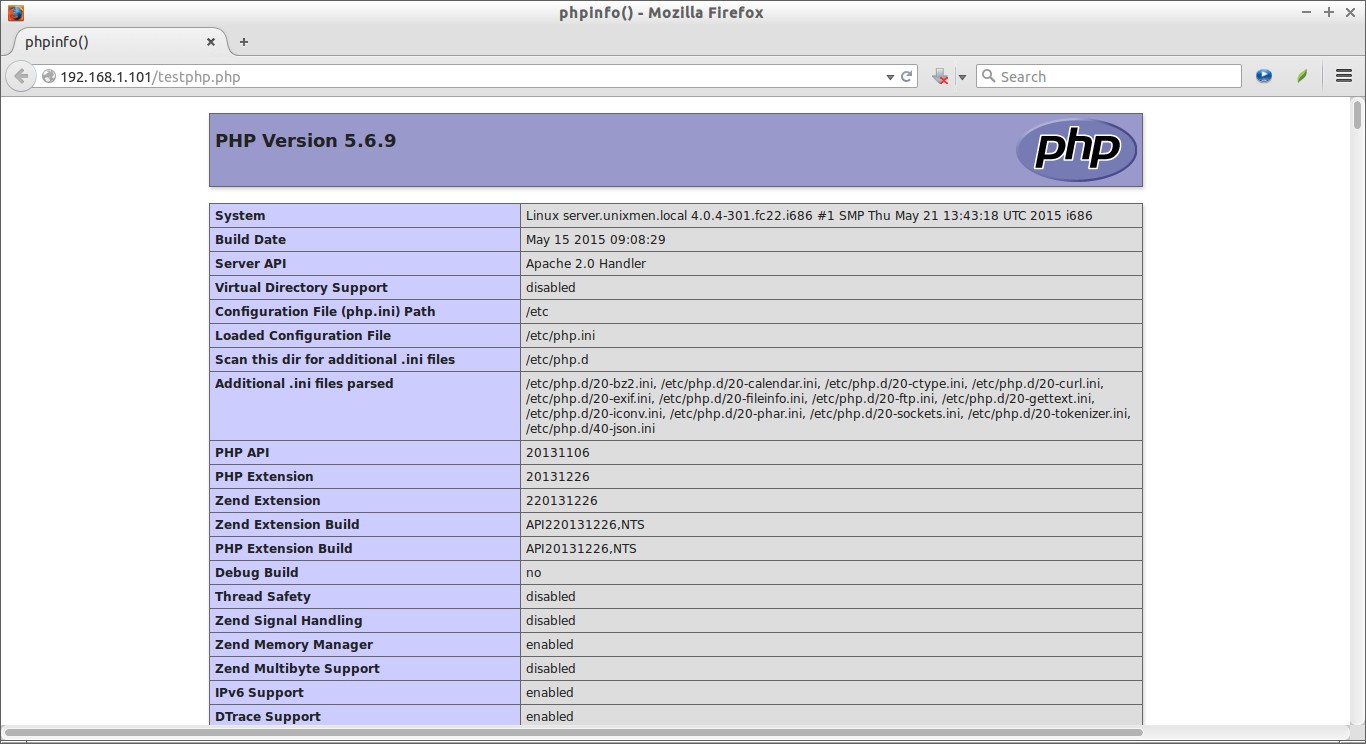
Open up your browser and enter http://ip-address/ in the address bar. You will see the following Apache default page.

Test Page for the Apache HTTP Server on Fedora - Mozilla Firefox_001

If you see the above output, then Congratulations! Apache is working!

Install MariaDB

MariaDB is a drop in replacement for MySQL. It is a robust, scalable and reliable SQL server that comes rich set of enhancements. The default database in Fedora 19 is MariaDB.

Install it using the following command:

In Fedora 22:

dnf install mariadb mariadb-server -y

In Fedora 21 and earlier versions:

yum install mariadb mariadb-server -y

Enable mariadb service at boot time with following command:

systemctl enable mariadb

And start mariadb service using command:

systemctl start mariadb

Set MariaDB root password:

By default mysql root user password is empty. So, to prevent unauthorized access to mysql databases, let us set a root user password:

mysql_secure_installation
NOTE: RUNNING ALL PARTS OF THIS SCRIPT IS RECOMMENDED FOR ALL MariaDB
      SERVERS IN PRODUCTION USE!  PLEASE READ EACH STEP CAREFULLY!

In order to log into MariaDB to secure it, we'll need the current
password for the root user.  If you've just installed MariaDB, and
you haven't set the root password yet, the password will be blank,
so you should just press enter here.

Enter current password for root (enter for none): 
OK, successfully used password, moving on...

Setting the root password ensures that nobody can log into the MariaDB
root user without the proper authorisation.

You already have a root password set, so you can safely answer 'n'.

Change the root password? [Y/n] y     ## Enter 'y' and press enter ##
New password:               ## Enter password ##
Re-enter new password:      ## Re-enter password ##
Password updated successfully!
Reloading privilege tables..
 ... Success!

By default, a MariaDB installation has an anonymous user, allowing anyone
to log into MariaDB without having to have a user account created for
them.  This is intended only for testing, and to make the installation
go a bit smoother.  You should remove them before moving into a
production environment.

Remove anonymous users? [Y/n]    ## Press Enter ##
 ... Success!

Normally, root should only be allowed to connect from 'localhost'.  This
ensures that someone cannot guess at the root password from the network.

Disallow root login remotely? [Y/n] ## Press Enter ##
 ... Success!

By default, MariaDB comes with a database named 'test' that anyone can
access.  This is also intended only for testing, and should be removed
before moving into a production environment.

Remove test database and access to it? [Y/n] ## Press Enter ##
 - Dropping test database...
ERROR 1008 (HY000) at line 1: Can't drop database 'test'; database doesn't exist
 ... Failed!  Not critical, keep moving...
 - Removing privileges on test database...
 ... Success!

Reloading the privilege tables will ensure that all changes made so far
will take effect immediately.

Reload privilege tables now? [Y/n] ## Press Enter ##
 ... Success!

Cleaning up...

All done!  If you've completed all of the above steps, your MariaDB
installation should now be secure.

Thanks for using MariaDB!

Install PHP

PHP (recursive acronym for PHP: Hypertext Preprocessor) is a widely used open-source general purpose scripting language that is especially suited for web development and can be embedded into HTML.

Install PHP with following command:

In Fedora 22:

dnf install php -y

In Fedora 21 and earlier versions:

yum install php -y

Test PHP:

Create a sample “testphp.php” file in Apache document root folder and append the lines as shown below:

vi /var/www/html/testphp.php

Add the following lines:

<?php
phpinfo();
?>

Restart httpd service:

systemctl restart httpd

Now, navigate to http://server-ip-address/testphp.php. It will display all the details about PHP such as version, build date and commands etc.

phpinfo() - Mozilla Firefox_002

Install PHP Modules:

Search for the available PHP modules using the following command:

In Fedora 22:

dnf search php

In Fedora 21 and earlier versions:

yum search php

Now install the required module of your choice, for example php-mysql, using the following command:

In Fedora 22:

dnf install php-mysql -y

In Fedora 21 and earlier versions:

yum install php-mysql -y

Restart the httpd service.

systemctl restart httpd

To verify the modules, open your web browser and navigate to http://server-ip-address/testphp.php. You will able to see the installed PHP modules.

phpinfo() - Mozilla Firefox_003

As you see in the above screenshot, php-mysql module has been installed and activated.

Install phpMyAdmin

phpMyAdmin is a tool that can be used to manage mysql databases via web browser. This step is optional. If you’re advanced user, you can mange mysql databases from the command line.

phpMyAdmin is available in the default repositories. So, you can install it using command:

In Fedora 22:

dnf install phpmyadmin -y

In Fedora 21 and earlier versions:

yum install phpmyadmin -y

Configure phpMyAdmin:

By default, phpMyAdmin can be accessed only form the localhost. To access it from a remote system in your network, do the following steps.

Edit file /etc/httpd/conf.d/phpMyAdmin.conf,

vi /etc/httpd/conf.d/phpMyAdmin.conf

Find and comment out Require ip 127.0.0.1 and Require ip ::1 lines. And then add one extra line Require all granted just below to commented lines.

This is how my phpMyAdmin.conf file looked after the changes made. The changes are shown in bold letters.

[...]

Alias /phpMyAdmin /usr/share/phpMyAdmin
Alias /phpmyadmin /usr/share/phpMyAdmin

<Directory /usr/share/phpMyAdmin/>
   AddDefaultCharset UTF-8

   <IfModule mod_authz_core.c>
     # Apache 2.4
     <RequireAny>
#       Require ip 127.0.0.1
#       Require ip ::1
        Require all granted
     </RequireAny>
   </IfModule>
   <IfModule !mod_authz_core.c>
     # Apache 2.2
     Order Deny,Allow
     Deny from All
     Allow from 127.0.0.1
     Allow from ::1
   </IfModule>
</Directory>

<Directory /usr/share/phpMyAdmin/setup/>
   <IfModule mod_authz_core.c>
     # Apache 2.4
     <RequireAny>
#       Require ip 127.0.0.1
#       Require ip ::1
        Require all granted
     </RequireAny>
   </IfModule>
   <IfModule !mod_authz_core.c>
[...]

Important: But allowing phpMyAdmin to anyone other than localhost should be considered dangerous unless properly secured by SSL. Do this at your own risk.

Save and close the file. Restart httpd service.

systemctl restart httpd

Test phpMyAdmin:

Open up your web browser and navigate to http://ip-address/phpmyadmin URL. You should see the following like screen. Enter the mariadb root user name and password to access the phpmyadmin dashboard.

phpMyAdmin - Mozilla Firefox_004

phpMyAdmin Dashboard:

192.168.1.101 - localhost | phpMyAdmin 4.4.7 - Mozilla Firefox_005

From here, you can create, delete or modify databases easily than from the command line.

That’s it. Start using LAMP stack on Fedora 22.

---------------------------------------------------------------------
How To Install LAMP Stack (Apache, MariaDB And PHP) In Fedora 22

Tweak Your Fedora 22 Desktop Using Fedy And PostinstallerF

$
0
0


None of the Linux distributions comes with all essential applications for daily usage, Agree? You have to install additional Repositories, softwares like Chrome, Flash player, Java or something in order to get a perfect distro for the daily usage. We can do it in two methods. First, you can manually search and install all the required softwares one by one, and the second one is you can use a tool that will help you to find and install all essential applications from one place. Which method would you prefer? I prefer the second method most, not because it is easy, but also it saves some time.

Fedora is not exception too. After a fresh installation, we still need to install some additional important tools, repositories to get a perfect for daily usage desktop. Today, we will discuss about the following two tools which will help us to tweak Fedora desktop after fresh installation.

1. Fedy

Fedy, formerly known as Fedora utils, is a free, simple and open source utility that help you to install collection of useful utilities such as mp3 support, Adobe Flash, Oracle Java and many that Fedora doesn’t ship by default. Fedy lets you to install all the utilities with just a single click and you can customize/tweak your Fedora Linux as per your liking. Not only utilities, we can easily add repositories, so don’t bother about downloading and adding. repo files manually.

Fedy has a built-in-updater, so that it can easily update itself. It, also, will automatically find download links for updates of your software’s, and add repositories wherever possible. So you don’t have to worry about the updates. Fedy is developed by Satya Sahoo and released under GNU GPL V3.0. It can be easily extended via Plugin’s, and the source code is publicly available on GitHub for those who want to play with the source code, and to know what it does exactly.

Install Fedy On Fedora 22

For the purpose of this tutorial, I will be using Fedora 22 KDE.

Download the latest version using the command:

wget http://satya164.github.io/fedy/fedy-installer

Set executable permission and install as shown below:

chmod +x fedy-installer
sudo ./fedy-installer

During installation, It will automatically add some useful Repositories like RPMFusin.

Fedy Usage

Open Fedy, Probably it will be found under System Tools. Make sure you have a decent internet connection. At first launch, it will check for internet connection. This is how Fedy looks at first launch.

Fedora 22 KDE [Running] - Oracle VM VirtualBox_001

Fedy has two sections. One is ‘Apps’ section which contains many useful applications that doesn’t exist in the Fedora default repositories. And the other one is ‘Tweaks’ which will help you to fine tune the Fedora desktop.

Apps

Let us see what will ‘Apps’ section do.

Let us install Adobe Flash plugin.

To do that, click on the Install button of Adobe flash plugin.

Fedora 22 KDE [Running] - Oracle VM VirtualBox_001

You’ll be asked to enter the root password. Enter the root password and click OK.

Fedora 22 KDE [Running] - Oracle VM VirtualBox_002

After a few seconds the selected application will be installed on your Fedora desktop. You will see the ‘Install’ button has switched to ‘Remove’. It means the application is installed. Quite easy, isn’t it?

Fedora 22 KDE [Running] - Oracle VM VirtualBox_003

Similarly, you can install other applications too.

I’d like to install multimedia codecs, so i checked the option Install Multimedia codecs.

Now Fedy will automatically add the relevant repositories that has multimedia codecs and install multimedia codecs on your system. In my system, Fedy automatically added the RPM Fusion repository and installed all required codecs.

You don’t have to manually search and install each codec. Fedy will do it for you automatically, all you have to do is just select the tasks that you want to perform and sit back. Everything will be done by Fedy. After completing the required tasks, click Back to go back to Fedy Main Menu. Interesting app, isn’t it?

Please be mindful that, Fedy doesn’t have any own repository to install softwares. It just adds the repository which has the required software and automatically install them for you.

Tweaks

In this section, we can do some important tasks such as configuring Grub, Improving the font rendering, clean up junk files, configure SELinux , and configure Touchpad etc.

Let us, for example, clean the junk files. To do that, clcik ‘Cleanup’

Fedora 22 KDE [Running] - Oracle VM VirtualBox_005

That’s it. After few seconds, you will see the ‘Task Completed’ message.

2. PostinstallerF

PostInstallerF is a small, lightweight, useful tool that can be used to install 100+ essential softwares, Games, audio/video codecs, and third-party repositories which are not included by default in Fedora, Ubuntu and Manjaro. Initially, It was built only for Fedora distributions, but now it supports some other popular distributions such as Ubuntu and Manjaro. You need an Internet connection to download and install the packages. Keep in mind that PostInstallerF is not a Software Center.

Installation

On Fedora:

Run the following commands one by one to install PostInstallerF on Fedora systems.

Switch to root user:

su

cd to /etc/yum.repos.d/ directory.

cd /etc/yum.repos.d/
wget https://raw.github.com/kuboosoft/postinstallerf/master/postinstallerf.repo

Update the software repository, and install PostInstallerF.

dnf update
dnf install postinstallerf
On Ubuntu:

Run the following commands from your Terminal.

wget -c http://sourceforge.net/projects/postinstaller/files/ubuntu/app-install-data-postinstallerf_1.0-6_all.deb
wget -c http://sourceforge.net/projects/postinstaller/files/ubuntu/postinstallerf_1.5-13_all.deb

sudo add-apt-repository ppa:webupd8team/y-ppa-manager
sudo apt-get update
sudo apt-get install yad

sudo apt-get install packagekit

sudo dpkg -i app-install-data-postinstallerf_1.0-6_all.deb
sudo dpkg -i postinstallerf_1.5-13_all.deb
sudo apt-get install -f
On Manjaro:
wget -c http://sourceforge.net/projects/postinstaller/files/manjaro/postinstallerf-1.5-13-any.pkg.tar.xz
yaourt -U postinstallerf-1.5-13-any.pkg.tar.xz

Usage

Launch postInstallerF either from Menu or Unity Dash. This is the principal menu (main menu) of PostInstallerF.

Fedora 22 KDE [Running] - Oracle VM VirtualBox_001

As you in the above picture, You can do the following from the Principal menu.

  • Update your system;
  • Install compress utilities;
  • Install flash plugins;
  • Install additional repositories like RPMFusion ;
  • Install Gnome Shell extensions;
  • Install audio/video codecs;
  • And many.

Update your system

Click on the Update button to update your distribution. Click Ok to install updates.

Since, I already updated my system, It displayed “No updates”.

Categories

PostInstallerF has divided applications and put them in relevant categories to make it easy to find a particular type of application. Also, you can search applications directly from the principal menu using Search Package button.

Click on the Categories button from the main menu to list the available packages.

Fedora 22 KDE [Running] - Oracle VM VirtualBox_002

The Categories section makes easier to find a particular kind of application. The packages are grouped into separate groups, so you can navigate to the desired group and pick an application you want to install.

For example, I am going to install Chromium browser. Go to the Network category, and double click Chromium application to install it.

Fedora 22 KDE [Running] - Oracle VM VirtualBox_004

Click Install button.

Fedora 22 KDE [Running] - Oracle VM VirtualBox_005

Now, PostInstallerF will download and install the Chromium application.

Check list mode

This section is interesting and very useful too. This section allows you to install the best programs, to configure/tune your system functionality, or to shutdown/logout the system.

Fedora 22 KDE [Running] - Oracle VM VirtualBox_006

For example, If you want to install the best programs selected by PostInstallerF on your system, click on the Install button. The following screen should appear. Select the applications you want to install, and hit the OK button to install all applications at once. Or you can manually search and select the applications using the Categories option as shown above.

Fedora 22 KDE [Running] - Oracle VM VirtualBox_007

Now, PostInstallerF will start to download and install the selected applications.

Tweak your system

Do you want to tweak your system as the you want it? then it is possible too. Click on the Tweak button in the principal menu.

This section allows you to do the following things.

  • Install Broadcom wireless, and Nvidia drivers;
  • Install Cinnamon/GNOME/MATE/LXDE/ KDE/XFCE desktop environments;
  • Enable Or Disable Sudo;
  • Enable or Disable SELinux;
  • Remove old kernel;
  • Install Firefox spanish language.

Fedora 22 KDE [Running] - Oracle VM VirtualBox_008

Conclusion

As far as I know, both Fedy and PostinstallerF works great and these are must have tools for avid Fedora lovers. They will definitely reduce your precious time to get things done as quick as possible. Give them a try, you won’t be disappointed.

Cheers!

Reference links:

---------------------------------------------------------------------
Tweak Your Fedora 22 Desktop Using Fedy And PostinstallerF

Install LEMP Server (Nginx, MariaDB, And PHP) On Fedora 22

$
0
0


LEMP is a combination of the operating system and open-source software stack. The acronym LEMP is derived from the first letters of Linux, Nginx HTTP Server, MySQL/MariaDB database, and PHP, Perl or Python.

In this tutoril, how to install LEMP stack in Fedora 22 server. The same procedure should work on previous Fedora versions.

My testbox hostname and IP address are server.unixmen.local and 192.168.1.101/24 respectively.

Well, let us start to deploy the LEMP stack now.

Install Nginx

Nginx (pronounced engine-x) is a free, open-source, high-performance HTTP server and reverse proxy, as well as an IMAP/POP3 proxy server written by Igor Sysoev.

First login as root user to perform the installation:

su

Note: If you have installed apache or any other web servers before, remove or disable them.

systemctl disable httpd.service
systemctl stop httpd.service

To install Nginx enter the following command in your terminal:

In Fedora 22:

dnf install nginx

In Fedora 21 and earlier versions:

yum install nginx

Enable Nginx service to start automatically on every reboot:

systemctl enable nginx.service

Start Nginx service using the command:

systemctl start nginx.service

Adjust the firewall to allow the httpd service to access it from remote clients.

firewall-cmd --permanent --add-service=http
firewall-cmd --permanent --add-service=https

Restart firewalld service:

firewall-cmd --reload

Test Nginx:

Open up your web browser and navigate to http://ip-address/ or http://localhost/. You will see a screen something like below.

Test Page for the Nginx HTTP Server on Fedora - Mozilla Firefox_001

Configure Nginx:

Open the file /etc/nginx/nginx.conf in any editor:

vi /etc/nginx/nginx.conf

Set the worker_processes (i.e No. Of CPU’s in your system) or leave it as default. To see the no. Of CPU’s, use the command lscpu. In my case, it’s “1″. So I set this as ’1′:

worker_processes 1;

Scroll down further in this configuration file and set the server name and PHP scripts. The changes are shown in bold.

# For more information on configuration, see:
#   * Official English Documentation: http://nginx.org/en/docs/
#   * Official Russian Documentation: http://nginx.org/ru/docs/

user nginx;
worker_processes auto;
error_log /var/log/nginx/error.log;
pid /run/nginx.pid;

events {
    worker_connections 1024;
}

http {
    log_format  main  '$remote_addr - $remote_user [$time_local] "$request" '
                      '$status $body_bytes_sent "$http_referer" '
                      '"$http_user_agent" "$http_x_forwarded_for"';

    access_log  /var/log/nginx/access.log  main;

    sendfile            on;
    tcp_nopush          on;
    tcp_nodelay         on;
    keepalive_timeout   65;
    types_hash_max_size 2048;

    include             /etc/nginx/mime.types;
    default_type        application/octet-stream;

    # Load modular configuration files from the /etc/nginx/conf.d directory.
    # See http://nginx.org/en/docs/ngx_core_module.html#include
    # for more information.
    include /etc/nginx/conf.d/*.conf;

    server {
        listen       80 default_server;
        listen       [::]:80 default_server;
        server_name  server.unixmen.local;
        root         /usr/share/nginx/html;

        # Load configuration files for the default server block.
        include /etc/nginx/default.d/*.conf;

        location / {
        }
## Add the following lines ##  
  
    location ~ \.php$ {
              root           /usr/share/nginx/html;
              try_files $uri =404;
              fastcgi_split_path_info ^(.+\.php)(/.+)$;
              fastcgi_pass   127.0.0.1:9000;
              fastcgi_index  index.php;
              fastcgi_param  SCRIPT_FILENAME  $document_root$fastcgi_script_name;
              include        fastcgi_params;
    }

        error_page 404 /404.html;
            location = /40x.html {
        }

        error_page 500 502 503 504 /50x.html;
            location = /50x.html {
        }
    }
}

Save and close the file.

Test nginx configuration:

Test the nginx configuration for any syntax errors using command:

nginx -t

Sample output:

nginx: the configuration file /etc/nginx/nginx.conf syntax is ok
nginx: configuration file /etc/nginx/nginx.conf test is successful

Restart nginx service.

systemctl restart nginx.service

Install MariaDB

MariaDB is a drop in replacement for MySQL. It is a robust, scalable and reliable SQL server that comes rich set of enhancements.

Now, start installing MariaDB as shown below:

In Fedora 22:

dnf install mariadb-server mariadb

In Fedora 21 and earlier versions:

yum install mariadb-server mariadb

Start MariaDB service and let it to start automatically on every reboot:

systemctl start mariadb.service
systemctl enable mariadb.service

Setup Database root password:

By default, MySQL root password is empty. So, to prevent unauthorized access to MySQL, let us set root user password. Enter the following command to setup mysql root user password:

mysql_secure_installation
NOTE: RUNNING ALL PARTS OF THIS SCRIPT IS RECOMMENDED FOR ALL MariaDB
      SERVERS IN PRODUCTION USE!  PLEASE READ EACH STEP CAREFULLY!

In order to log into MariaDB to secure it, we'll need the current
password for the root user.  If you've just installed MariaDB, and
you haven't set the root password yet, the password will be blank,
so you should just press enter here.

Enter current password for root (enter for none): 
OK, successfully used password, moving on...

Setting the root password ensures that nobody can log into the MariaDB
root user without the proper authorisation.

Set root password? [Y/n] y ## Enter Y and press Enter
New password:   ## Enter new password
Re-enter new password:  ## Enter password again
Password updated successfully!
Reloading privilege tables..
 ... Success!


By default, a MariaDB installation has an anonymous user, allowing anyone
to log into MariaDB without having to have a user account created for
them.  This is intended only for testing, and to make the installation
go a bit smoother.  You should remove them before moving into a
production environment.

Remove anonymous users? [Y/n] y  ## Enter Y and press Enter
 ... Success!

Normally, root should only be allowed to connect from 'localhost'.  This
ensures that someone cannot guess at the root password from the network.

Disallow root login remotely? [Y/n] y  ## Enter Y and press Enter
 ... Success!

By default, MariaDB comes with a database named 'test' that anyone can
access.  This is also intended only for testing, and should be removed
before moving into a production environment.

Remove test database and access to it? [Y/n] y  ## Enter Y and press Enter
 - Dropping test database...
 ... Success!
 - Removing privileges on test database...
 ... Success!

Reloading the privilege tables will ensure that all changes made so far
will take effect immediately.

Reload privilege tables now? [Y/n] y  ## Enter Y and press Enter
 ... Success!

Cleaning up...

All done!  If you've completed all of the above steps, your MariaDB
installation should now be secure.

Thanks for using MariaDB!

Install PHP

PHP (recursive acronym for PHP: Hypertext Preprocessor) is a widely used open-source general purpose scripting language that is especially suited for web development and can be embedded into HTML.

Install PHP with following command:

In Fedora 22:

dnf install php-fpm php-mysql php-common

In Fedora 21 and earlier versions:

yum install php-fpm php-mysql php-common

Enable and start phpfpm service:

systemctl enable php-fpm.service
systemctl start php-fpm.service

Configure PHP:

Open up /etc/php.ini file in any editor:

vi /etc/php.ini

Find the line cgi.fix_pathinfo, uncomment and change the value from 1 to 0 (zero):

[...];
 http://www.php.net/manual/en/ini.core.php#ini.cgi.fix-pathinfo
cgi.fix_pathinfo=0
[...]

Open up the file /etc/php-fpm.d/www.conf:

vi /etc/php-fpm.d/www.conf

And change the user and group values from apache to nginx:

[...]
; Unix user/group of processes
; Note: The user is mandatory. If the group is not set, the default user's group
;       will be used.
; RPM: apache Choosed to be able to access some dir as httpd
user = nginx
; RPM: Keep a group allowed to write in log dir.
group = nginx
[...]

Save and close the file. Restart phpfpm service:

systemctl restart php-fpm.service

Test PHP:

Create a sample “testphp.php” file in the Apache document root folder:

vi /usr/share/nginx/html/testphp.php

Append the lines as shown below:

<?php
phpinfo();
?>

Save and close the file.

Now, Restart Nginx service using command:

systemctl restart nginx.service

Navigate to  http://server-ip-address/testphp.php. It will display all the details about PHP such as version, build date and commands etc.

phpinfo() - Mozilla Firefox_001

That’s it. LEMP server has been installed, and it is ready to host your website now.

---------------------------------------------------------------------
Install LEMP Server (Nginx, MariaDB, And PHP) On Fedora 22

How To Install DHCP Server In CentOS And Ubuntu

$
0
0


What is DHCP?

DHCP stands for Dynamic Host Configuration Protocol. DHCP is a standardized network protocol used on Internet Protocol networks for dynamically distributing network configuration parameters, such as IP addresses for interfaces and services. DHCP Server can be any server (Linux or Windows) that is used to distribute IP addresses automatically to the clients in the network. Since, DHCP Server assigns IP addresses automatically to all systems, a system or Network administrator need not to assign IP addresses manually to every single machine in the network. DHCP is opt for system or Network administrator who is managing thousands of systems.

In this tutorial, let us see how to install and configure DHCP Server in CentOS and Ubuntu systems. For the purpose of this tutorial, I will be using the following three systems:

  1. CentOS 7 64bit Minimal server (DHCP Server)
  2. Ubuntu 15.04 64bit Minimal server (DHCP Server)
  3. Ubuntu 14.04 Desktop (DHCP Client)

A note of warning: Do not use two or more DHCP servers at the same time in your network. The client systems might not be able to get IP addresses from the multiple DHCP servers and it leads to IP address conflict issue. If your Router or Switch has DHCP feature enabled by default, you need to turn it off too.

More importantly, you must a assign a static IP address to your DHCP server’s network interface card.

1. Install DHCP Server in CentOS

First let us see how to install and configure DHCP server in CentOS 7 64bit. The same steps will work on CentOS 6.x and other older versions.

Log in as root user.

To install DHCP server on CentOS system, run:

yum install dhcp

1.1 Configuration

In CentOS 6.x systems, we have to assign which interface you want your DHCP server to run on in /etc/sysconfig/dhcpd file. In my case, I have only one Interface on my system (eth0), so I assigned eth0.

WARNING: This file is NOT used anymore in CentOS 7.x systems. If you are here to restrict what interfaces should dhcpd listen on, be aware that dhcpd listens *only* on interfaces for which it finds subnet declaration in dhcpd.conf. It means that explicitly enumerating interfaces also on command line should not be required in most cases.

If you use CentOS 6.x system, edit file /etc/sysconfig/dhcpd,

vi /etc/sysconfig/dhcpd

Assign the network interface:

# Command line options here
DHCPDARGS=eth0

Save and close the file.

Then, copy the sample dhcp configuration file to /etc/dhcp/ directory.

cp /usr/share/doc/dhcp-4.2.5/dhcpd.conf.example /etc/dhcp/dhcpd.conf

Now, edit dhcpd.conf file,

vi /etc/dhcp/dhcpd.conf

Make the changes as shown below.

Set the domain name and domain-name servers:

[...]

# option definitions common to all supported networks...
 option domain-name "unixmen.local";
 option domain-name-servers server.unixmen.local;

[...]

If this DHCP server is the official DHCP server for the local network, you should uncomment the following line:

[...]
authoritative;
[...]

Define the sunbet, range of ip addresses, domain and domain name servers like below:

[...]
# A slightly different configuration for an internal subnet.
 subnet 192.168.1.0 netmask 255.255.255.0 {
 range 192.168.1.20 192.168.1.30;
 option domain-name-servers server.unixmen.local;
 option domain-name "unixmen.local";
 option routers 192.168.1.1;
 option broadcast-address 192.168.1.255;
 default-lease-time 600;
 max-lease-time 7200;
 }
[...]

If you want to assign a fixed IP address to your client, you should enter it’s MAC id and the IP address in the following directive. For example, I want to assign a fixed IP address 192.168.1.15 to my Ubuntu client, hence I modified the following directive as shown below.

[...]
host ubuntu-client {
 hardware ethernet 00:22:64:4f:e9:3a; 
 fixed-address 192.168.1.15; 
} 
[...]

After making all the changes you want, save and close the file. Be mindful that if you have another unused entries on the dhcpd.conf file, comment them. Otherwise, you’ll have issues while starting dhcpd service.

Now, start the dhcpd service and make it to start automatically on every reboot.

On CentOS 7.x systems:

systemctl enable dhcpd
systemctl start dhcpd

On CentOS 6.x systems:

service dhcpd start
chkconfig dhcpd on

That’s it. Now, jump to the ‘Configure DHCP Clients’ section and configure your clients to get IP addresses automatically from the DHCP server.

Some of you might want to setup DHCP server in Ubuntu systems. If you one of them, then refer the following section.

2. Install DHCP Server in Ubuntu

Let us see how to install and configure DHCP server in Ubuntu 15.04 64 bit server.

To install DHCP server on Ubuntu 15.04, enter the following command:

sudo apt-get install isc-dhcp-server

2.1 Configuration

DHCP server configuration is not that difficult. First, we have to assign on what interfaces should the DHCP server (dhcpd) serve DHCP requests. In my case, I have only one Interface on my system (eth0), so I assigned eth0.

To do that, edit file /etc/default/isc-dhcp-server,

sudo vi /etc/default/isc-dhcp-server

Assign the network interface:

[...]
INTERFACES="eth0"

Save and close the file.

Now, edit dhcpd.conf file,

sudo vi /etc/dhcp/dhcpd.conf

Make the changes as shown below.

Set the domain name and domain-name servers:

[...]

# option definitions common to all supported networks...
 option domain-name "unixmen.local";
 option domain-name-servers server.unixmen.local;

[...]

If this DHCP server is the official DHCP server for the local network, you should uncomment the following line:

[...]
authoritative;
[...]

Define the sunbet, range of ip addresses, domain and domain name servers like below:

[...]
# A slightly different configuration for an internal subnet.
 subnet 192.168.1.0 netmask 255.255.255.0 {
 range 192.168.1.20 192.168.1.30;
 option domain-name-servers server.unixmen.local;
 option domain-name "unixmen.local";
 option routers 192.168.1.1;
 option broadcast-address 192.168.1.255;
 default-lease-time 600;
 max-lease-time 7200;
 }
[...]

If you want to assign a fixed IP address to your client, you should enter it’s MAC id and the IP address in the following directive. For example, I want to assign a fixed IP address 192.168.1.15 to my Ubuntu client, therefore I modified the following directive as shown below.

[...]
host ubuntu-client {
 hardware ethernet 00:22:64:4f:e9:3a;
 fixed-address 192.168.1.15;
 }
[...]

After making all the changes you want, save and close the file. Be mindful that if you have unused entries on the dhcpd.conf file, comment all of them. Otherwise, you’ll get issues while starting dhcp service.

Now, restart dhcp service:

In Ubuntu 15.04:

sudo systemctl restart isc-dhcp-server

In Ubuntu 14.04 and older systems:

sudo service isc-dhcp-server restart

Likewise, you can start/stop dhcp service as shown below:

In Ubuntu 15.04 systems:

sudo systemctl start isc-dhcp-server
sudo systemctl stop isc-dhcp-server

In Ubuntu 14.04 and older systems:

sudo service isc-dhcp-server start
sudo service isc-dhcp-server stop

3. Configure DHCP Clients

Now, go to the client configuration network settings and change the IP settings to Automatic (DHCP).

Here is my Lubuntu 14.04 settings:

Editing Wired connection 1_001

Restart the network or reboot the client system to get IP address automatically from the DHCp server.

Now, you should see the IP address has been automatically assigned to the clients from the DHCP server.

Run the following command from the client system Terminal:

sudo ifconfig

Sample output:

sk@sk: ~_002

As you see in the above picture, My Ubuntu 14.04 desktop system which has MAC id 00:22:64:4f:e9:3a got a fixed IP address ( 192.168.1.15 ) from the DHCP server.

That’s it. DHCP server is up and ready.

Cheers!

---------------------------------------------------------------------
How To Install DHCP Server In CentOS And Ubuntu

openDCIM – A Free, Open Source Data Center Management Tool

$
0
0


About openDCIM

Today we present to you a great tool that will help you to manage your data center.

openDCIM is an free and open source solution for Data Center Infrastructure Management. It is already used by a few organizations, and is quickly improving due to the efforts of its developers. The number one goal for openDCIM is to eliminate the excuse for anybody to ever track their data center inventory using a spreadsheet or word processing document again. We’ve all been there in the past, which is what drove us developers to create this project.

Features

The following features are available in the present version:

  • Image mapping with custom image for creating click-able zones for each cabinet
  • Overlay layers on map for Power, Space, Temperature, and Weight capacity
  • Mapping of power connections from device -> power strip -> panel -> source feed
  • Mapping of network connections to any device classified as a switch
  • Chassis device support
  • Graphical Cabinet Viewer (user must supply graphic images)
  • Multiple levels of user rights
  • Basic workflow system for generating rack requests
  • Reporting on Hosting Costs by department based on a cost per U and cost per Watt formula
  • Reporting on Fault Tolerance status for devices, and impact simulation of a panel or source feed outage
  • Support for automatic transfer switches

Requirements

Before start installing openDCIM you need to have those requirements:

  • Web host running Apache 2.x (or higher) with an SSL Enabled site.
  • MySQL 5.x (or higher) database
  • PHP 5.3 (or higher)
  • User Authentication
  • Web Based Client

Let’s start.

openDCIM Server configuration

Before installing openDCIM, make sure that you have a properly configured instance of Apache/PHP running.

First steps to do is to install LAMP server under your centos server.

yum install httpd php mysql mysql-server php-mbstring php-mysql

For more details you can check our article Install LAMP Server (Apache, MySQL, PHP) On RHEL, CentOS, Scientific Linux 6.5/6.4

The next step is to create a database for openDCIM (change the database name dcim and the password dcimpassword to something that suits you):

mysql -u root -p
mysql> create database dcim;
mysql> grant all privileges on dcim.* to 'dcim' identified by 'dcimpassword';

Then you need to enable https under your web server. This command is to install mod_ssl under centos.

yum -y install mod_ssl

Next step is to generate the necessary keys and copy them to the proper directories:

cd /root
openssl genrsa -out ca.key 1024 
openssl req -new -key ca.key -out ca.csr
openssl x509 -req -days 365 -in ca.csr -signkey ca.key -out ca.crt
cp ca.crt /etc/pki/tls/certs
cp ca.key /etc/pki/tls/private/ca.key
cp ca.csr /etc/pki/tls/private/ca.csr

To let Apache know of the proper locations of the keys, edit /etc/httpd/conf/httpd.conf

vim +/SSLCertificateFile /etc/httpd/conf.d/ssl.conf

comment out the line

SSLCertificateFile /etc/pki/tls/certs/localhost.crt

..and substitute with this line

SSLCertificateFile /etc/pki/tls/certs/ca.crt

Also comment out the line

SSLCertificateKeyFile /etc/pki/tls/private/localhost.key

… and substitute with this ligne

SSLCertificateKeyFile /etc/pki/tls/private/ca.key

To set the server name:

vim +/ServerName /etc/httpd/conf/httpd.conf

Find the line…

#ServerName www.example.com:80

…and add below it:

ServerName opendcim.example.com:443

Finally restart Apache…

service httpd restart

After you enabled mod_ssl under your web service , you need now to create virtual host.

vim +/NameVirtualHost /etc/httpd/conf/httpd.conf

Find the line:

#NameVirtualHost *:80

and add below it:

NameVirtualHost *:443

Now create a new configuration file for the openDCIM VirtualHost…

vim /etc/httpd/conf.d/opendcim.example.com.conf

and finally add the lines

<VirtualHost *:443>
     ServerAdmin anis@unixmen.com
     DocumentRoot /var/www/opendcim
     ServerName opendcim.unximen.net
     <Directory /var/www/opendcim>
         AuthType Basic
         AuthName "openDCIM"   
         AuthUserFile /var/www/.htpasswd
         Require valid-user
     </Directory>
</VirtualHost>

You have protected the openDCIM web directory with a requirement for Basic authentication, with the lines already added in your Apache configuration file above.

Now, to create at least on user, do:

touch /var/www/.htpasswd
htpasswd /var/www/.htpasswd Administrator

You will be asked for a password for user “Administrator” twice.

The last step in the server configuration is to enable port 443 under your firewall

The iptables firewall is enabled on CentOS be default, and blocks access to HTTPS port 443. To allow it…

vim /etc/sysconfing/iptables

..and add below this line:

-A INPUT -m state --state NEW -m tcp -p tcp --dport 443 -j ACCEPT

Restart iptables:

service iptables restart

openDCIM Installation

Now after finished the configuration of the server, you need to download the openDCIM package from opendcim.com

cd /var/www
wget http://www.opendcim.org/packages/openDCIM-3.2.tar.gz

Extract the archive and create a symbolic link:

tar zxvf openDCIM-3.2.tar.gz
ln -s openDCIM-3.2.1 opendcim

The symbolic link is not required. If you don’t want to create it, just rename the directory openDCIM-2.1 to opendcim. However, having a symbolic link in place allows you to find out the version of openDCIM at a glance, and makes upgrades easier.

Now, prepare the configuration file for access to the database:

cd /var/www/opendcim
cp db.inc.php-dist db.inc.php
vim db.inc.php

Edit the following lines, to reflect your settings of database host (in this example localhost), database name (dcim), and credentials that you assigned when creating the database:

$dbhost = 'localhost';
$dbname = 'dcim';
$dbuser = 'dcim';
$dbpass = 'dcimpassword';

Finally, restart Apache one last time:

service httpd restart

Now, you can open openDCIM in your browser to proceed with the installation. If you have set up a DNS entry for a domain name to point to your web server’s IP, you will go to something similar to https://opendcim.example.com/. Otherwise, you can visit https://IP_of_web_server/.

Screenshots

1

2

3

That’s all for now. Thanks for visiting Unixmen. Stay tuned with us.

---------------------------------------------------------------------
openDCIM – A Free, Open Source Data Center Management Tool

Install MySecureShell SFTP Server In Linux

$
0
0


About MySecureShell

MySecureShell is an Open Source, Multi-platform, very secure FTP server based on OpenSSH. Since it is based on OpenSSH, you have the high level of security of it MORE functionality and POWERFUL FTP server. It is easy to install, configure and administrate. The goal of MySecureShell is to offer the power and security of OpenSSH, with enhanced features (like ACL) to restrict connected users. What else you need? We can have a perfect SFTP server in minutes using MySecureShell. It will work on several types of Operating Systems like Linux, Mac OS X, Solaris, BSD and Windows (with Cygwin).

Why MySecureShell?

You might ask me why MySecureShell instead of traditional FTP server. There are several reasons including:

  • You do not have to open some dedicated firewall ports for file transfers ;
  • You are using one of the most used and secure protocol (SSH) ;
  • You do not have to manage SSL certificates to guaranty the security ;
  • As easy to use as a classical FTP server ;
  • As many or more features that you can find on any classical FTP servers ;
  • Easy to install, configure, maintain and use.

Features

Concerning about MySecureShell, we can list the following:

  • Control of bandwidth ;
  • Security rights information ;
  • Only authorized files and folders can be shown ;
  • Easy installation and administration of the server with a graphical interface ;
  • Management of activity of the server with logs ;
  • Restrictions of users by ip, groups ;
  • Power Encryption ;
  • No certificate problems non-certified or certificate generation ;
  • Support public and private keys for secure authentication without password ;
  • Only one port to open for SSH and SFTP (port 22 by default) ;
  • The protocol used is much more optimized than FTP because it is based on the protocol of the NFS ;
  • Free and open source ;
  • Advanced logging information ;
  • ACL can be made with IP/Usernam/Groups/VirtualHost/… ;
  • Confined environments (chroot, which is also available in the latest version of OpenSSH) ;
  • Restrict users to have sftp only (shell access is disabled by default) ;
  • And more…

Install MySecureShell On Linux

Add the MySecureShell repository depending upon the distribution you use. All steps should run as ‘root’ user.

To switch to root user, run:

sudo su

Or

su

On Debian:

MySecureShell is available in the default repositories of Debian 8.

To install it, simply run:

apt-get install mysecureshell

For Debian 7 and previous versions:

Edit /etc/apt/sources.list file,

nano /etc/apt/sources.list

Add the following lines:

deb http://mysecureshell.free.fr/repository/index.php/debian testing main
deb-src http://mysecureshell.free.fr/repository/index.php/debian testing main

To import GPG key, enter:

gpg --keyserver hkp://pool.sks-keyservers.net --recv-keys E328F22B; gpg --export E328F22B | apt-key add -

OR

wget -O - "http://pool.sks-keyservers.net:11371/pks/lookup?op=get&search=0x7601D76CE328F22B" | apt-key add -

Now update the source list and install MySecureShell as shown below.

apt-get update
apt-get install mysecureshell

On Ubuntu:

MySecureShell is available in the default repositories of Ubuntu 15.04, so we can install it using command:

apt-get install mysecureshell

On Ubuntu 14.04 and previous versions, Edit file “/etc/apt/sources.list” and add the following lines,

deb http://mysecureshell.free.fr/repository/index.php/ubuntu testing main
deb-src http://mysecureshell.free.fr/repository/index.php/ubuntu testing main

To import GPG key, enter:

gpg --keyserver hkp://pool.sks-keyservers.net --recv-keys E328F22B; gpg --export E328F22B | apt-key add -

OR

wget -O - "http://pool.sks-keyservers.net:11371/pks/lookup?op=get&search=0x7601D76CE328F22B" | apt-key add -

Now update the source list and install MySecureShell as shown below.

apt-get update && apt-get install mysecureshell

On RHEL/CentOS:

Edit file “/etc/yum.conf” and the following lines at the end.

[mysecureshell]
name=MySecureShell
baseurl=http://mysecureshell.free.fr/repository/index.php/centos/$basearch/
enabled=1
gpgcheck=0

Update Repository and install MySecureShell as shown below.

yum update
yum install mysecureshell

On Fedora:

Edit file “/etc/yum.conf” and add the following lines:

[mysecureshell]
name=MySecureShell
baseurl=http://mysecureshell.free.fr/repository/index.php/fedora/$basearch/
enabled=1
gpgcheck=0

Update Repository and install MySecureShell as shown below.

yum update
yum install mysecureshell

We have installed MySecureShell. Let us now see how to use it.

Usage

Adding users to MySecureShell

First, we have to find where MySecureShell is installed.

To do that, run:

whereis mysecureshell

Sample output:

mysecureshell: /usr/bin/mysecureshell /usr/share/man/man8/mysecureshell.8.gz

As you in the above output, mysecureshell installation path is /usr/bin/mysecureshell. Verifying MySecureShell installation path is must, because, we should specify that path while creating new FTP users or assign exiting users to access the SFTP server.

Now, Create a new user with command:

useradd -m -s /usr/bin/mysecureshell unixmen
passwd unixmen

Also you can assign the existing users to access and use MySecureShell using command:

sudo usermod -s /usr/bin/mysecureshell sk

Mow you can connect to your SFTP server from your clients as shown below.

sftp unixmen@192.168.1.102

Sample output:

unixmen@192.168.1.102's password: 
Connected to 192.168.1.102.
sftp>

Also you can login to your SFTP server with any graphical clients such as FileZilla from your client system.

Open your favourite FTP client (Ex.FileZilla). Enter sftp://IP-address, user name, password, and SFTP port 22 and click Connect.

sftp:--sk@192.168.1.102 - FileZilla_001

Unlike vsftpd or other FTP servers, MySecureShell SFTP server is lot easy to install and configure.

Configure MySecureShell

The main MySecureShell config file is /etc/ssh/sftp_config. MySecureShell will work well with default configuration. The options in the configuration are self-explanatory, so I didn’t cover them.

You can adjust or specify various options such as specify upload and download bandwidth, chroot users, the max. amount of connections etc., in the MySecureShell configuration file. You can set this options to either everybody or just for a particular group.

Say for example, Let us limit the download speed for the FTP users to 25K. To do that open MySecureShell main configuration file.

nano /etc/ssh/sftp_config

Find the following line and set the download limit to 25k under Default section.

[...]
<Default>
GlobalDownload          25k     #total speed download for all clients
[...]

Save and close the file. Restart MySecureShell service to take effect the saved changes.

service mysecureshell restart

Or,

systemctl restart mysecureshell

Now the FTP users will be able to download files at 25k speed.

MySecureShell Commands

MySecureShell has the following set of commands to administrate your SFTP server.

  • sftp-admin
  • sftp-kill
  • sftp-state
  • sftp-user
  • sftp-verif
  • sftp-who

Let us see a brief description of each command.

sftp-admin

This command allows to manage a MySecureShell waiter remotely.

Usage:

sftp-admin [ssh options] user@hostname

sftp-kill

It will disconnect the user from the FTP server.

Usage:

sftp-kill unixmen

sample output:

Kill unixmen on PID 6753
No lamer to kill ?

The above command will disconnect the user ‘unixmen’ from FTP server.

sftp-state 

It allows you to control activity of the server.

sftp-state

Sample output:

Server is up

sftp-user

This command allows you to create a SFTP user.

Usage:

sftp-user create test

The above command will create a user called test.

sftp-user delete test

The above command will delete the the user test.

sftp-user list

Sample output:

test
unixmen

The above command will list SFTP users.

sftp-verif 

This command will verify and correct problems on a MySecureShell server.

Usage:

sftp-verif

Sample output:

################################################################################
MySecureShell Verification Tool
################################################################################

### Verifing file existance ###

/bin/MySecureShell                                                       [ OK ]
/bin/sftp-who                                                            [ OK ]
/bin/sftp-kill                                                           [ OK ]
/bin/sftp-state                                                          [ OK ]
/bin/sftp-admin                                                          [ OK ]
/bin/sftp-verif                                                          [ OK ]
/bin/sftp-user                                                           [ OK ]

### Verifing rights ###

Verifing file rights of /etc/ssh/sftp_config                             [ OK ]
Verifing file rights of /bin/sftp-who                                    [ OK ]
Verifing file rights of /bin/sftp-verif                                  [ OK ]
Verifing file rights of /bin/sftp-user                                   [ OK ]
Verifing file rights of /bin/sftp-kill                                   [ OK ]
Verifing file rights of /bin/sftp-state                                  [ OK ]
Verifing file rights of /bin/sftp-admin                                  [ OK ]
Verifing file rights of /bin/MySecureShell                               [ OK ]

### Verifing rotation logs ###

Rotation logs have been found                                            [ OK ]

### Verifing server status ###

Verifing server status (ONLINE)                                          [ OK ]

### Verifing server dependencies ###

Show only error(s) :

### Verifing server configuration ###

Show only error(s) :
Trying user: root

### All tests dones ###

sftp-who

This command will tell you who is currently logged-in to the FTP server.

Usage:

sftp-who

Sample output:

--- 1 / 10 clients ---
Global used bandwidth : 0 bytes/s / 0 bytes/s
PID: 1472   Name: unixmen   IP: sk
    Home: /home/unixmen
    Status: idle    Path: 
    File: 
    Connected: 2015/06/26 17:29:44 [since 03s]
    Speed: Download: 0 bytes/s [5.00 kbytes/s]  Upload: 0 bytes/s [unlimited]
    Total: Download: 134 bytes   Upload: 23 bytes

MySecureShell GUI Front-end

Managing MySecureShell via command line is not that difficult. However if you’re looking for a graphical management tool for MSecureShell, there is a MySecureShell GUI front-end is available.

You Can install this GUI tool in any of your client system and start managing your SFTP server graphically as well as remotely. Also you have to install Java on your system before installing this front-end tool.

Please note: Before using MySecureShell GUI, you must adjust the configuration file to allow the SFTP server to be managed remotely.

To do so, go to your SFTP server, edit file /etc/ssh/sftp_config,

nano /etc/ssh/sftp_config

Find and uncomment the following line.

[...]
#<Group sftp_administrator>
        IsAdmin         true            #can admin the server
[...]

Save and close the file. Restart mysecureshell service to take effect the changes.

systemctl restart mysecureshell

Or,

service mysecureshell restart

Now, download the MySecureShell client from here or download it directly from your Terminal using command:

wget http://sourceforge.net/projects/mysecureshell/files/MySecureShell%20Graphical%20Tools/v1.90/MSS_Frontend_v1.9.zip

Extract and run it as shown below.

unzip MSS_Frontend_v1.9.zip
java -jar sftp-mss.jar

The following screen should appear. Enter the your remote SFTP server username and password and click Connect.

Graphical Tools v1.9 for MySecureShell v1.20_002

After connecting to the SFTP server it will look like below.

Graphical Tools v1.9 for MySecureShell v1.20_003

Now you can manage your SFTP server remotely.

Sftp-who

To see the connected users to SFTP server click on sftp-who tab. It will show the current users connected to the SFTP server.

Graphical Tools v1.9 for MySecureShell v1.20_004

Sftp-state

To view the SFTP server status, click on sftp-state tab.

Graphical Tools v1.9 for MySecureShell v1.20_005

Config Wizard

To create user, go to Wizard tab. Select Configuration of users:

Graphical Tools v1.9 for MySecureShell v1.20_006

Click Create New user. Enter the new user name and password. Finally click Ok and Finish.

Graphical Tools v1.9 for MySecureShell v1.20_007

Also you can change the default home directory, global download/upload speed of the ftp users. To do that, go to Wizard -> Configuration of Server. Enter the new values and click Finish.

Graphical Tools v1.9 for MySecureShell v1.20_008

Expert Mode

In the expert mode, you can adjust/modify various configuration options like Global, Security ad Advanced security. It’s not that difficult. Every option is self-explanatory.

Graphical Tools v1.9 for MySecureShell v1.20_009

Log

You can analyze what’s happening in the SFTP server using logs.

Graphical Tools v1.9 for MySecureShell v1.20_010

That’s all for now. At this stage, you will have a working SFTP server.

Reference links:

---------------------------------------------------------------------
Install MySecureShell SFTP Server In Linux


Install And Configure LDAP Server In CentOS 7

$
0
0


This tutorial describes how to install and configure LDAP server (389-DS) in CentOS 7.

About 389-DS Server

389-DS (389 Directory Server) is an open source enterprise class LDAP server for Linux, and is developed by Red Hat community. It is hardened by real-world use, is full-featured, supports multi-master replication, and already handles many of the largest LDAP deployments in the world. The 389 Directory Server can be downloaded for free, and set up in less than an hour using the graphical console. 389-DS can handle thousands of concurrent users more effectively.

Features

Concerning about 389-DS features, we can list the following:

  • High performance ;
  • Multi-Master Replication, to provide fault tolerance and high write performance ;
  • The codebase has been developed and deployed continuously by the same team for more than a decade ;
  • Active Directory user and group synchronization ;
  • Secure authentication and transport (TLSv1, and SASL) ;
  • Support for LDAPv3 ;
  • On-line, zero downtime, LDAP-based update of schema, configuration, management and in-tree Access Control Information (ACIs) ;
  • Graphical console for all facets of user, group, and server management ;
  • Continuous Integration Testing (lib389) – prevents regressions and helps maintain stability with each release.

For more details, check the Features page.

Install and Configure LDAP server in CentOS 7

In this how-to, I will be using the following system as LDAP server.

  • Operating System: CentOS 7 server
  • Host name: server1.unixmen.local
  • IP Address: 192.168.1.150/24.

Prerequisites

Before installing LDAP server, you must do the following requirements.

1. Set your server fully qualified domain in /etc/hosts file

Edit file /etc/hosts/,

vi /etc/hosts

Add your hostname as shown below.

[...]
192.168.1.150   server1.unixmen.local    server1

Change the values as per your requirement.

2. Firewall Configuration

Allow the following ldap ports to your iptables.

firewall-cmd --permanent --add-port=389/tcp
firewall-cmd --permanent --add-port=636/tcp
firewall-cmd --permanent --add-port=9830/tcp

Restart firewall.

firewall-cmd --reload

3. Add EPEL and REMI Repository

Follow the below links to install and enable EPEL and REMI repositories.

4. Performance and Security tuning for LDAP server

Before installing LDAP server, we have to adjust some files for performance and security.

Edit file “/etc/sysctl.conf”,

vi /etc/sysctl.conf

Add the following lines at the end.

[...]
net.ipv4.tcp_keepalive_time = 300
net.ipv4.ip_local_port_range = 1024 65000
fs.file-max = 64000

Edit file “/etc/security/limits.conf”,

vi /etc/security/limits.conf

Add the following lines at the bottom.

[...]
*               soft     nofile          8192   
*               hard     nofile          8192

Edit file “/etc/profile”,

vi /etc/profile

Add the line at the end.

[...]
ulimit -n 8192

Edit file “/etc/pam.d/login”,

vi /etc/pam.d/login

Add the line at the end.

[...]
session    required     /lib/security/pam_limits.so

Now Restart the server.

Install 389 Directory Server

Create a LDAP user account.

useradd ldapadmin
passwd ldapadmin

Install 389-ds-base package using command:

yum install 389-ds-base openldap-clients

Right now, all required packages for 389-DS server are not available in the CentOS repositories. We have to download and install manually the following packages.

Now, install the above packages one by one as shown below.

yum localinstall ftp://rpmfind.net/linux/epel/testing/7/x86_64/i/idm-console-framework-1.1.14-1.el7.noarch.rpm
yum localinstall ftp://rpmfind.net/linux/epel/testing/7/x86_64/3/389-adminutil-1.1.22-1.el7.x86_64.rpm
yum localinstall ftp://rpmfind.net/linux/epel/testing/7/x86_64/3/389-admin-1.1.42-1.el7.x86_64.rpm
yum localinstall ftp://rpmfind.net/linux/epel/testing/7/x86_64/3/389-admin-console-1.1.10-1.el7.noarch.rpm
yum localinstall ftp://rpmfind.net/linux/epel/testing/7/x86_64/3/389-console-1.1.9-1.el7.noarch.rpm
yum localinstall ftp://rpmfind.net/linux/epel/testing/7/x86_64/3/389-ds-console-1.2.12-1.el7.noarch.rpm

That’s it.

Configure LDAP server

Now it’s time to configure LDAP server. It’s quite long way process. Run the following command to configure 389 directory server.

setup-ds-admin.pl

You will be asked to answer for a couple of questions. Please read the instructions carefully and answer them accordingly.

If you made any mistake and want to go back to previous screen press CTRL+B and Enter. To cancel the setup press CTRL+C.

==============================================================================
This program will set up the 389 Directory and Administration Servers.

It is recommended that you have "root" privilege to set up the software.
Tips for using this program:
 - Press "Enter" to choose the default and go to the next screen
 - Type "Control-B" then "Enter" to go back to the previous screen
 - Type "Control-C" to cancel the setup program

Would you like to continue with set up? [yes]:  ## Press Enter

==============================================================================
Your system has been scanned for potential problems, missing patches,
etc. The following output is a report of the items found that need to
be addressed before running this software in a production
environment.

389 Directory Server system tuning analysis version 23-FEBRUARY-2012.

NOTICE : System is x86_64-unknown-linux3.10.0-123.9.3.el7.x86_64 (1 processor).

WARNING: 616MB of physical memory is available on the system. 1024MB is recommended for best performance on large production system.

NOTICE : The net.ipv4.tcp_keepalive_time is set to 7200000 milliseconds
(120 minutes). This may cause temporary server congestion from lost
client connections.

WARNING: There are only 1024 file descriptors (soft limit) available, which
limit the number of simultaneous connections.

WARNING : The warning messages above should be reviewed before proceeding.

Would you like to continue? [no]: yes ## Type 'Yes' and press Enter

==============================================================================
Choose a setup type:

1. Express
 Allows you to quickly set up the servers using the most
 common options and pre-defined defaults. Useful for quick
 evaluation of the products.

2. Typical
 Allows you to specify common defaults and options.

3. Custom
 Allows you to specify more advanced options. This is 
 recommended for experienced server administrators only.

To accept the default shown in brackets, press the Enter key.

Choose a setup type [2]:  ## Press Enter

==============================================================================
Enter the fully qualified domain name of the computer
on which you're setting up server software. Using the form
<hostname>.<domainname>
Example: eros.example.com.

To accept the default shown in brackets, press the Enter key.

Warning: This step may take a few minutes if your DNS servers
can not be reached or if DNS is not configured correctly. If
you would rather not wait, hit Ctrl-C and run this program again
with the following command line option to specify the hostname:

General.FullMachineName=your.hostname.domain.name

Computer name [server1.unixmen.local]:  ## Press Enter

==============================================================================
The servers must run as a specific user in a specific group.
It is strongly recommended that this user should have no privileges
on the computer (i.e. a non-root user). The setup procedure
will give this user/group some permissions in specific paths/files
to perform server-specific operations.

If you have not yet created a user and group for the servers,
create this user and group using your native operating
system utilities.

System User [nobody]: ldapadmin ## Type LDAP user name which we created earlier
System Group [nobody]: ldapadmin ## Type ldap group

==============================================================================
Server information is stored in the configuration directory server.
This information is used by the console and administration server to
configure and manage your servers. If you have already set up a
configuration directory server, you should register any servers you
set up or create with the configuration server. To do so, the
following information about the configuration server is required: the
fully qualified host name of the form
<hostname>.<domainname>(e.g. hostname.example.com), the port number
(default 389), the suffix, the DN and password of a user having
permission to write the configuration information, usually the
configuration directory administrator, and if you are using security
(TLS/SSL). If you are using TLS/SSL, specify the TLS/SSL (LDAPS) port
number (default 636) instead of the regular LDAP port number, and
provide the CA certificate (in PEM/ASCII format).

If you do not yet have a configuration directory server, enter 'No' to
be prompted to set up one.

Do you want to register this software with an existing
configuration directory server? [no]:  ## Press Enter

==============================================================================
Please enter the administrator ID for the configuration directory
server. This is the ID typically used to log in to the console. You
will also be prompted for the password.

Configuration directory server
administrator ID [admin]:  ## Press Enter
Password:   ## Type Password
Password (confirm):  ## Re-type password

==============================================================================
The information stored in the configuration directory server can be
separated into different Administration Domains. If you are managing
multiple software releases at the same time, or managing information
about multiple domains, you may use the Administration Domain to keep
them separate.

If you are not using administrative domains, press Enter to select the
default. Otherwise, enter some descriptive, unique name for the
administration domain, such as the name of the organization
responsible for managing the domain.

Administration Domain [unixmen.local]:  ## Press Enter

==============================================================================
The standard directory server network port number is 389. However, if
you are not logged as the superuser, or port 389 is in use, the
default value will be a random unused port number greater than 1024.
If you want to use port 389, make sure that you are logged in as the
superuser, that port 389 is not in use.

Directory server network port [389]:  ## Press Enter

==============================================================================
Each instance of a directory server requires a unique identifier.
This identifier is used to name the various
instance specific files and directories in the file system,
as well as for other uses as a server instance identifier.

Directory server identifier [server1]:  ## Press Enter

==============================================================================
The suffix is the root of your directory tree. The suffix must be a valid DN.
It is recommended that you use the dc=domaincomponent suffix convention.
For example, if your domain is example.com,
you should use dc=example,dc=com for your suffix.
Setup will create this initial suffix for you,
but you may have more than one suffix.
Use the directory server utilities to create additional suffixes.

Suffix [dc=unixmen, dc=local]:  ##Press Enter

==============================================================================
Certain directory server operations require an administrative user.
This user is referred to as the Directory Manager and typically has a
bind Distinguished Name (DN) of cn=Directory Manager.
You will also be prompted for the password for this user. The password must
be at least 8 characters long, and contain no spaces.
Press Control-B or type the word "back", then Enter to back up and start over.

Directory Manager DN [cn=Directory Manager]: ## Press Enter
Password: ## Type Password 
Password (confirm): ## Re-enter password

==============================================================================
The Administration Server is separate from any of your web or application
servers since it listens to a different port and access to it is
restricted.

Pick a port number between 1024 and 65535 to run your Administration
Server on. You should NOT use a port number which you plan to
run a web or application server on, rather, select a number which you
will remember and which will not be used for anything else.

Administration port [9830]:  ## Press Enter

==============================================================================
The interactive phase is complete. The script will now set up your
servers. Enter No or go Back if you want to change something.

Are you ready to set up your servers? [yes]:  ## Press Enter
Creating directory server . . .
Your new DS instance 'server1' was successfully created.
Creating the configuration directory server . . .
Beginning Admin Server creation . . .
Creating Admin Server files and directories . . .
Updating adm.conf . . .
Updating admpw . . .
Registering admin server with the configuration directory server . . .
Updating adm.conf with information from configuration directory server . . .
Updating the configuration for the httpd engine . . .
Starting admin server . . .
The admin server was successfully started.
Admin server was successfully created, configured, and started.
Exiting . . .
Log file is '/tmp/setupOLhgGH.log'

Congratulations! We have successfully configured 389 Directory Server.

Starting/Stopping 389-ds services

Make the LDAP server services to start automatically on every reboot.

systemctl enable dirsrv.target
systemctl enable dirsrv-admin

To start directory server, run:

systemctl start dirsrv.target

Or

start-dirsrv

To stop it, run:

systemctl stop dirsrv.target

Or

stop-dirsrv

Likewise, to start directory admin, run:

systemctl start dirsrv-admin

Or

start-ds-admin

To stop it:

systemctl stop dirsrv-admin

Or

stop-ds-admin

Likewise, you can check the status of the both services using commands:

systemctl status dirsrv.target
systemctl status dirsrv-admin

To restart the above services. run:

systemctl restart dirsrv.target
systemctl restart dirsrv-admin

All configuration files will be found under /etc/dirsrv/ directory and all log files will found under /var/log/dirsrv/ directory.

Test LDAP Server

Now let us test our LDAP Server now for any errors using following command.

ldapsearch -x -b "dc=unixmen,dc=local"

Sample output:

# extended LDIF
#
# LDAPv3
# base <dc=unixmen,dc=local> with scope subtree
# filter: (objectclass=*)
# requesting: ALL
#

# unixmen.local
dn: dc=unixmen,dc=local
objectClass: top
objectClass: domain
dc: unixmen

# Directory Administrators, unixmen.local
dn: cn=Directory Administrators,dc=unixmen,dc=local
objectClass: top
objectClass: groupofuniquenames
cn: Directory Administrators
uniqueMember: cn=Directory Manager

# Groups, unixmen.local
dn: ou=Groups,dc=unixmen,dc=local
objectClass: top
objectClass: organizationalunit
ou: Groups

# People, unixmen.local
dn: ou=People,dc=unixmen,dc=local
objectClass: top
objectClass: organizationalunit
ou: People

# Special Users, unixmen.local
dn: ou=Special Users,dc=unixmen,dc=local
objectClass: top
objectClass: organizationalUnit
ou: Special Users
description: Special Administrative Accounts

# Accounting Managers, Groups, unixmen.local
dn: cn=Accounting Managers,ou=Groups,dc=unixmen,dc=local
objectClass: top
objectClass: groupOfUniqueNames
cn: Accounting Managers
ou: groups
description: People who can manage accounting entries
uniqueMember: cn=Directory Manager

# HR Managers, Groups, unixmen.local
dn: cn=HR Managers,ou=Groups,dc=unixmen,dc=local
objectClass: top
objectClass: groupOfUniqueNames
cn: HR Managers
ou: groups
description: People who can manage HR entries
uniqueMember: cn=Directory Manager

# QA Managers, Groups, unixmen.local
dn: cn=QA Managers,ou=Groups,dc=unixmen,dc=local
objectClass: top
objectClass: groupOfUniqueNames
cn: QA Managers
ou: groups
description: People who can manage QA entries
uniqueMember: cn=Directory Manager

# PD Managers, Groups, unixmen.local
dn: cn=PD Managers,ou=Groups,dc=unixmen,dc=local
objectClass: top
objectClass: groupOfUniqueNames
cn: PD Managers
ou: groups
description: People who can manage engineer entries
uniqueMember: cn=Directory Manager

# search result
search: 2
result: 0 Success

# numResponses: 10
# numEntries: 9

The output will look something like above. If you have got result as 2 shown in the  above output, you’re done.

Now, our LDAP server is ready to use.

Check our next article to manage LDAP server graphically using 389 management console.

You might want to setup LDAP server CentOS 6.x systems. If yes, refer the following link.


Reference Links:

The post Install And Configure LDAP Server In CentOS 7 appeared first on Unixmen.

Manage 389 Directory Server Graphically Using 389 Management Console

$
0
0


In our previous tutorial, we have discussed how to install and configure LDAP server in CentOS 7. Check the following link to install and configure 389 Directory Server.

Today, we will see how to manage 389-DS more easily via a graphical interface.

About 389 Management Console

389 management console is a built-in, Java based remote management console that can be used to manage your LDAP server (389-DS) server from any remote or local system. This console helps you to easily create, edit or delete Organizational units, groups, users more easily via a cool graphical interface. You don’t need to memorize or know all commands to manage LDAP server. Everything can be done via 389 management console.

Please be mindful that if you want to manage your 389 ds server graphically, you LDAP server should have installed with a GUI desktop environment. If you did a minimal installation and don’t have GUI in your LDAP server, then, you can’t access the management console.

As I had installed LDAP server in minimal CentOS 7 server, Here, I am going to install XFCE desktop on my server.

yum groupinstall Xfce

After installing GUI, reboot the server to take effect the changes.

reboot

Log in to server.

Now, you can access the 389 ds admin console either from the local server itself or from a remote desktop client.

To access 389 ds admin console locally, type the following command in the Terminal:

389-console

To access 389-ds admin console from the remote system, enter the following command in Terminal.

ssh -X root@192.168.1.150 /usr/bin/389-console -a http://192.168.1.150:9830

Replace the IP address with your own.

Now, you’ll be asked to enter your LDAP server administrative log in details. In my case my LDAP admin name is admin and password is centos.

win0 (server1.unixmen.local)_001
This is how my admin server console looks.

389 Management Console (server1.unixmen.local)_002

From here, you can create, delete or edit LDAP organizational units, groups and users graphically.

389-ds admin server console has two groups by default:

  • Administration Server
  • Directory Server

You can use any one of the server group.

1. Administration Server

To access Administration Server interface, click on your LDAP domain name to expand.

Go to Server Group –> Administration Server and click Open on the right side. Refer the following screenshot.

389 Management Console (server1.unixmen.local)_003

The following screen should appear.

The Admin server has tabs.

  • Tasks,
  • Configuration.

Tasks Tab:

In the Tasks section, you can Stop/Restart/Configure admin server.

Administration Server (server1.unixmen.local)_004

Configuration tab:

In the Configuration tab, you change/edit your Admin server ip address, default port, LDAP admin password, default user directory. Also you can define which host names to allow and which ip addresses to allow to access your LDAP server.

Administration Server (server1.unixmen.local)_005

2. Directory server

To access Directory Server interface, click on your LDAP domain name to expand.

Go to Server Group Directory Server and click Open on the right side. Refer the following screenshot.

389 Management Console (server1.unixmen.local)_006

In Directory Server section, you can do all necessary configuration for your LDAP server. You can change/modify default port, create users, groups, organizational units etc.

server1.unixmen.local - 389 Directory Server - server1 (server1.unixmen.local)_007

There are lot of options available in Directory Server section. Go thorough the each section and configure your LDAP server as per your requirement.

Create Organization units, Groups And Users

Create organizational unit:

Go to your Directory Server from the main console.

Select Directory tab.

server1.unixmen.local - 389 Directory Server - server1 (server1.unixmen.local)_012

Right click on your Domain name (Ex. Unixmen). Select New -> Organization Unit. Refer the following screen.

Menu_011

Enter your OU name (ex. Support Division) and click Ok.

Create New Organizational Unit (server1.unixmen.local)_013

The new OU (ex. Support Division) will be created under Unixmen domain.

server1.unixmen.local - 389 Directory Server - server1 (server1.unixmen.local)_014

Create a Group:

Now navigate to Support Division OU and create a new group (ex. support_group).

Menu_015

Enter group name and click Ok.

Create New Group (server1.unixmen.local)_016

The new group will be created under Unixmen/Support Division.

Create User:

Right click on the Support_group, and click New -> User.

Menu_021

Enter the user details such as first name, last name, userid, mail id etc., and click Ok.

Create New User (server1.unixmen.local)_022

That’s it. Now, we have created OU, Group and an user in LDAP server.

Test LDAP server

Verify whether the newly created Organizational Unit, Group, User with following command on our server.

ldapsearch -x -b "dc=unixmen,dc=local"

Sample output:

Check the result that I have marked as bold at the end.

# extended LDIF
#
# LDAPv3
# base <dc=unixmen,dc=local> with scope subtree
# filter: (objectclass=*)
# requesting: ALL
#

# unixmen.local
dn: dc=unixmen,dc=local
objectClass: top
objectClass: domain
dc: unixmen

# Directory Administrators, unixmen.local
dn: cn=Directory Administrators,dc=unixmen,dc=local
objectClass: top
objectClass: groupofuniquenames
cn: Directory Administrators
uniqueMember: cn=Directory Manager

# Groups, unixmen.local
dn: ou=Groups,dc=unixmen,dc=local
objectClass: top
objectClass: organizationalunit
ou: Groups

# People, unixmen.local
dn: ou=People,dc=unixmen,dc=local
objectClass: top
objectClass: organizationalunit
ou: People

# Special Users, unixmen.local
dn: ou=Special Users,dc=unixmen,dc=local
objectClass: top
objectClass: organizationalUnit
ou: Special Users
description: Special Administrative Accounts

# Accounting Managers, Groups, unixmen.local
dn: cn=Accounting Managers,ou=Groups,dc=unixmen,dc=local
objectClass: top
objectClass: groupOfUniqueNames
cn: Accounting Managers
ou: groups
description: People who can manage accounting entries
uniqueMember: cn=Directory Manager

# HR Managers, Groups, unixmen.local
dn: cn=HR Managers,ou=Groups,dc=unixmen,dc=local
objectClass: top
objectClass: groupOfUniqueNames
cn: HR Managers
ou: groups
description: People who can manage HR entries
uniqueMember: cn=Directory Manager

# QA Managers, Groups, unixmen.local
dn: cn=QA Managers,ou=Groups,dc=unixmen,dc=local
objectClass: top
objectClass: groupOfUniqueNames
cn: QA Managers
ou: groups
description: People who can manage QA entries
uniqueMember: cn=Directory Manager

# PD Managers, Groups, unixmen.local
dn: cn=PD Managers,ou=Groups,dc=unixmen,dc=local
objectClass: top
objectClass: groupOfUniqueNames
cn: PD Managers
ou: groups
description: People who can manage engineer entries
uniqueMember: cn=Directory Manager

# Support Division, unixmen.local
dn: ou=Support Division,dc=unixmen,dc=local
ou: Support Division
objectClass: top
objectClass: organizationalunit

# support_group, Support Division, unixmen.local
dn: cn=support_group,ou=Support Division,dc=unixmen,dc=local
objectClass: top
objectClass: groupofuniquenames
cn: support_group

# skumar, support_group, Support Division, unixmen.local
dn: uid=skumar,cn=support_group,ou=Support Division,dc=unixmen,dc=local
mail: sk@unixmen.com
uid: skumar
givenName: senthil
objectClass: top
objectClass: person
objectClass: organizationalPerson
objectClass: inetorgperson
sn: kumar
cn: senthil kumar

# search result
search: 2
result: 0 Success

# numResponses: 13
# numEntries: 12

As you see in the above output, a new OU called Support Division, a new group called support_vision, a new user called skumar have been created. Voila! Our LDAP server is working.

Conclusion

In this tutorial, I covered only installation part and basic configuration. There are lot to learn about 389 ds. Refer the link provided at the bottom to know more about 389 ds.

In my personal experience, 389-ds is much easier than openldap in terms of installation and configuration. We will see how to configure client systems to authenticate using LDAP server in our next article.

Good luck. Cheers!

Reference:

The post Manage 389 Directory Server Graphically Using 389 Management Console appeared first on Unixmen.

Setup A Local Mail Server In CentOS 7

$
0
0


Introduction

This tutorial describes how to setup a local mail server using Postfix, Dovecot And Squirrelmail in CentOS 7. Please note that I said “local mail server”. This tutorial doesn’t help you if you want to send or receive mails to outside like Gmail or yahoo. However, if you want send/receive mails to outside, you should configure the mail server with a public IP, and request your ISP to configure the MX record of your mail server in their DNS server.

I tested this setup on CentOS 64 bit server. Although, the same steps should work on RHEL and Scientific Linux 7 distributions. My test box details are given below:

  • OS: CentOS 7 64bit minimal server
  • IP Address: 192.168.1.150/24
  • Hostname: server1.unixmen.local

Let us get started now.

Prerequisites:

1. Remove default MTA sendmail first if it’s already installed. Sendmail will not be installed by default in minimal installation, so you can skip this step.

yum remove sendmail

2. Setup DNS server and add the Mail server MX records in the forward and reverse zone files.

To install and configure DNS server, refer the following link.

And, don’t forget to ask your ISP to point your external static IP to your mail domain.

3. Add hostname entries in /etc/hosts file as shown below:

vi /etc/hosts

Add your FQDN:

127.0.0.1 localhost localhost.localdomain localhost4 localhost4.localdomain4
::1 localhost localhost.localdomain localhost6 localhost6.localdomain6
192.168.1.150 server1.unixmen.local server1

4. I disabled SELinux to reduce the complexity in postfix configuration.

To do that, edit:

vi /etc/sysconfig/selinux

Change SELINUX=enforcing to SELINUX=disabled.

SELINUX=disabled

5. Install EPEL Repository:

Squirrelmail webmail client is not available in CentOS official repositories. So let us enable EPEL repository.

yum install epel-release

6. Allow the Apache default port 80 through your firewall/router:

firewall-cmd --permanent --add-port=80/tcp

Restart firewall using command:

firewall-cmd --reload

Restart your server to take effect all changes.

Install Postfix

Postfix is a free open source mail transfer agent (MTA). It is fast, secure and easy to administer. It’s an alternative to Sendmail, which is the default MTA for RHEL.

Now, install Postifix using command:

yum install postfix

Configuring Postfix

Edit /etc/postfix/main.cf file:

vi /etc/postfix/main.cf

Find and edit the following lines:

## Line no 77 - Uncomment and set your mail server FQDN ##
myhostname = server1.unixmen.local

## Line 85 - Uncomment and Set domain name ##
mydomain = unixmen.local

## Line 101 - Uncomment ##
myorigin = $mydomain

## Line 115 - Uncomment and Set ipv4 ##
inet_interfaces = all

## Line 121 - Change to all ##
inet_protocols = all

## Line 166 - Comment ##
#mydestination = $myhostname, localhost.$mydomain, localhost,

## Line 167 - Uncomment ##
mydestination = $myhostname, localhost.$mydomain, localhost, $mydomain

## Line 266 - Uncomment and add IP range ##
mynetworks = 192.168.1.0/24, 127.0.0.0/8

## Line 421 - Uncomment ##
home_mailbox = Maildir/

Save and exit the file.

Start/restart Postfix service now:

systemctl enable postfix
systemctl restart postfix

Testing Postfix mail server

First, create a test user called SK.

useradd sk

Set the password for the user:

passwd sk

Access the server via Telnet and enter the commands manually shown in red colored text.

telnet localhost smtp

Sample output:

Trying ::1...
Connected to localhost.
Escape character is '^]'.
220 server1.unixmen.local ESMTP Postfix
ehlo localhost     ## Type this line ##
250-server1.unixmen.local
250-PIPELINING
250-SIZE 10240000
250-VRFY
250-ETRN
250-ENHANCEDSTATUSCODES
250-8BITMIME
250 DSN
mail from:<sk>     ## Type this - mail sender address ##
250 2.1.0 Ok
rcpt to:<sk>     ## Type this - mail receiver address ##
250 2.1.5 Ok
data     ## Type this to input body of Email ##
354 End data with <CR><LF>.<CR><LF>
Welcome to unixmen mail server     ## Body of the Email ##
.     ## Type dot (.) after composing your email ##
250 2.0.0 Ok: queued as E2B522032F93
quit     ## Type quit to exit from mail ##
221 2.0.0 Bye
Connection closed by foreign host.

Now navigate to the user sk mail directory and check whether the new mail has been received.

ls /home/sk/Maildir/new/

Sample output:

1437722056.Vfd01I203e3e7M938078.server1.unixmen.local

Success! A new mail is received to the user “sk“.

To read the mail, enter the following command:

cat /home/sk/Maildir/new/1437722056.Vfd01I203e3e7M938078.server1.unixmen.local

Sample output:

Return-Path: <sk@unixmen.local>
X-Original-To: sk
Delivered-To: sk@unixmen.local
Received: from localhost (localhost [IPv6:::1])
 by server1.unixmen.local (Postfix) with ESMTP id E2B522032F93
 for <sk>; Fri, 24 Jul 2015 12:42:36 +0530 (IST)
Message-Id: <20150724071330.E2B522032F93@server1.unixmen.local>
Date: Fri, 24 Jul 2015 12:42:36 +0530 (IST)
From: sk@unixmen.local

Welcome to unixmen mail server

Done. Postfix is working!!

Install Dovecot

Dovecot is an open source IMAP and POP3 mail server for Unix/Linux systems.

To install it, run:

yum install dovecot

Configuring Dovecot

Edit file /etc/dovecot/dovecot.conf file,

vi /etc/dovecot/dovecot.conf

Uncomment the following line:

## Line 24 - umcomment ##
protocols = imap pop3 lmtp

Edit file /etc/dovecot/conf.d/10-mail.conf file

vi /etc/dovecot/conf.d/10-mail.conf

Make the changes as shown below:

## Line 24 - uncomment ##
mail_location = maildir:~/Maildir

Edit /etc/dovecot/conf.d/10-auth.conf

vi /etc/dovecot/conf.d/10-auth.conf

And make the changes as shown below:

## line 10 - uncomment##
disable_plaintext_auth = yes

## Line 100 - Add the word: "login" ##
auth_mechanisms = plain login

Edit file /etc/dovecot/conf.d/10-master.conf,

vi /etc/dovecot/conf.d/10-master.conf

Make changes as shown below:

## Line 91, 92 - Uncomment and add "postfix"
#mode = 0600
   user = postfix
   group = postfix
[...]

Start Dovecot service:

systemctl enable dovecot
systemctl start dovecot

Testing Dovecot

It’s time to test Dovecot configuration. Enter the following command in Terminal:

telnet localhost pop3

Enter the commands manually which are marked as bold:

Trying ::1...
Connected to localhost.
Escape character is '^]'.
+OK Dovecot ready.
user sk     ## Enter the mail user name ##
+OK
pass centos     ## Enter the password ##
+OK Logged in.
retr 1     ## Type this command to view mail ##
+OK 415 octets
Return-Path: <sk@unixmen.local>
X-Original-To: sk
Delivered-To: sk@unixmen.local
Received: from localhost (localhost [IPv6:::1])
 by server1.unixmen.local (Postfix) with ESMTP id E2B522032F93
 for <sk>; Fri, 24 Jul 2015 12:42:36 +0530 (IST)
Message-Id: <20150724071330.E2B522032F93@server1.unixmen.local>
Date: Fri, 24 Jul 2015 12:42:36 +0530 (IST)
From: sk@unixmen.local

Welcome to unixmen mail server
.
quit     ## Type 'quit' to exit ##
+OK Logging out.
Connection closed by foreign host.

As you see in the above result, Dovecot is working!

Install Squirrelmail

Sending and receiving mails form command line is not easy all the time. It is better if we do it from a graphical console. No worries. We can easily send/receive mails using webmail client called Squirrelmail via a web browser.

Make sure that you’ve installed and enabled EPEL repository.

Then, Install Squirrelmail using the following command:

yum install squirrelmail

Configuring Squirrelmail

Navigate to /usr/share/squirrelmail/config/ directory:

cd /usr/share/squirrelmail/config/

..and run the following command to configure Squirrelmail.

./conf.pl

The following wizard will open. Enter choice “1” to set your organization details:

SquirrelMail Configuration : Read: config.php (1.4.0)
---------------------------------------------------------
Main Menu --
1. Organization Preferences
2. Server Settings
3. Folder Defaults
4. General Options
5. Themes
6. Address Books
7. Message of the Day (MOTD)
8. Plugins
9. Database
10. Languages

D. Set pre-defined settings for specific IMAP servers

C Turn color off
S Save data
Q Quit

Command >> 1

The following wizard will open. Enter “1” again to modify your organization details:

SquirrelMail Configuration : Read: config.php (1.4.0)
---------------------------------------------------------
Organization Preferences
1. Organization Name : SquirrelMail
2. Organization Logo : ../images/sm_logo.png
3. Org. Logo Width/Height : (308/111)
4. Organization Title : SquirrelMail $version
5. Signout Page : 
6. Top Frame : _top
7. Provider link : http://squirrelmail.org/
8. Provider name : SquirrelMail

R Return to Main Menu
C Turn color off
S Save data
Q Quit

Command >> 1

Set your Organization name and press Enter:

We have tried to make the name SquirrelMail as transparent as
possible. If you set up an organization name, most places where
SquirrelMail would take credit will be credited to your organization.

If your Organization Name includes a '$', please precede it with a \. 
Other '$' will be considered the beginning of a variable that
must be defined before the $org_name is printed.
$version, for example, is included by default, and will print the
string representing the current SquirrelMail version.

[SquirrelMail]: Unixmen

Similarly, set all the details such as organization title, logo, provider name in the above wizard. Once you done, press “S” to save the changes, and press “R” to return back to your main menu:

SquirrelMail Configuration : Read: config.php (1.4.0)
---------------------------------------------------------
Organization Preferences
1.  Organization Name      : Unixmen
2.  Organization Logo      : ../images/sm_logo.png
3.  Org. Logo Width/Height : (308/111)
4.  Organization Title     : SquirrelMail $version
5.  Signout Page           : 
6.  Top Frame              : _top
7.  Provider link          : http://squirrelmail.org/
8.  Provider name          : Unixmen Mail

R   Return to Main Menu
C   Turn color off
S   Save data
Q   Quit

Command >> S

Now, enter “2” to setup mail Server settings such as domain name and mail agent etc.:

SquirrelMail Configuration : Read: config.php (1.4.0)
---------------------------------------------------------
Main Menu --
1.  Organization Preferences
2.  Server Settings
3.  Folder Defaults
4.  General Options
5.  Themes
6.  Address Books
7.  Message of the Day (MOTD)
8.  Plugins
9.  Database
10. Languages

D.  Set pre-defined settings for specific IMAP servers

C   Turn color off
S   Save data
Q   Quit

Command >> 2

Enter “1”, Enter your mail domain (ex. unixmen. local) and press Enter key.

SquirrelMail Configuration : Read: config.php (1.4.0)
---------------------------------------------------------
Server Settings

General
-------
1. Domain : localhost
2. Invert Time : false
3. Sendmail or SMTP : Sendmail

A. Update IMAP Settings : localhost:143 (uw)
B. Change Sendmail Config : /usr/sbin/sendmail

R Return to Main Menu
C Turn color off
S Save data
Q Quit

Command >> 1

The domain name is the suffix at the end of all email addresses. If
for example, your email address is jdoe@example.com, then your domain
would be example.com.

[localhost]: unixmen.local

Enter “3” and change from sendmail to Postfix MTA (i.e. SMTP):

SquirrelMail Configuration : Read: config.php (1.4.0)
---------------------------------------------------------
Server Settings

General
-------
1.  Domain                 : unixmen.local
2.  Invert Time            : false
3.  Sendmail or SMTP       : Sendmail

A.  Update IMAP Settings   : localhost:143 (uw)
B.  Change Sendmail Config : /usr/sbin/sendmail

R   Return to Main Menu
C   Turn color off
S   Save data
Q   Quit

Command >> 3

Enter “2” to switch from sendmail MTA to postfix.

You now need to choose the method that you will use for sending
messages in SquirrelMail.  You can either connect to an SMTP server
or use sendmail directly.

  1.  Sendmail
  2.  SMTP
Your choice [1/2] [1]: 2

Now enter “S” followed by “Q” to save and exit Squirrelmail configuration.

Create a squirrelmail vhost in apache config file:

vi /etc/httpd/conf/httpd.conf

Add the following lines at the end:

Alias /webmail /usr/share/squirrelmail
<Directory /usr/share/squirrelmail>
 Options Indexes FollowSymLinks
 RewriteEngine On
 AllowOverride All
 DirectoryIndex index.php
 Order allow,deny
 Allow from all
</Directory>

Restart the Apache service:

systemctl restart httpd

Create mail users

Create some users for testing. In my case I create two users namely senthil and kumar.

useradd senthil
passwd senthil
useradd kumar
passwd kumar

Access Webmail

Now navigate to http://ip-address/webmail or http://domain-name/webmail from your browser.

The following screen should appear. Enter the username and password of the user which we have created earlier.

Unixmen - Login - Chromium_003

Now, you’ll be able to access the user mail box.

SquirrelMail 1.4.22-15.el7 - Chromium_004

Compose mails

Let us compose a test mail from user senthil to userkumar. Click on the Compose link on the top. Enter the recipient mail id (ex. kumar@unixmen.local), subject and body of the mail and click Send.

SquirrelMail 1.4.22-15.el7 - Chromium_005

Now, log out from user senthil and log in to user kumar mail and check for any new mail.

SquirrelMail 1.4.22-15.el7 - Chromium_006

Hurrah! We have got a new mail from senthil@unixmen.local mail id.

To read the mail, click on it. You’ll now be able to read, reply, delete or compose a new mail.

SquirrelMail 1.4.22-15.el7 - Chromium_007

That’s all for now. We’ve successfully configured a local mail server that will serve in/out mails within a local area network.

Hope this tutorial will help you.

Good luck!

To setup mail server in CentOS 6.x server, refer the following link.

Reference links:

The post Setup A Local Mail Server In CentOS 7 appeared first on Unixmen.

Pydio – An Open Source Alternative To Dropbox

$
0
0


About Pydio

Having a private file server is always a best idea. Instead of saving your precious data in the third party servers and Cloud, why not turn your old system into a robust File server, put your data safely in it, and access them anywhere from any device? Sounds good? Let me introduce Pydio, an open source alternative to Dropbox and box.net.

Pydio, formerly known as AjaXplorer, is an open source application that can be used to setup fileserver on any system. It is an alternative to SaaS Boxes and Drives, with more control, safety and privacy, and favorable TCOs. It provides the easy access to files/folders from any system, from any browser over LAN or WAN. It has an embedded WebDAV server and native mobile applications for iOS and Android. It is easy to install, configure and it is designed to provide enterprise grade security and control over your data. Moreover, Pydio users and groups can be mapped directly from your external LDAP/AD server, or from the most common PHP-based CMS.

Pydio is available in four different editions.

  1. Community (Free for personal usage) ;
  2. Pro Edition ;
  3. Enterprise Edition ;
  4. Ultimate Edition.

Check the complete details of each edition here.

Install Pydio Community Edition in CentOS 7

My testbox details:

Here is my testbox details that I am going to install and configure Pydio.

  • Operating System: CentOS 7 64bit minimal
  • IP Address: 192.168.1.150/24
  • Hostname: server1.unixmen.local

Though it was tested in CentOS, the same steps should work all RPM based distributions such as RHEL/Scientific Linux 7 and Fedora.

Software Requirements:

As I mentioned above, we can deploy Pydio with any webserver equiped with PHP 5.1 or later, along with the DomXML , MCrypt and GD extensions.. Pydio will work on all webservers, including Apache, Nginx, Lighttpd, and IIS. However, Apache is recommended for a production environment by Pydio team.

Hardware Requirements:

This may highly vary, depending your number of users and volume of documents. Any system with a 2GHz dual-core with 4GB of RAM should be more than enough for basic needs (up to 50 users) to setup Pydio.

In this tutorial, I am going to setup Pydio fileserver using LAMP stack in CentOS 7 server.

To install and configure LAMP server, refer the following link.

After setting up Apache, mariaDB and PHP, add EPEL repository and install some prerequisites needed by Pydio as shown below.

yum install epel-release
yum install php-apc php-mbstring php-pecl-apc php-mysql php-cli php-devel php-gd php-ldap php-pecl-memcache php-pspell php-snmp php-xmlrpc php-xml php-imap php-mcrypt* wget unzip

Edit php.ini file,

vi /etc/php.ini

Find the following lines and make changes as shown below.

[...]
upload_max_filesize = 1024M

[...]
post_max_size = 1024M

[...]
output_buffering = Off

[...]

Save and close the file.

Create Database And User For Pydio:

Login to the database server:

mysql -u root -p

Create a database called pydiodb and a database user called pydiouser. You can use your own values of your choice.

Welcome to the MariaDB monitor. Commands end with ; or \g.
Your MariaDB connection id is 10
Server version: 5.5.41-MariaDB MariaDB Server

Copyright (c) 2000, 2014, Oracle, MariaDB Corporation Ab and others.

Type 'help;' or '\h' for help. Type '\c' to clear the current input statement.

MariaDB [(none)]> create database pydiodb;
Query OK, 1 row affected (0.05 sec)

MariaDB [(none)]> GRANT ALL ON pydiodb.* TO pydiouser@localhost IDENTIFIED BY 'centos';
Query OK, 0 rows affected (0.08 sec)

MariaDB [(none)]> flush privileges;
Query OK, 0 rows affected (0.04 sec)

MariaDB [(none)]> exit
Bye

Download Pydio:

Download the latest version from the Pydio download page.

Here, you have two choices. You can manually download the tar or zip file and deploy it, or add the Pydio repository to your server.

In our case, let us download the zip file and do the manual installation.

wget http://sourceforge.net/projects/ajaxplorer/files/pydio/stable-channel/6.0.8/pydio-core-6.0.8.zip

Extract the zip file and move the contents to your web root directory.

unzip pydio-core-6.0.8.zip
mv pydio-core-6.0.8/ /var/www/html/pydio

Make sure that data folder has full permission(Read/Write).

chmod -R 777 /var/www/html/pydio/data/

Edit file /etc/httpd/conf/httpd.conf,

vi /etc/httpd/conf/httpd.conf

Find the line,

AllowOverride None

Change it to:

AllowOverride All

Save and close the file.

Note: I disabled SELinux permanently to reduce the complexity since I am going to test it in my local network.

However, the official documentation guide says you can use the following SELinux commands to override any permission issues.

Adjust SELinux to avoid “403 forbidden error” or “Forbidden You don’t have permission to access /pydio on this server” errors.

setsebool -P httpd_enable_homedirs true
chcon -R -t httpd_sys_content_t /var/www/html/pydio/

Restart apache service.

systemctl restart httpd

Start Pydio Web Installation

Now, open up the browser and type http://domain-name/pydio or http://ip-address/pydio in the address bar.

You will see the following screen. It will show you any warnings or errors if exists. Review the error lines to check what action you should do.

Then, Click on the link that says: click here to continue to Pydio.

Pydio - Google Chrome_001

Click Start Wizard to continue.

Pydio - - - Google Chrome_002

Click on the each section and set the required parameters.

Setup Admin account:

Pydio - - - Google Chrome_003

Set default language and file server title:

Pydio - - - Google Chrome_004

Configure MySQL database name and user. Enter mysql database and user details and click “try connecting to database”. If everything ok, you should see a message: “Connexion established” in the bottom.

Pydio - - - Google Chrome_005

Create a new user. You can create any number of users by clicking on the plus (+) button. Finally click Install Pydio now button.

Pydio - - - Google Chrome_001

You should see the following screen.

Pydio - - - Google Chrome_002

Copy the contents shown in the above window and paste them in /var/www/html/pydio.htaccess file.

vi /var/www/html/pydio/.htaccess

Here is the contents that I added in my /var/www/html/pydio/.htaccess file.

<IfModule mod_rewrite.c>
# You must set the correct values here if you want
# to enable webDAV sharing. The values assume that your 
# Pydio installation is at http://yourdomain/
# and that you want the webDAV shares to be accessible via 
# http://yourdomain/shares/repository_id/
RewriteEngine on
RewriteBase /pydio
RewriteCond %{REQUEST_FILENAME} !-f
RewriteCond %{REQUEST_FILENAME} !-d
RewriteRule ^shares ./dav.php [L]
RewriteRule ^api ./rest.php [L]
RewriteRule ^user ./index.php?get_action=user_access_point [L]
RewriteCond %{REQUEST_URI} !^/pydio/index
RewriteCond %{REQUEST_URI} !^/pydio/plugins
RewriteCond %{REQUEST_URI} ^/pydio/dashboard|^/pydio/welcome|^/pydio/settings|^/pydio/ws-
RewriteRule (.*) index.php [L]

#Following lines seem to be necessary if PHP is working
#with apache as CGI or FCGI. Just remove the #
#See http://doc.tiki.org/WebDAV#Note_about_Apache_with_PHP_as_fcgi_or_cgi

#RewriteCond %{HTTP:Authorization} ^(.*)
#RewriteRule ^(.*) - [E=HTTP_AUTHORIZATION:%1]

#Following lines may be necessary for a PHP-FPM setup
# to make sure that authorization is transmitted.
# Just remove the # at the beginning of the line

#SetEnvIf Authorization "(.*)" HTTP_AUTHORIZATION=$1

</IfModule>
AddType application/json .json

Now, refresh the page again.

Congratulations! We have successfully setup Pydio in our CentOS 7server.

Here is my Pydio login screen.

Unixmen - - - Google Chrome_003

Pydio Usage

Enter the username and password to login that you’ve created during installation.

First, we will login to the Administrator console.

Enter your administrator user name(Ex. admin in my case) and it’s password.

This is how my administrator console looked.

Unixmen - - - Google Chrome_004

Select your workspace and click on the “Enter” button. By default. Pydio has two workspaces.

  1. Common files
  2. My files

Select the workplace of your choice and click Enter to view the contents.

Unixmen - - - Google Chrome_005

From now on, add your files or folders and share them to your network. To create a folder, right click on the empty space, and select “Create” button.

Unixmen - - - Google Chrome_006

Enter your folder name and click on the Ok button (the right arrow button).

Unixmen - - - Google Chrome_007

That’s it. Now you can add files or sub folders. To do that, open the folder by double clicking on it. Right click on the empty space and select Upload button.

Unixmen - My share - Google Chrome_008

Select the files either from your local or remote system. That’s it. The selected files will uploaded to your newly created share folder.

Unixmen - My share - Google Chrome_010

Now, you can share the entire folder or it’s files/subfolders over network by clicking on the share button.

Selection_011

Selection_012

You can set different permissions whether an user can view or download or upload contents to your shared folder/file.

Similarly, you can create and share as many as files or folders to your friends and colleagues over LAN or WAN. Although, you can create separate users and share files to different users of your choice.

That’s all for now. For additional in-depth configuration and administration and usage, I suggest you to refer the official documentation page.

Cheers!

Reference link:

The post Pydio – An Open Source Alternative To Dropbox appeared first on Unixmen.

Install And Configure DenyHosts In CentOS

$
0
0


Introduction

DenyHosts is a script intended to be running by Linux system administrators in order to help thwart SSH server attacks (also known as dictionary based attacks and brute force attacks). Thanks to its simplicity and the ability to manually configure the rules DenyHost is widely used as an alternative to Fail2ban which is a bit more complicated to use and configure.

DenyHosts is an open source and free log-based intrusion prevention security program for SSH servers developed in Python language. It is intended to monitor and analyze SSH server logs for invalid login attempts, dictionary based attacks and brute force attacks by blocking the originating IP addresses via the adding of an entry to /etc/hosts.deny file on the server and prevents the IP address from making any further such login attempts.

In this tutorial we will show you how you can install and configure DenyHosts on your CentOS 6 server. It is simple and easy to installa and configure and use.

Features

From its various features we list the following ones from its official site.

  • Parses /var/log/secure to find all login attempts and filters failed and successful attempts.
  • Synchronization mode (new in 2.0) allows DenyHosts daemons the ability to share data via a centralized server to proactively thwart attacks.
  • Can be run from the command line, cron or as a daemon (new in 0.9)
  • Records all failed login attempts for the user and offending host
  • For each host that exceeds a threshold count, records the evil host
  • Keeps track of each non-existent user (eg. sdadasd) when a login attempt failed.
  • Keeps track of each existing user (eg. root) when a login attempt failed.
  • Keeps track of each offending host (with 0.8+ these hosts can be purged if the associated entry in /etc/hosts.deny is expired)
  • Keeps track of suspicious logins (that is, logins that were successful for a host that had many login failures)
  • Keeps track of the file offset, so that you can reparse the same file (/var/log/secure) continuously (until it is rotated).
  • When the log file is rotated, the script will detect it and parse from the beginning.
  • Appends /etc/hosts.deny and adds the newly banned hosts
  • Optionally sends an email of newly banned hosts and suspicious logins.
  • Keeps a history of all user, host, user/host combo and suspicious logins encountered which includes the data and number of corresponding failed login attempts.
  • Maintains failed valid and invalid user login attempts in separate files, such that it is easy to see which valid user is under attack (which would give you the opportunity to remove the account, change the password or change it’s default shell to something like /sbin/nologin
  • Upon each run, the script will load the previously saved data and re-use it to append new failures.
  • Resolves IP addresses to hostnames, if available (new in v0.6.0).
  • /etc/hosts.deny entries can be expired (purge) at a user specified time (new in 0.8)
  • FreeBSD support (added in 0.7)

Prerequisites

Before starting, make sure you have a CentOS 6 server already configured with a static IP address.

Installation and configuration of DenyHost on CentOS 6

Step 1:

Before starting, we will check if our server is fully up to date by using the following command:

yum update

After being sure that the server is up to date we can start the installation.

Step 2:

Now, we will use the following command to download the EPEL repository:

sudo rpm -Uvh http://mirror.metrocast.net/fedora/epel/6/i386/epel-release-6-8.noarch.rpm

And to install the DenyHost packages we will use the following command:

sudo yum install denyhosts

You have to be careful that you have prevented your DenyHost’s server IP address from being denied during the installation. We will use the following command now:

nano /etc/hosts.allow

And the following command to protect our address IP, you can find your address IP within this link. Don’t forget to replace “You_IP” with your address:

sshd: Your_IP

Now we will block everything. So we will use the nano editor to open the file:

nano /etc/hosts.deny

And using the following line we will edit the file by adding it to the button of the file:

sshd: ALL **

Then we will save and restart DenyHost using the following command:

/etc/init.d/denyhosts restart

And if you want to make any configuration of your installed DenyHost you have to open the following file and update it according to your preference:

nano /etc/denyhosts.conf

Step 3:

To check denyhosts ssh logs to know how many attackers and hackers are attempted to gain access to your server use the following command:

# tail -f /var/log/secure

And if you want to remove a banned IP address from the denyhosts, use the following command to stop denyhost firstly:

# /etc/init.d/denyhosts stop

And then use the following lines to remove or delete the banned IP address completely:

# nano /etc/hosts.deny
# nano /var/lib/denyhosts/hosts
# nano /var/lib/denyhosts/hosts-restricted
# nano /var/lib/denyhosts/hosts-root
# nano /var/lib/denyhosts/hosts-valid
# nano /var/lib/denyhosts/users-hosts

After removing the banned IP address, you have to restart the denyhost using the following command:

# /etc/init.d/denyhosts start

If you want to find a specific address IP, the easiest way is to use the grep command like the following example by replacing wanted_IP with your selected address:

#cd /var/lib/denyhosts
grep wanted_IP *

Conclusion

In this tutorial, we discussed how to install and configure DenyHosts on your CentOs 6 server. Also, we showed you how to defend against brute force attacks. As far as I know, It is easy to configure and it also supports email, smtp, and syslog notifications. Hope this tool will be useful for you sometime.

Cheers!

Reference link:

The post Install And Configure DenyHosts In CentOS appeared first on Unixmen.

Viewing all 343 articles
Browse latest View live